60 WebStorm/IntelliJ IDE Tips, Tricks, and Features That Will Make Your Life Easier
ref https://medium.com/litslink/webstorm-intellij-ide-tips-tricks-and-features-that-will-make-your-life-easier-6d0c38ff3d4b
感觉学到了好些新的 intelJ 配置。。。。。。感觉挺好
In this article we will talk about capabilities, tip and features of JetBrains IDEs like Webstorm and Intellij that you get out of the box but 90% chance that you don’t use it.
For our examples, I will use a simple Typescript React project created by create-react-app script and simple TS files for tests like 2 + 2 = 4.
1. Presentation plugin
Before we will begin our journey I will install a Presentation plugin…
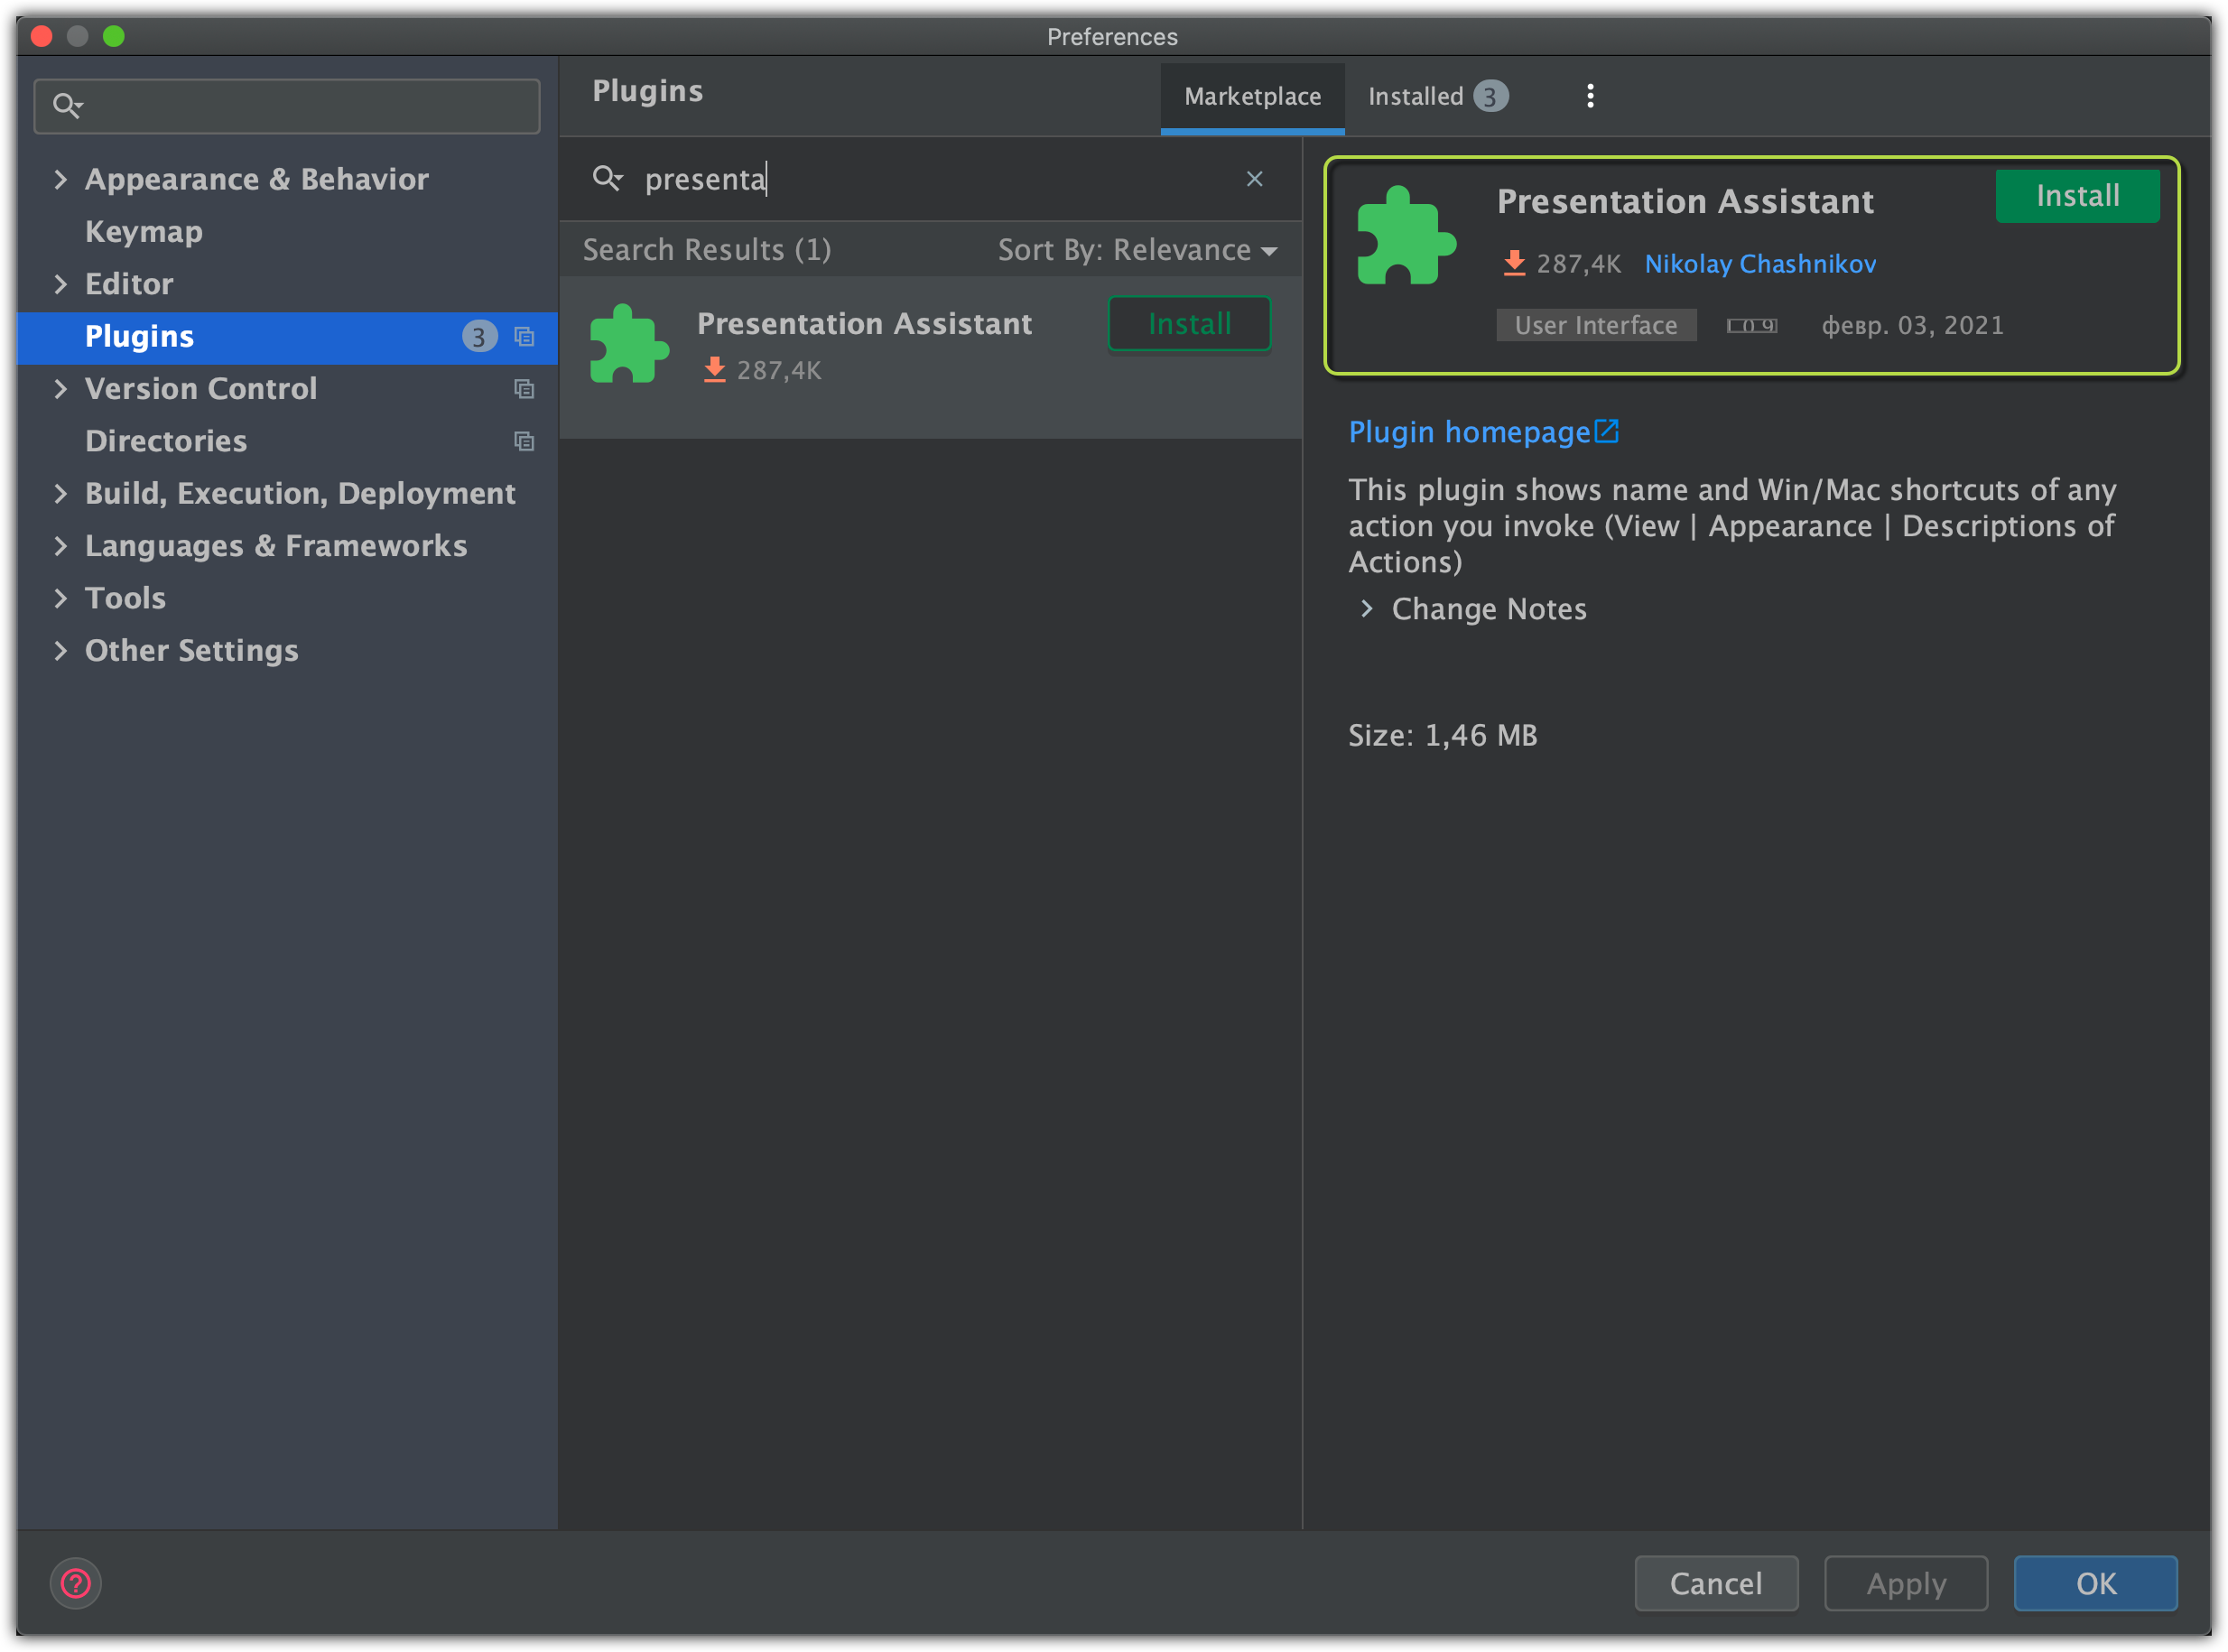
…that will show us notifications with the action name and shortcuts for iOS/Win/Linux:
2. Find in files
We will start with a simple Find in files feature [**Shift+Command+F**]. It allows you to search any text fragments everywhere in your Project:

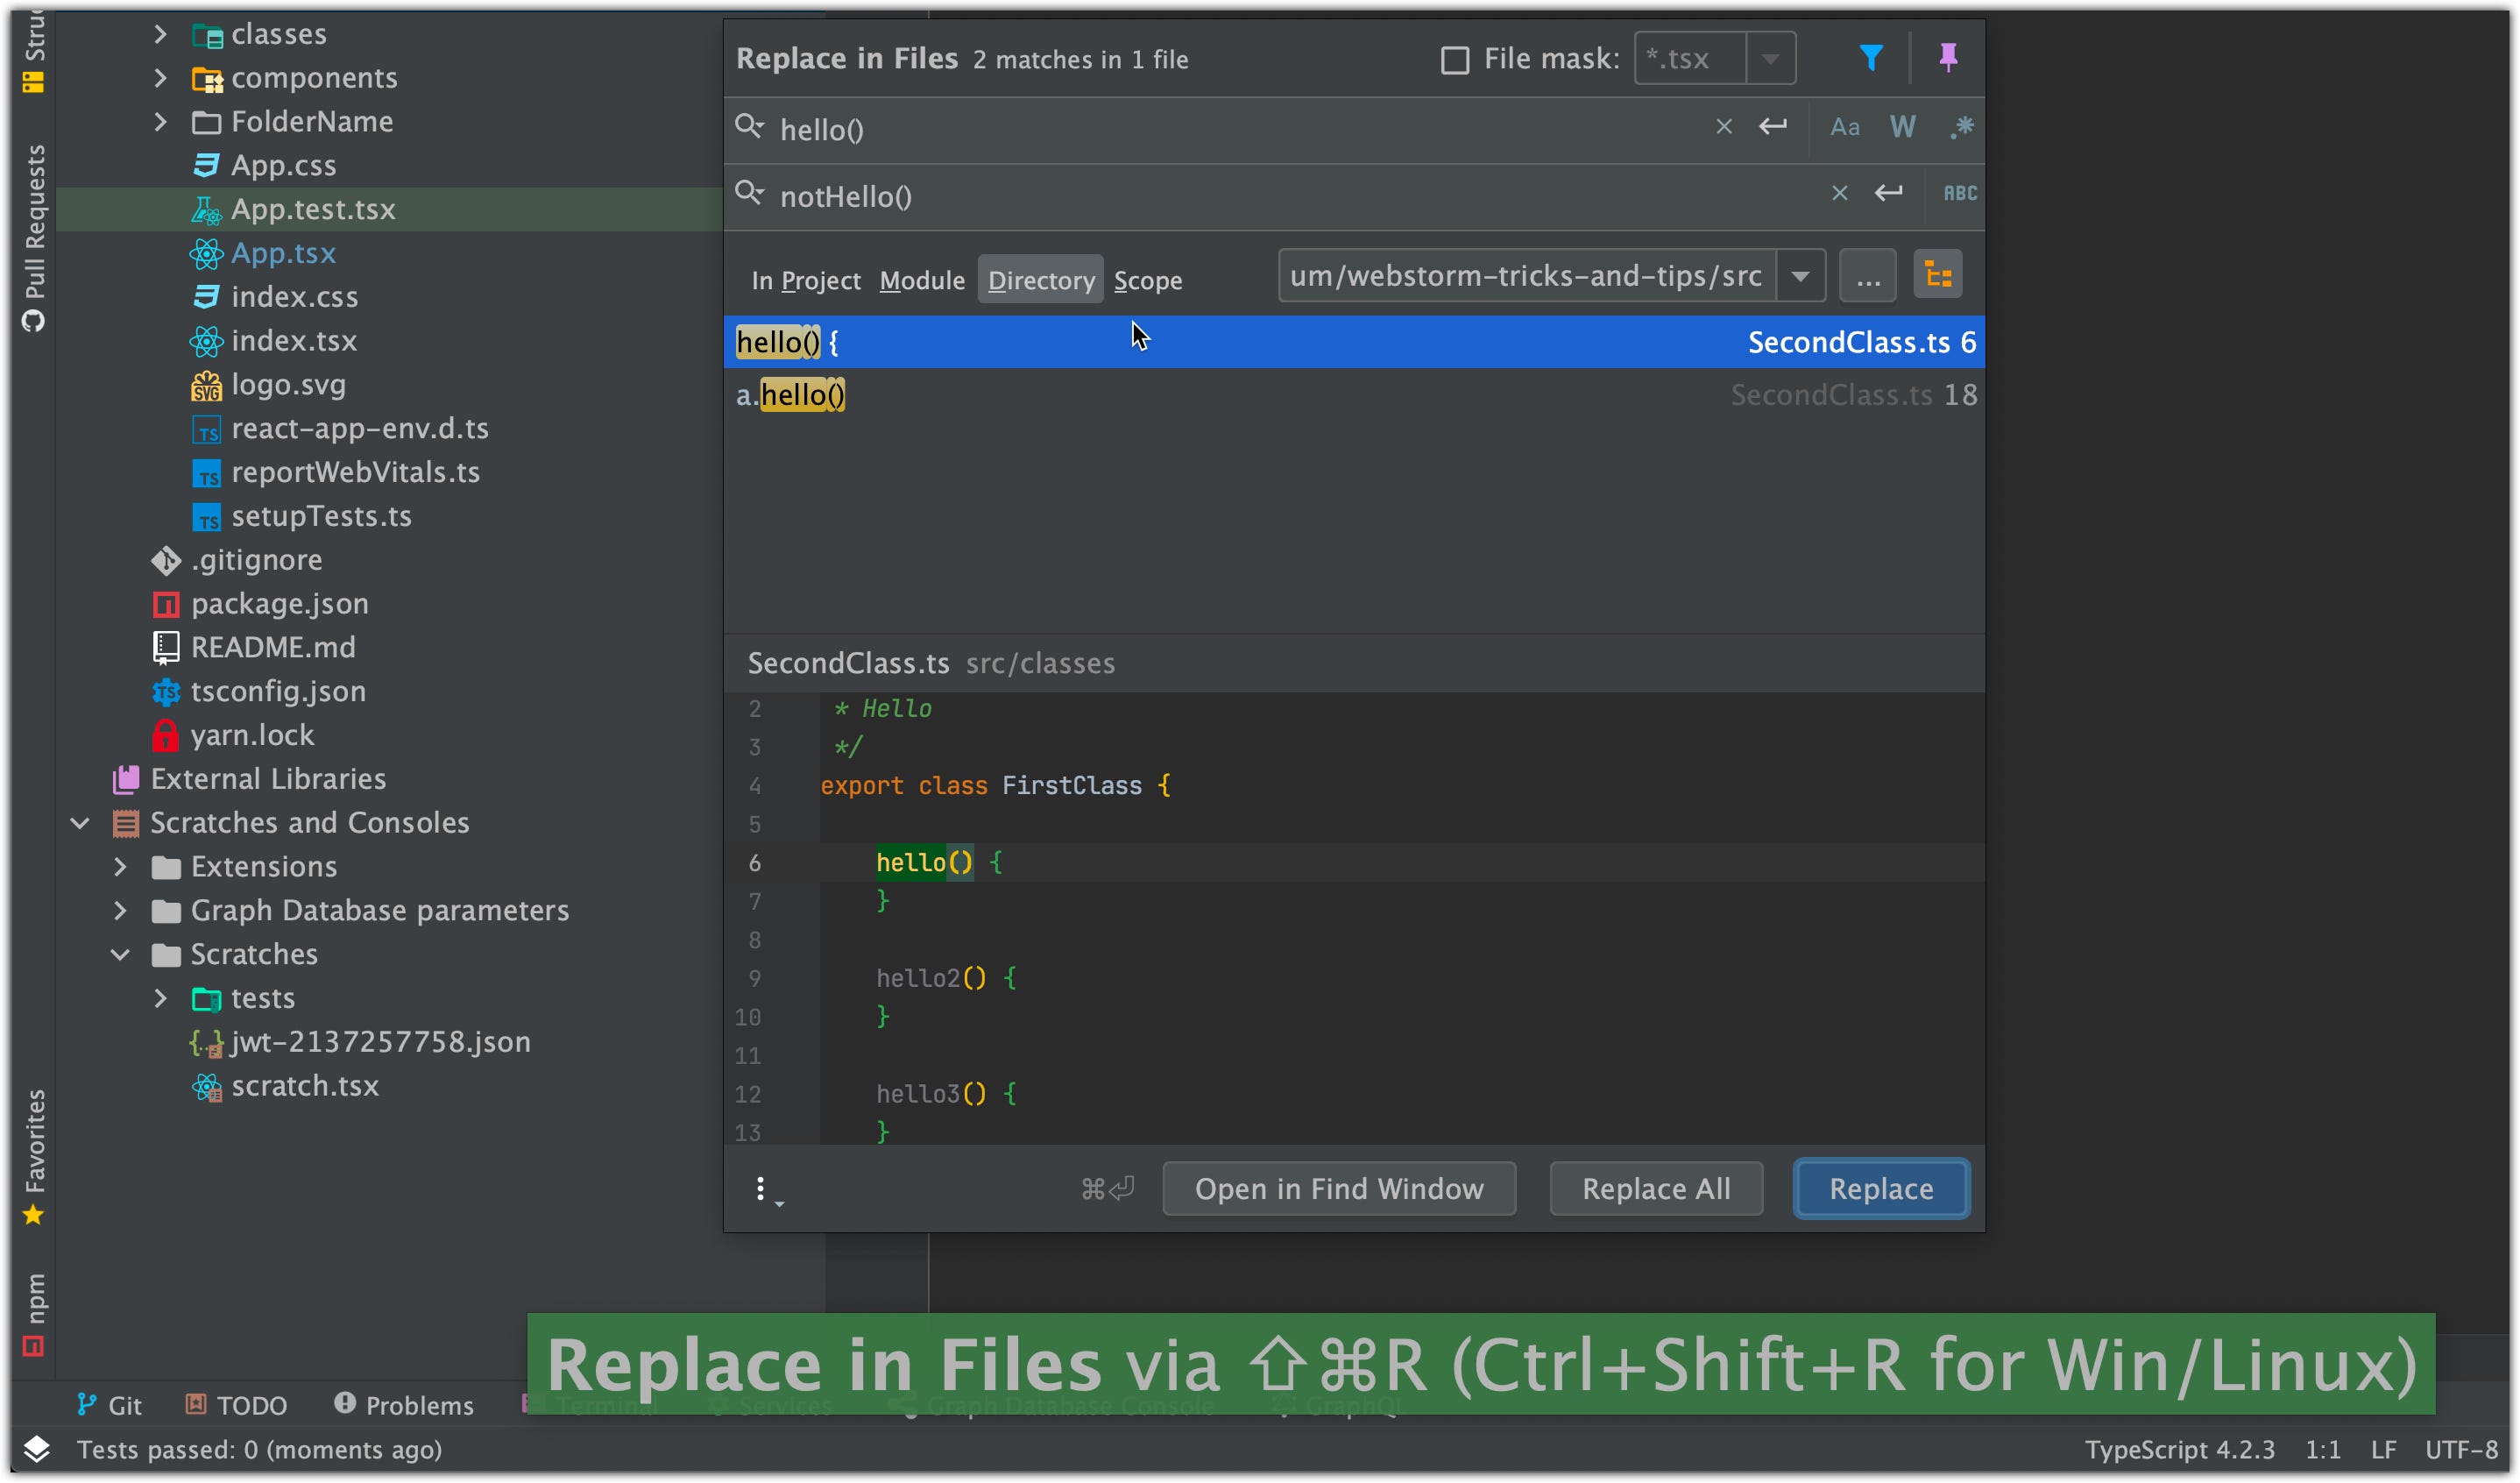
3. Replace in files
[Shift+Command+R]
This feature allows you to rename all fragments that match the search.
You can just click Replace All and IDE will rename each and every variable that will be in the list. You need to be careful with using Replace All especially if you’re not using Git.
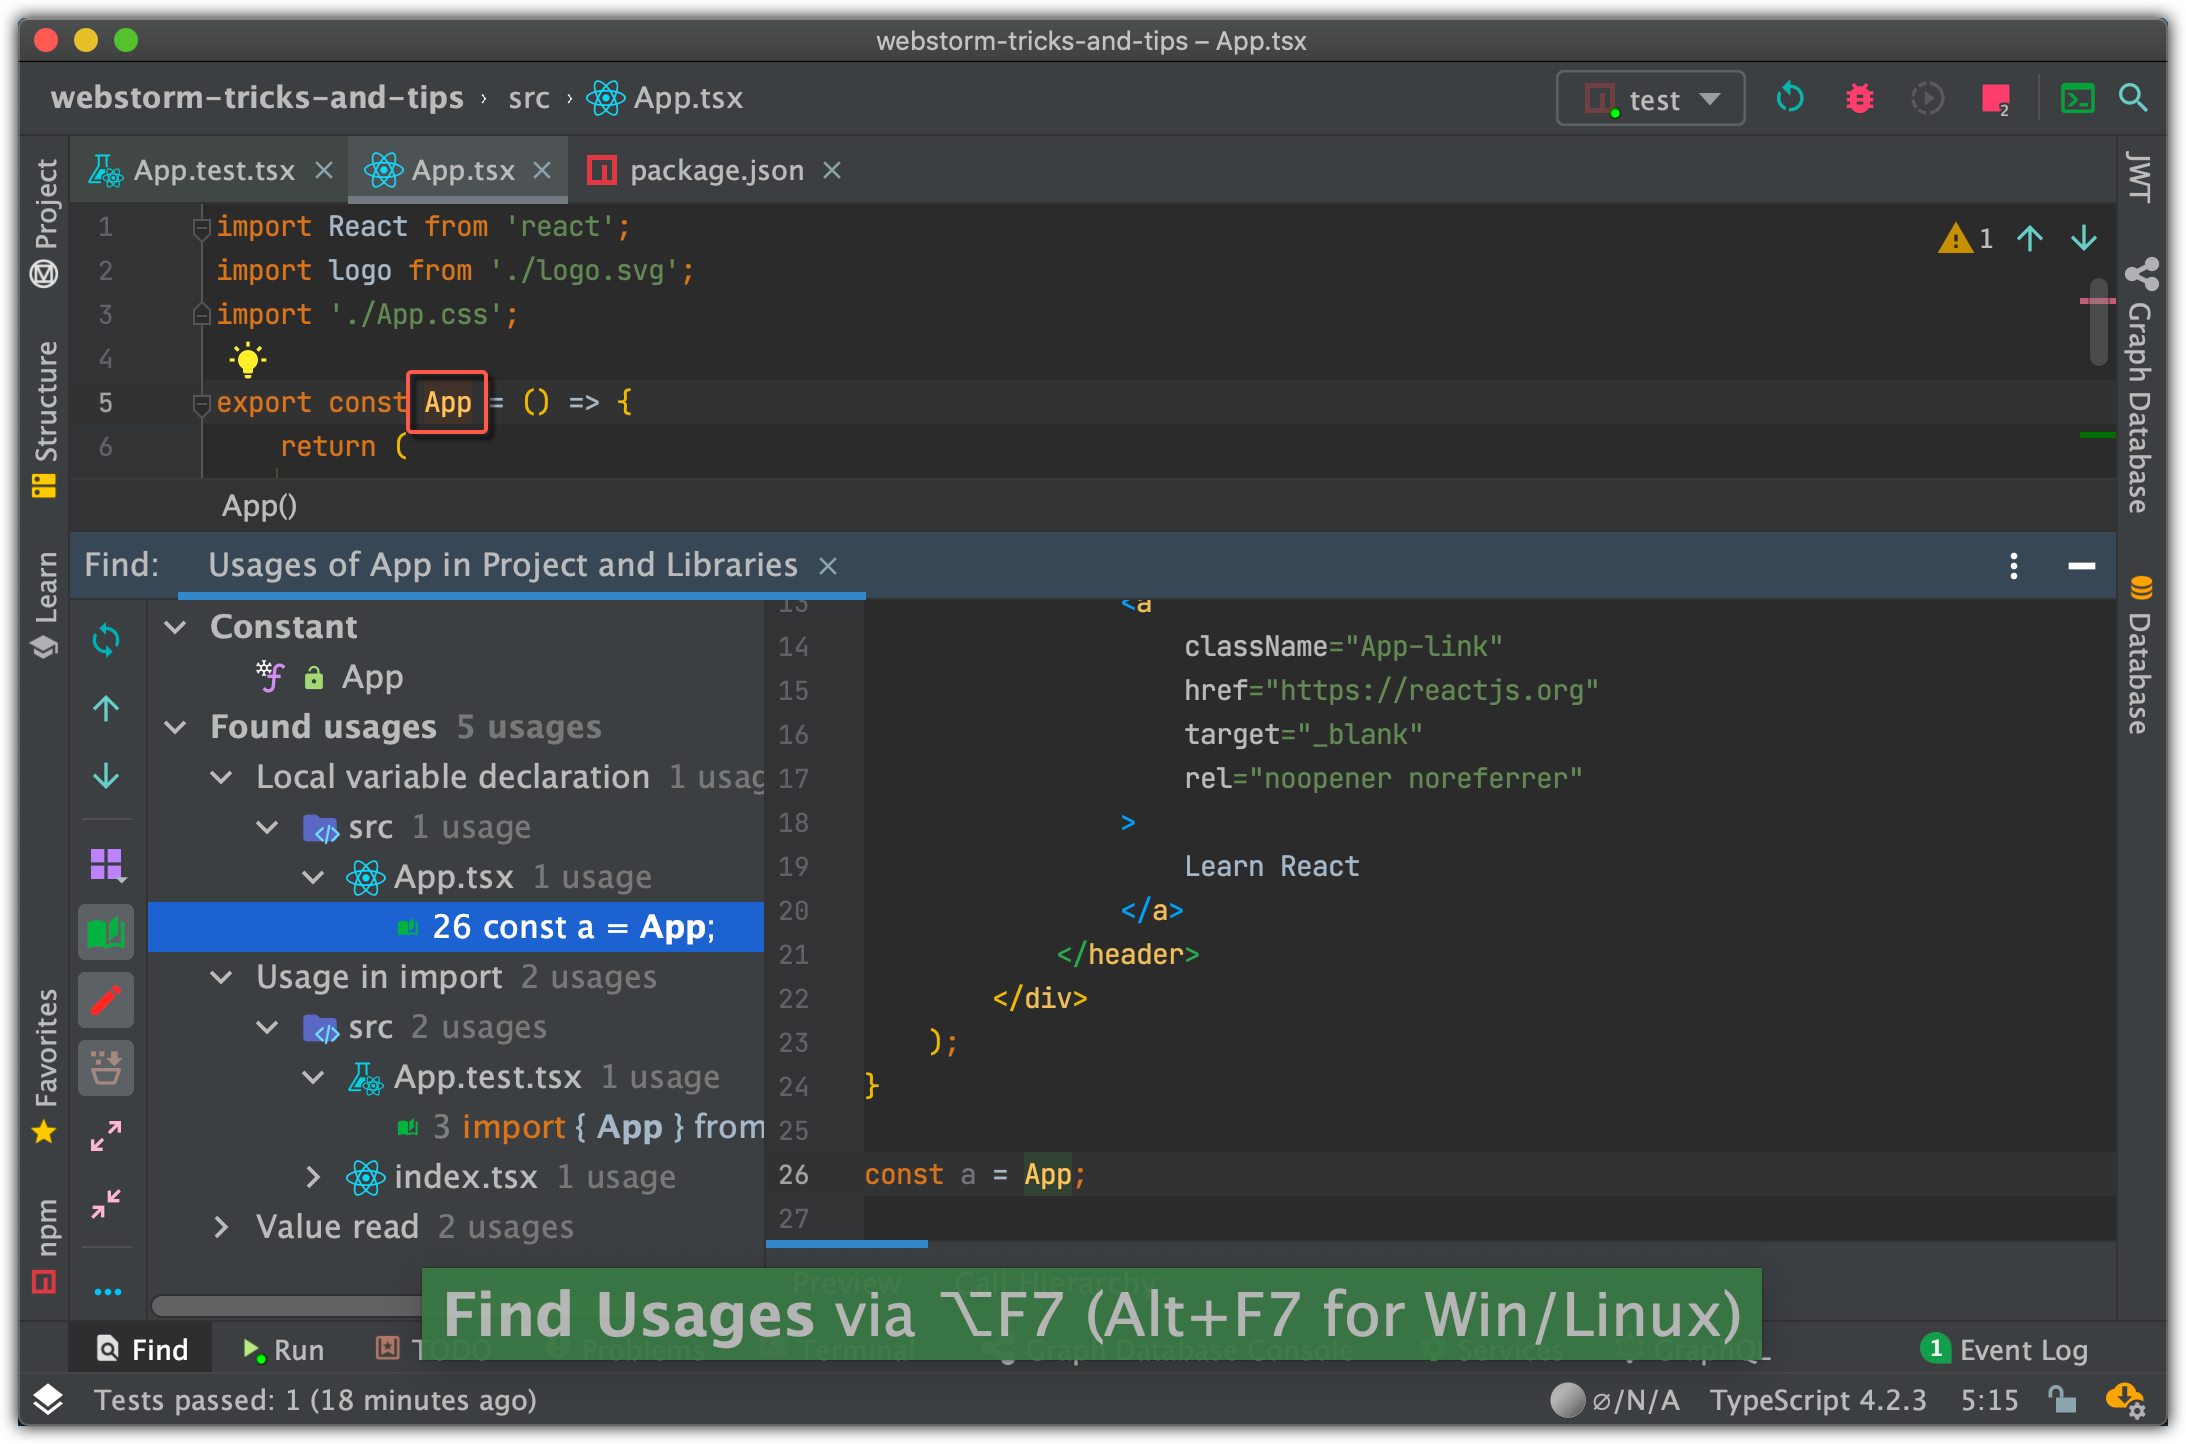
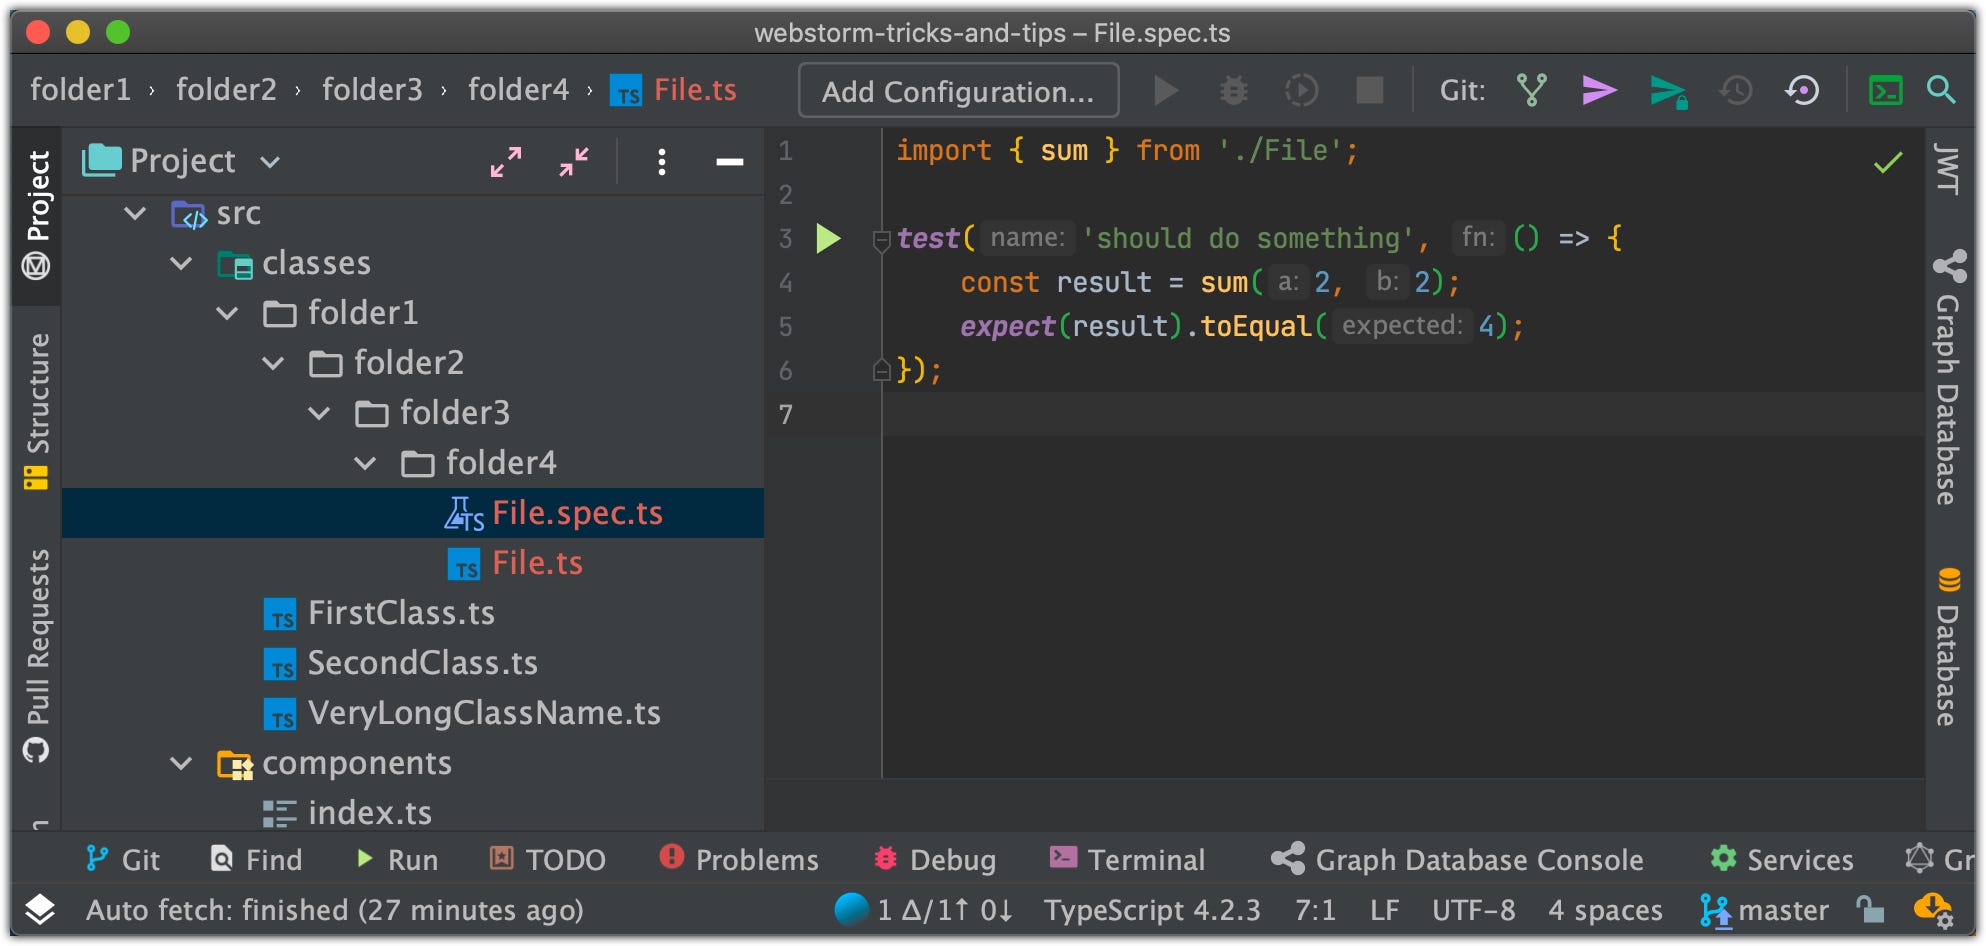
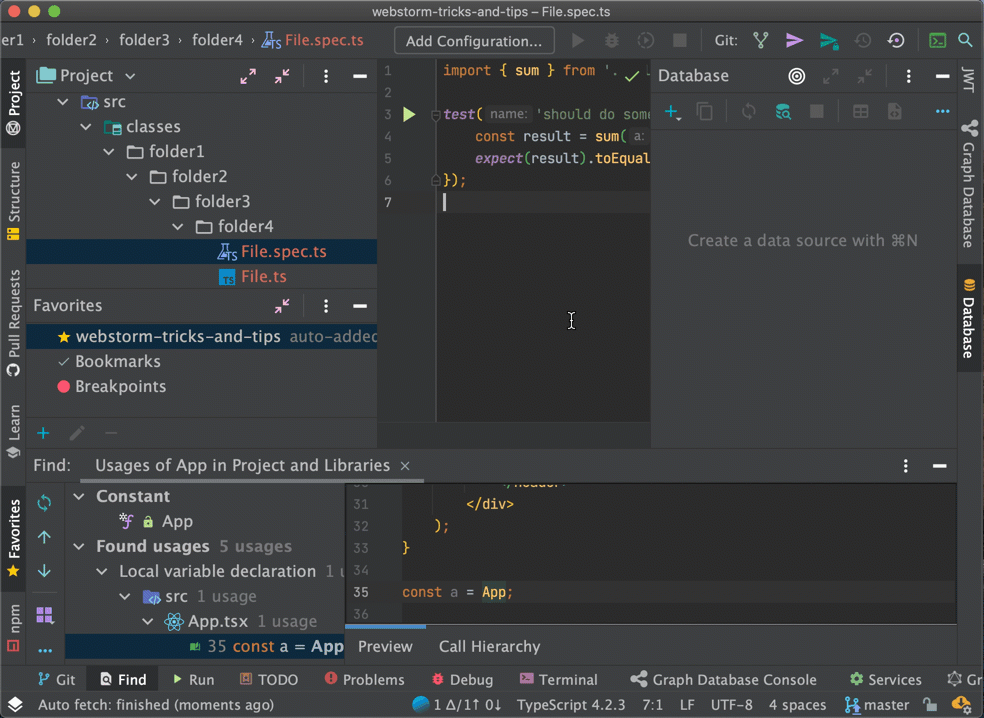
4. Find usages
[Option+F7]
Find usages will show you places where current function/class/variable is used:
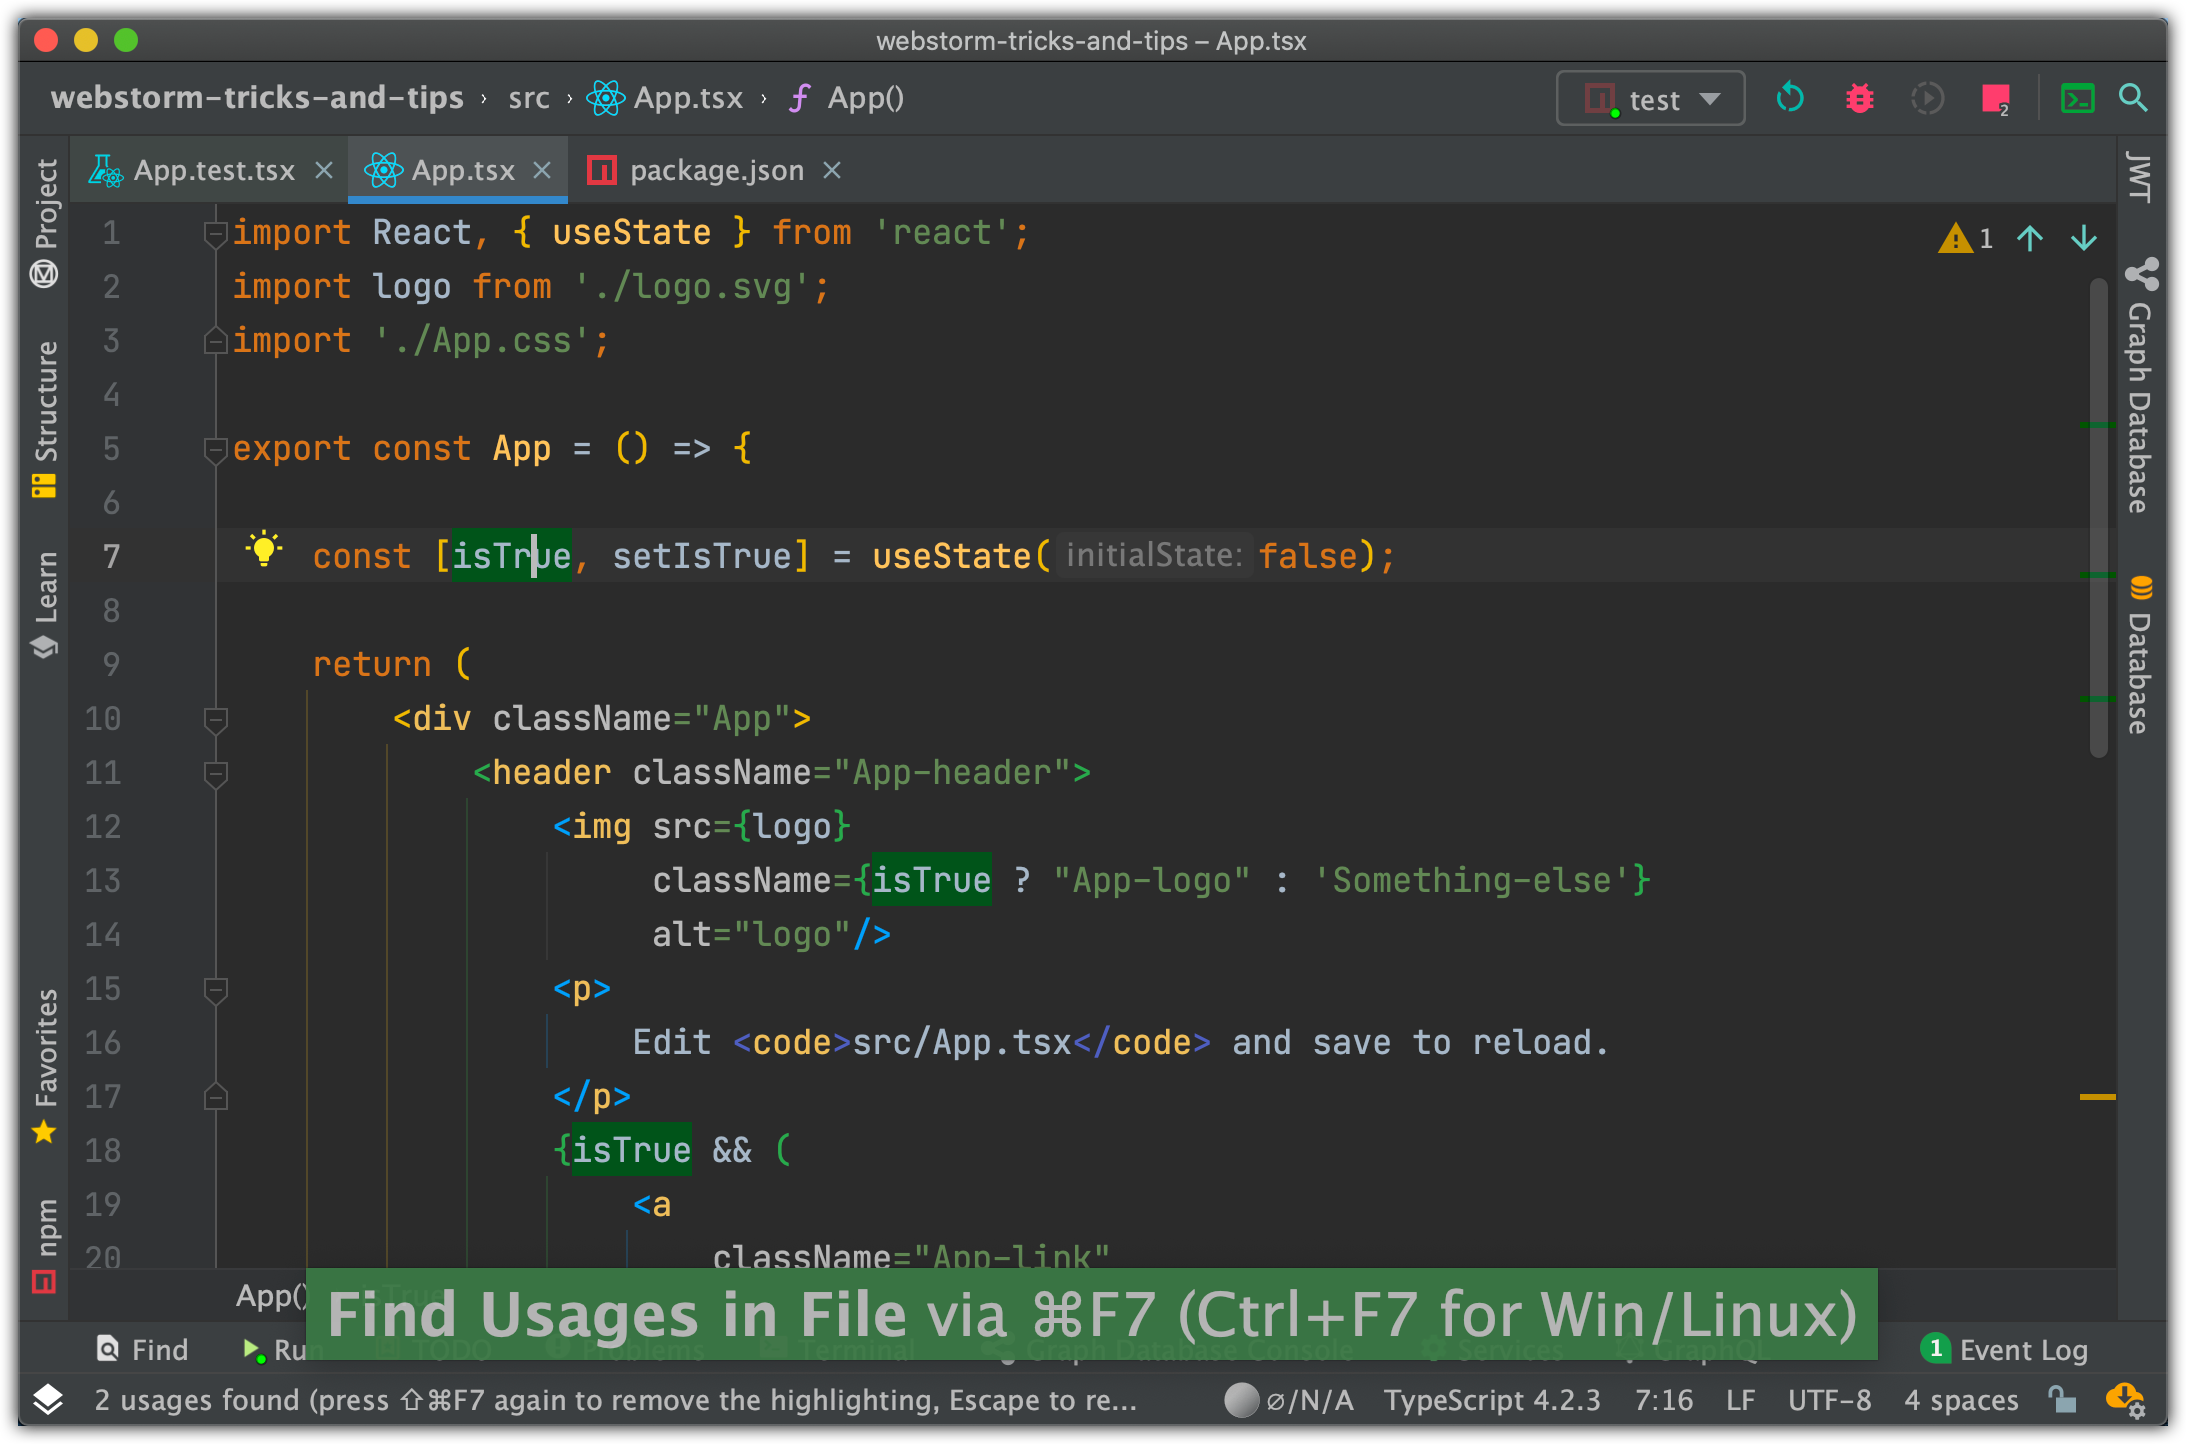
5. Find usage in File
[Shift+F7]
IDE will highlight all appearances in the current file and highlights will remain until you press **ESC** key:
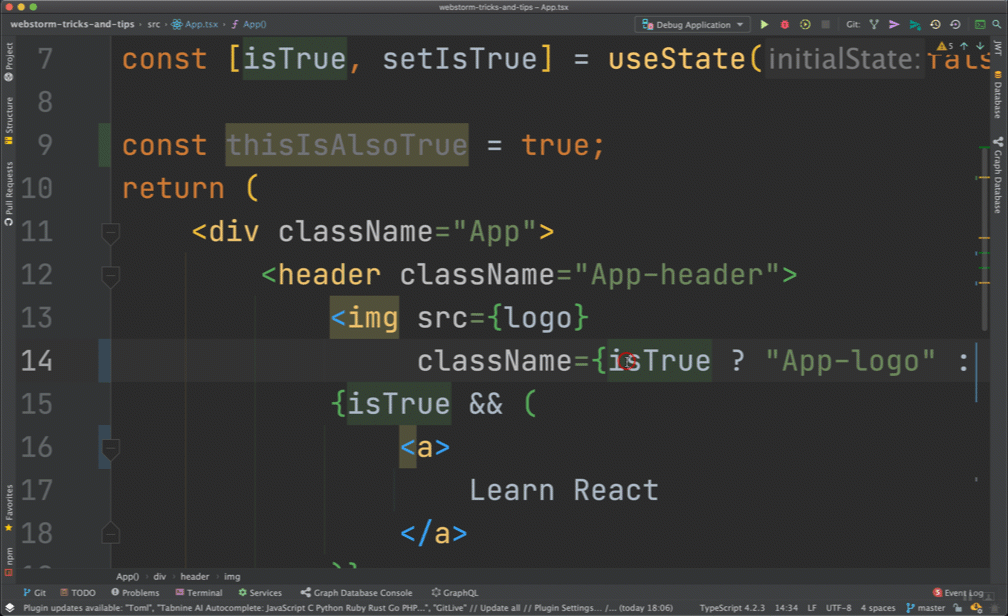
6. Find next / Move to next Occurrence
You can move to the next occurrence with Find Next/Move to next occurrence action by selecting what you need to search and pressing **Command+G** hotkey:

7. Go to declaration or usages
You don’t need to use your mouse for finding Usages, just use [Command+B] hotkey:

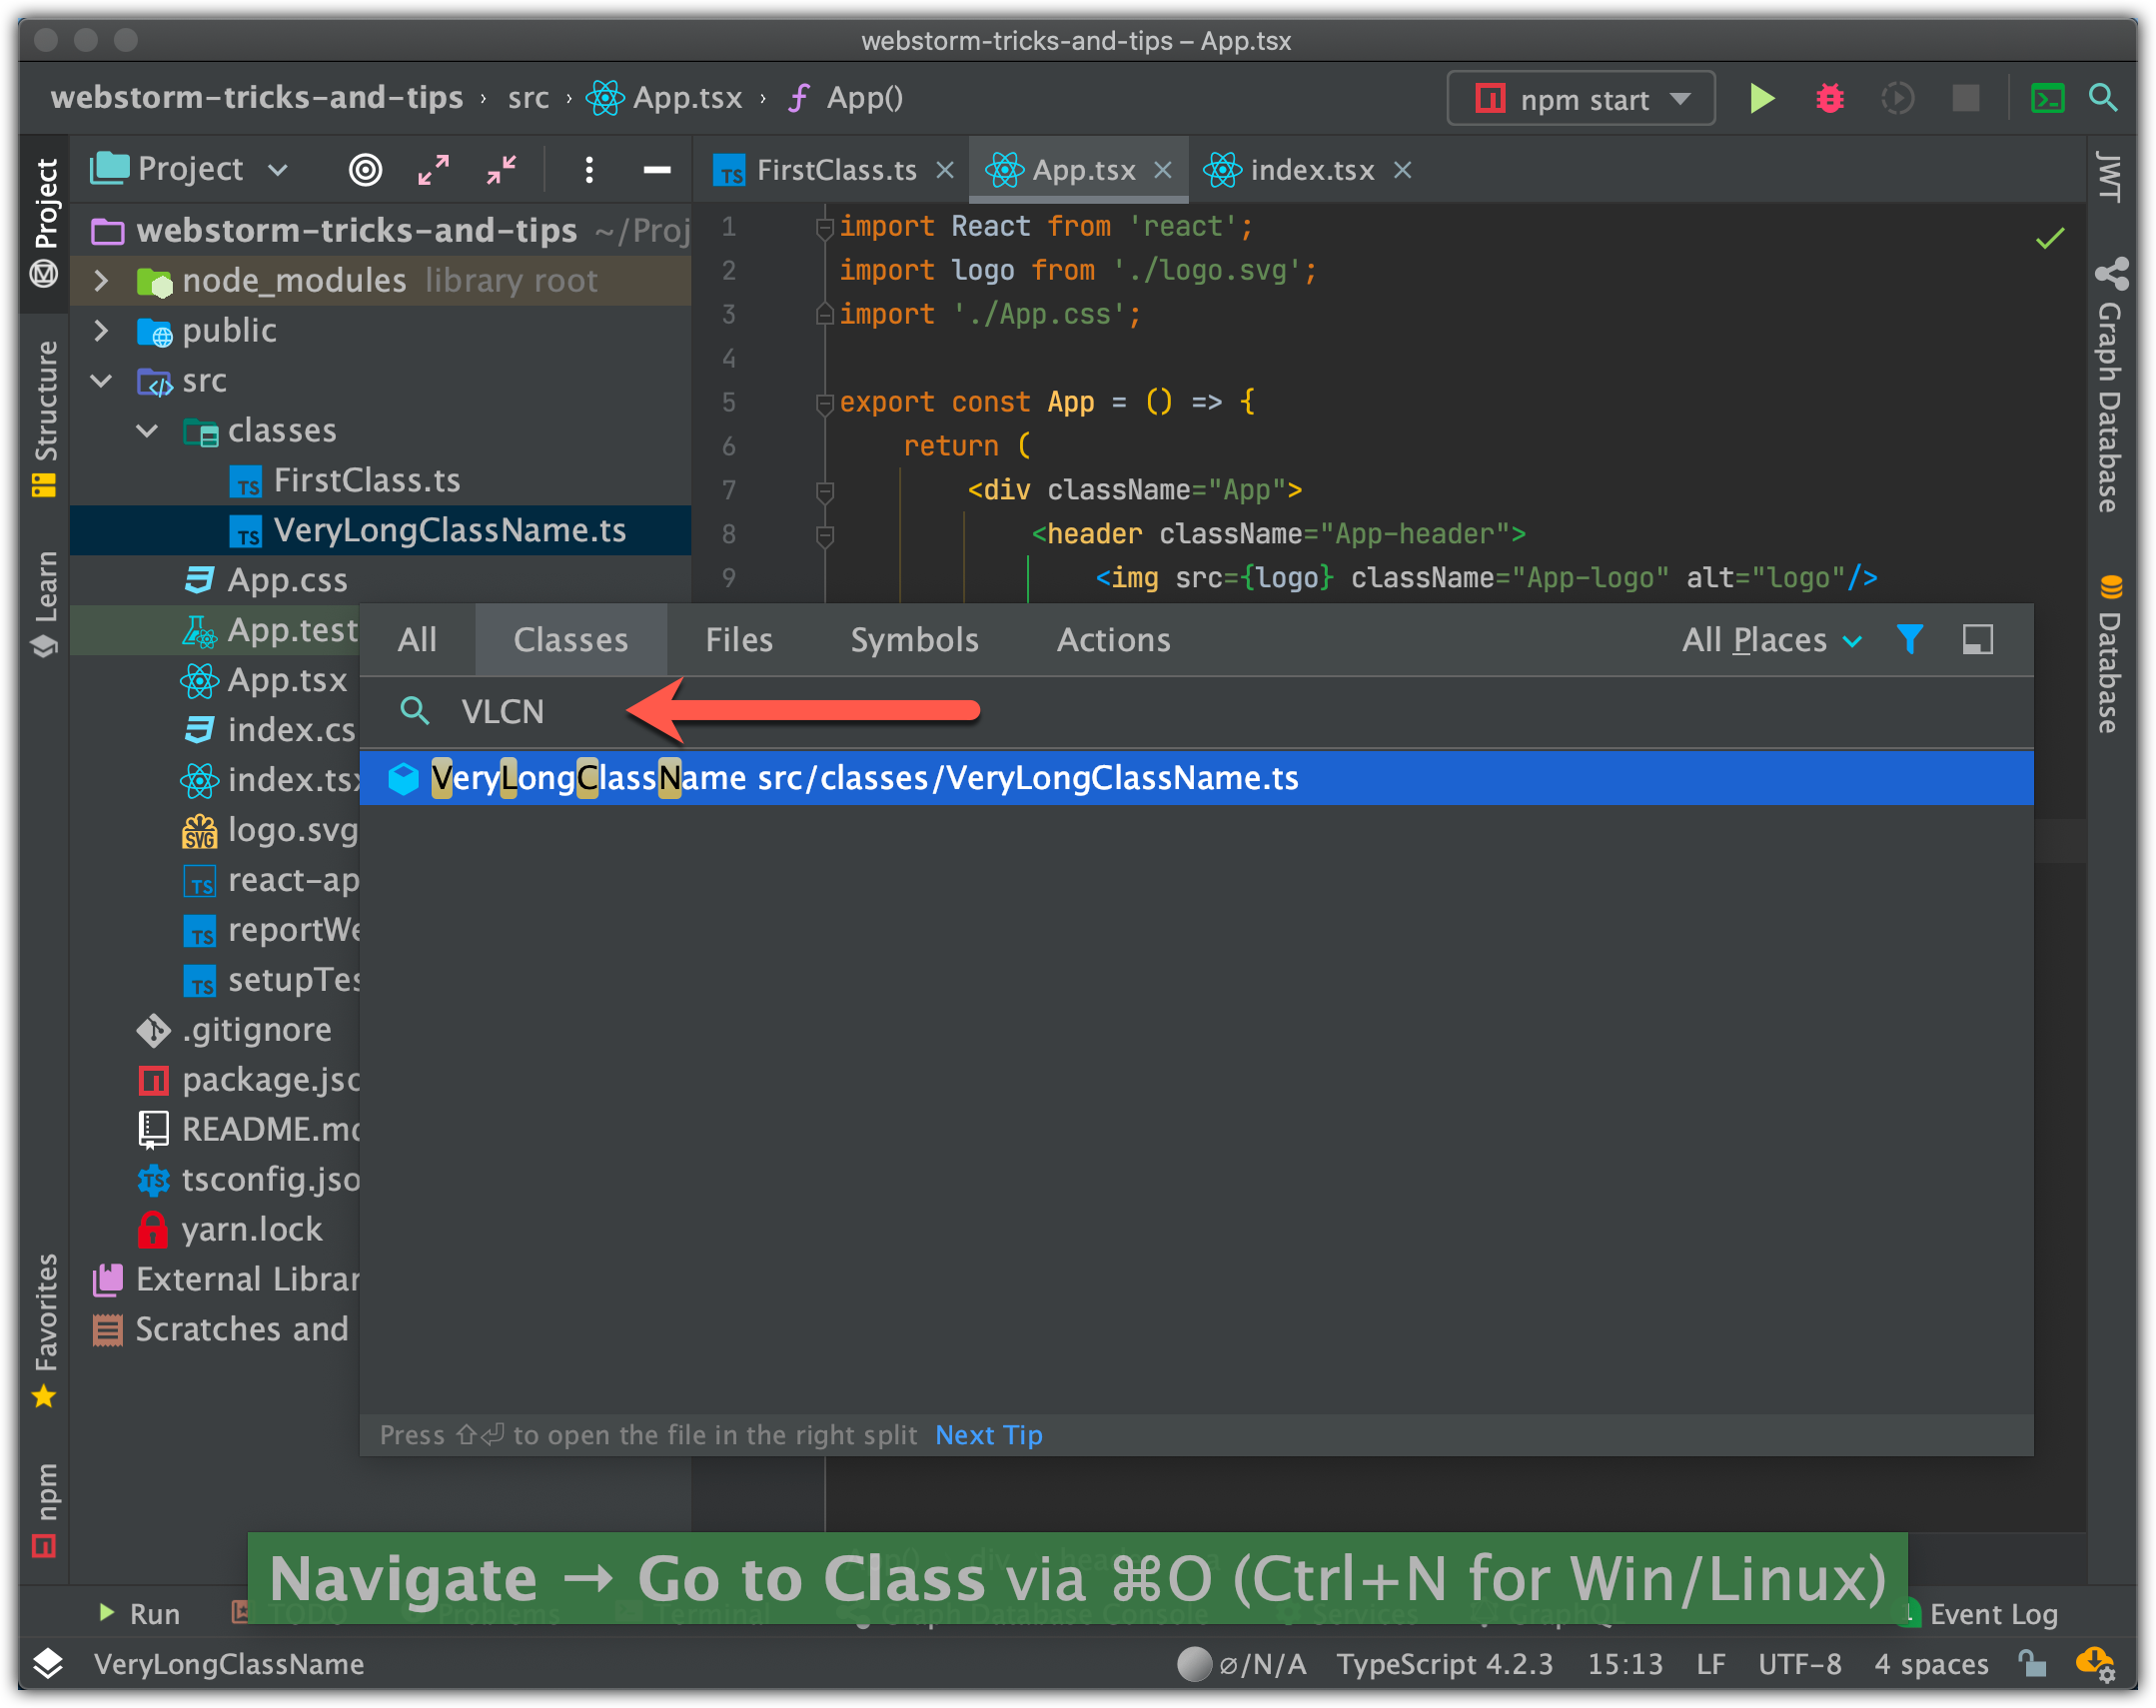
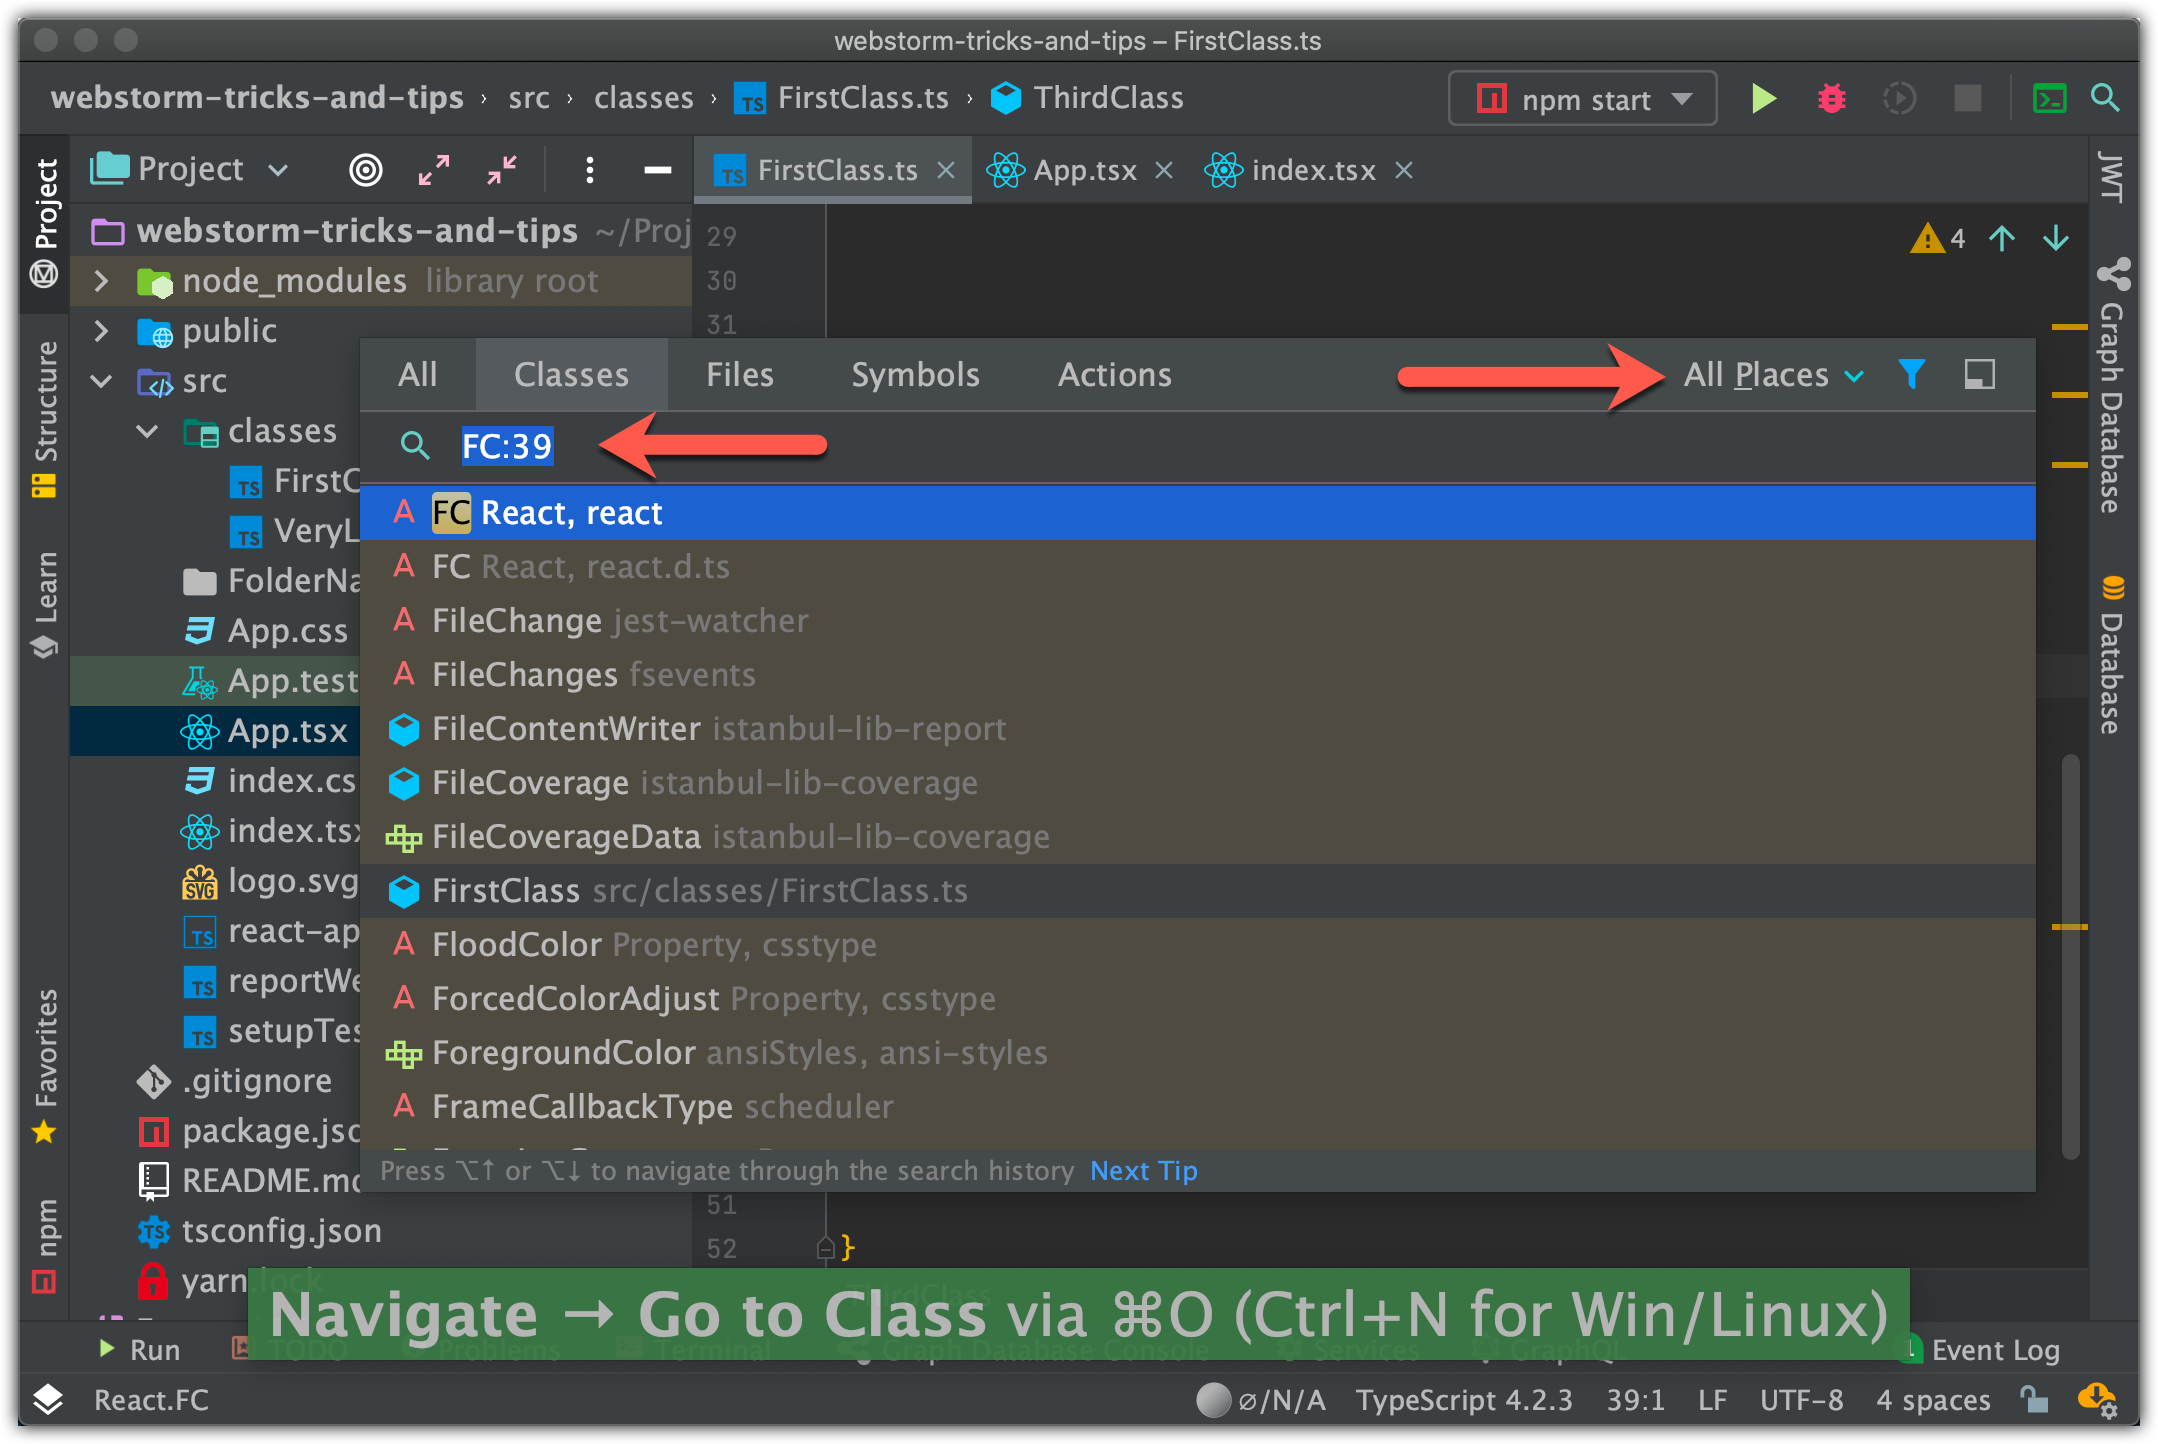
8. Go to Class:
If you are looking for a class in your project you can use [Command+O] hotkey
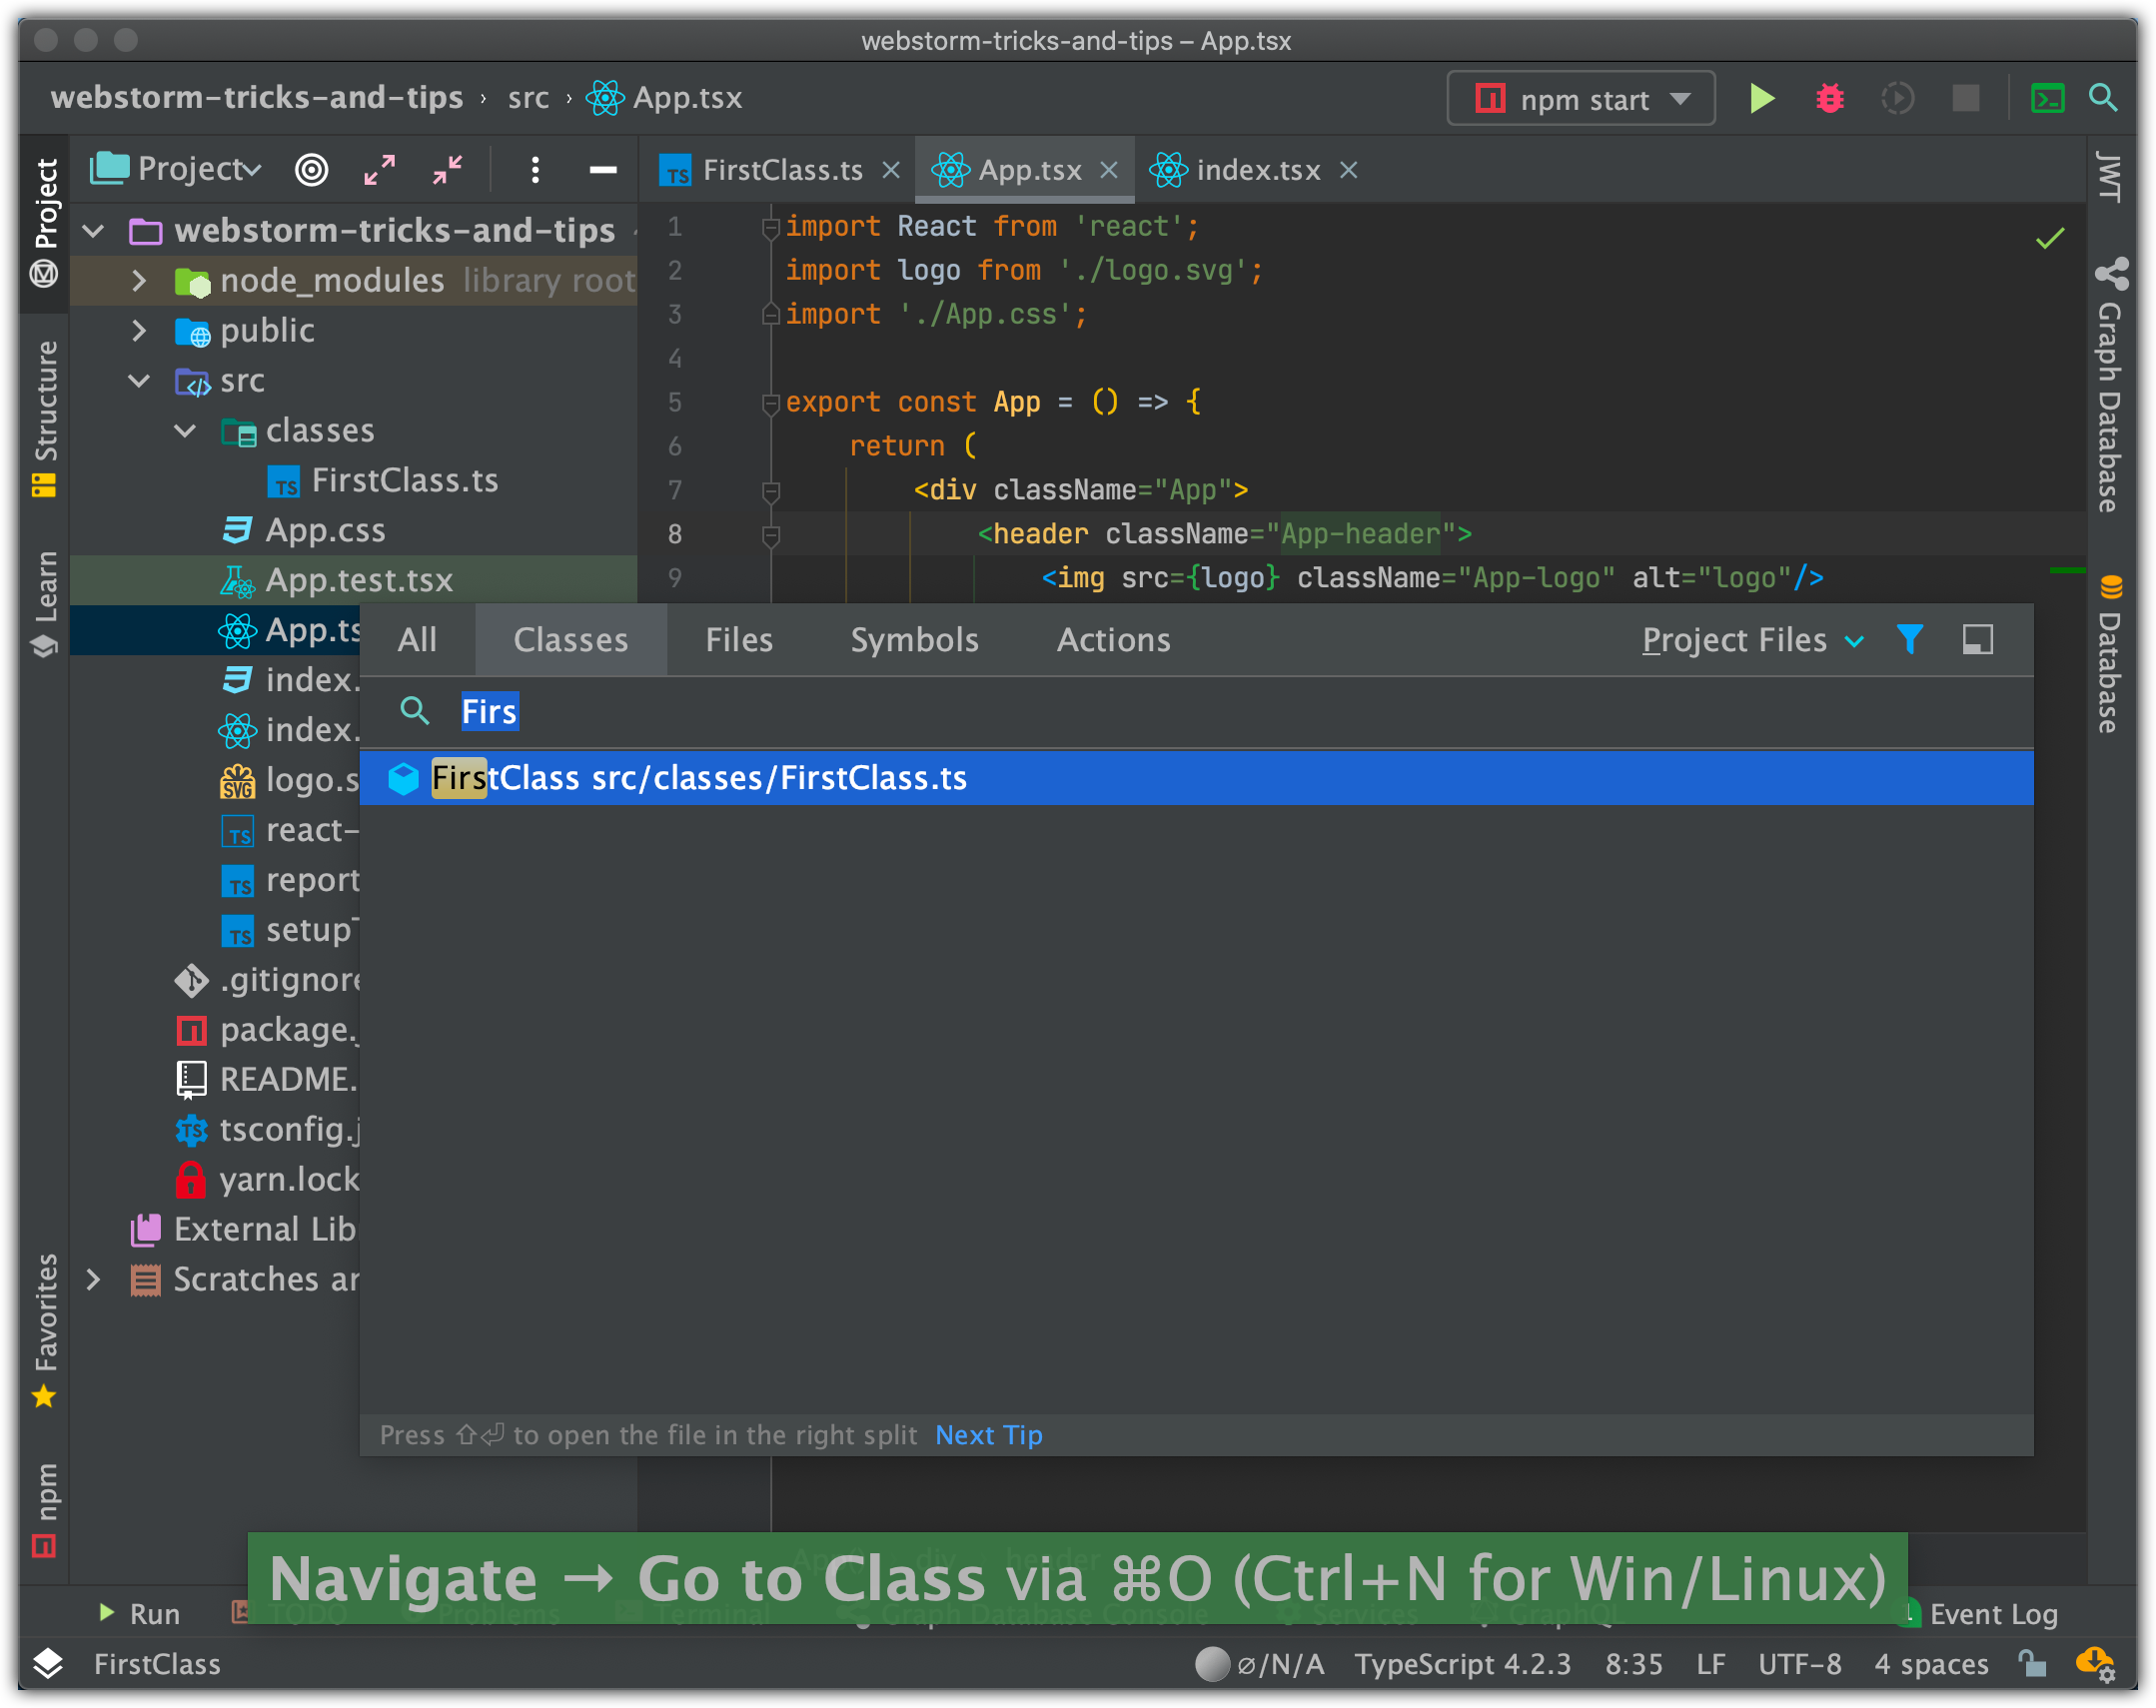
If you don’t remember the name of your class, you can try to search by Name fragments:
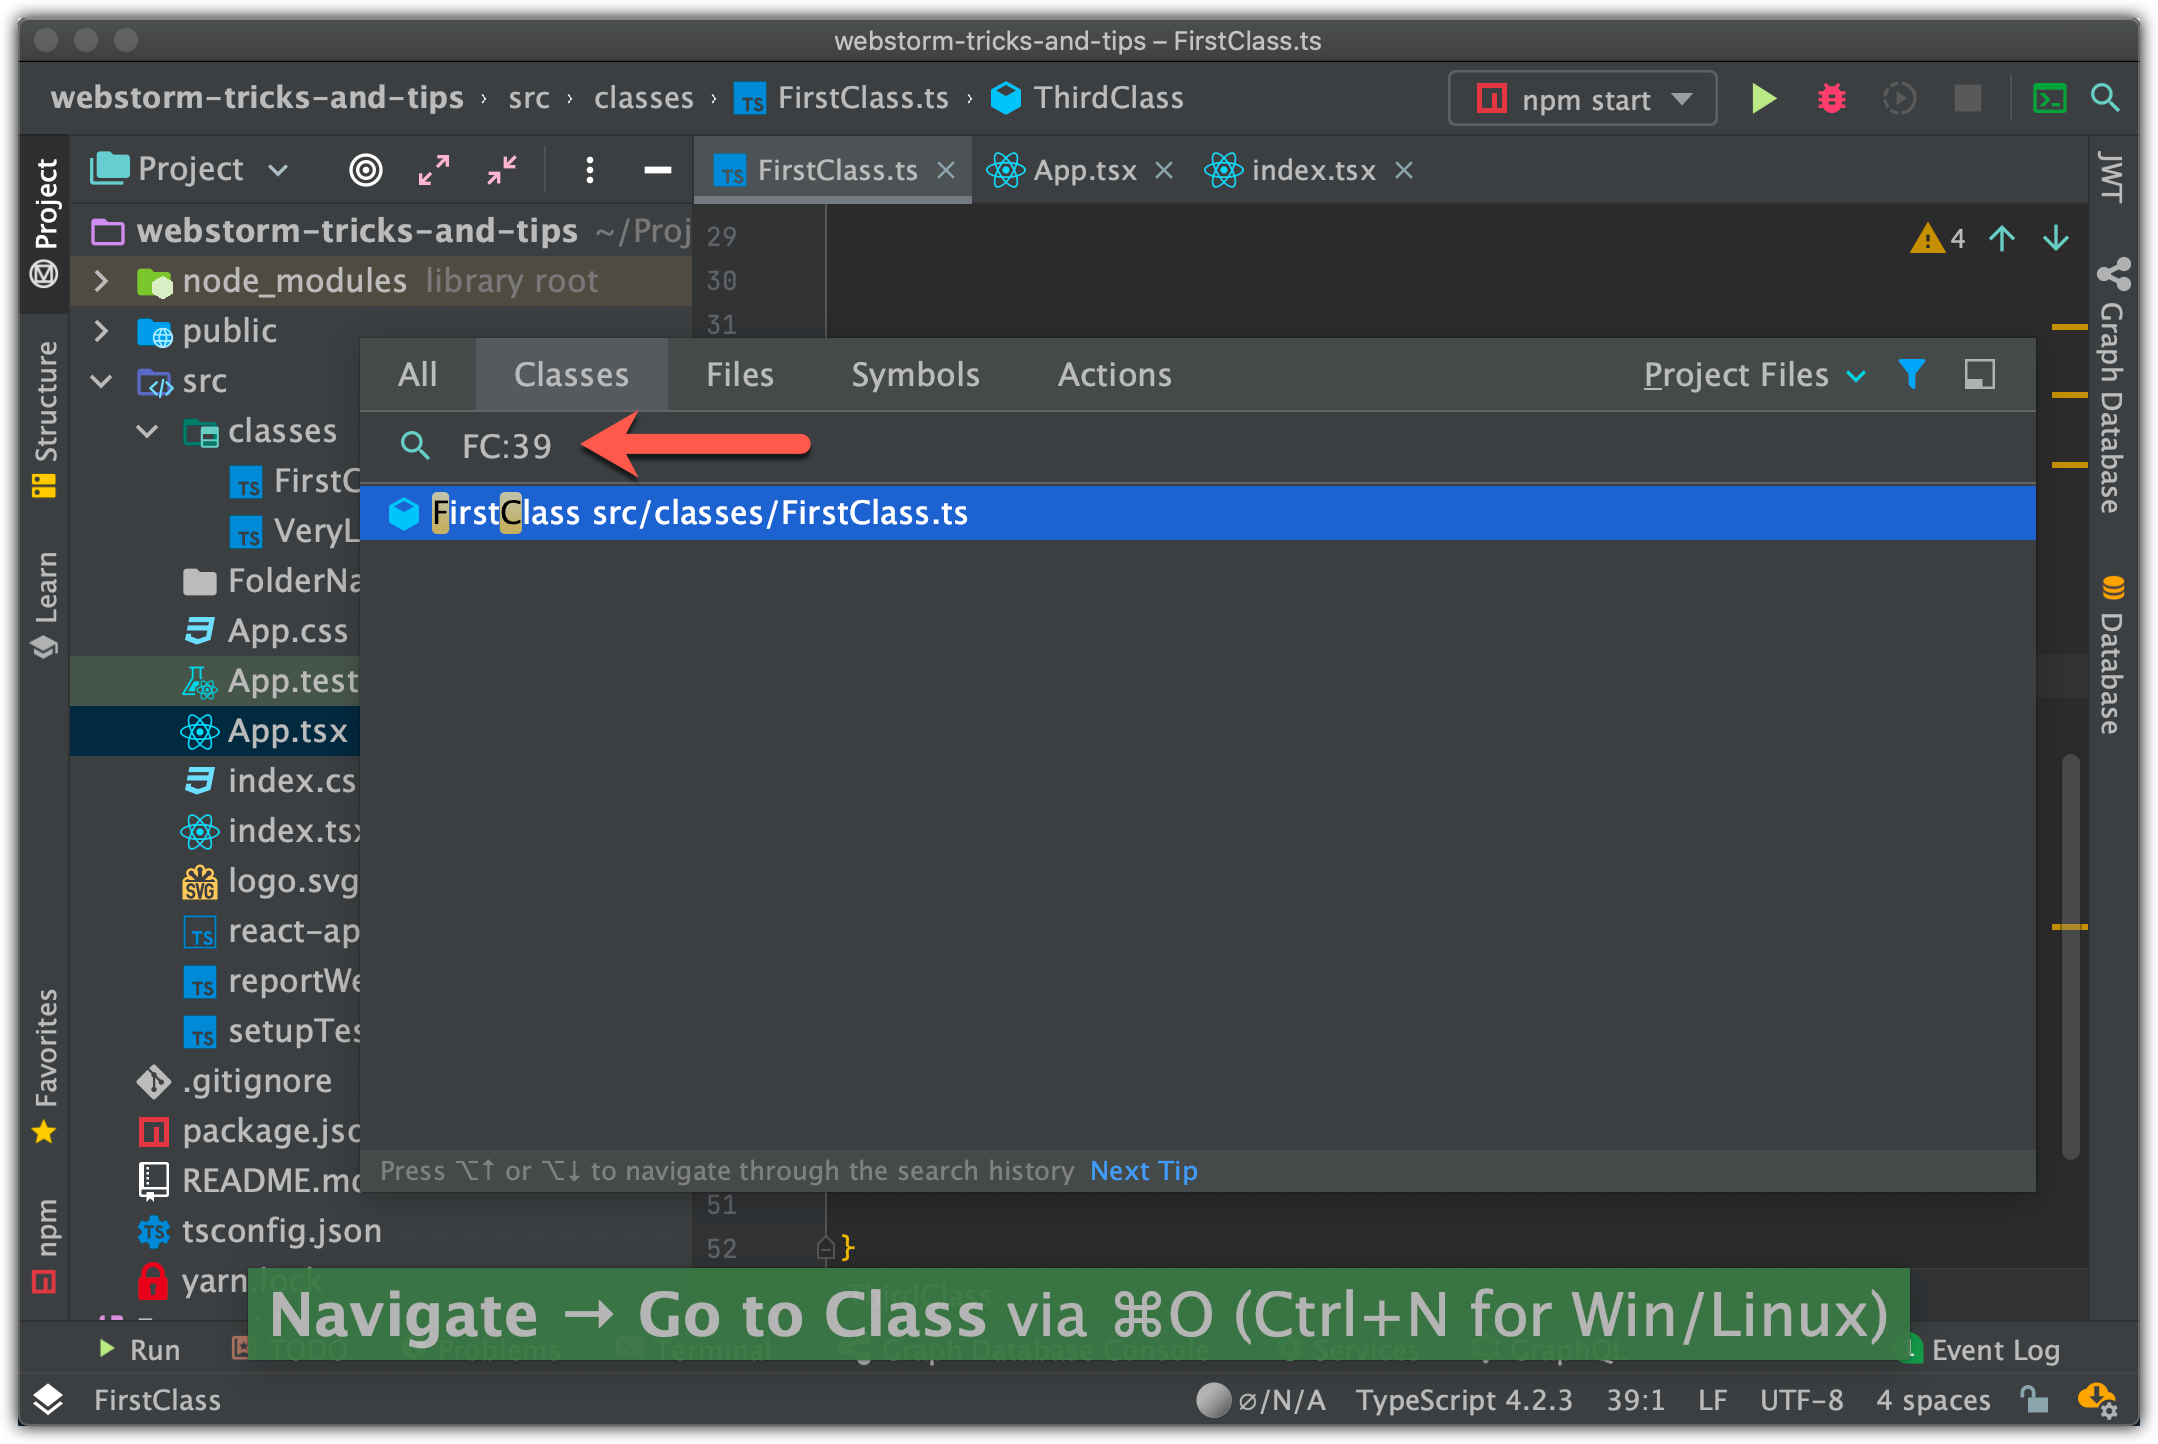
If you know the specific code line you need to check you can use a dots : notation → <file name>:<codeline number> and IDE will redirect you directly there:
If you are at the Classes navigation press Commad + O again to search everywhere, including Project’s libraries/packages folders, I will look for types and interfaces too:
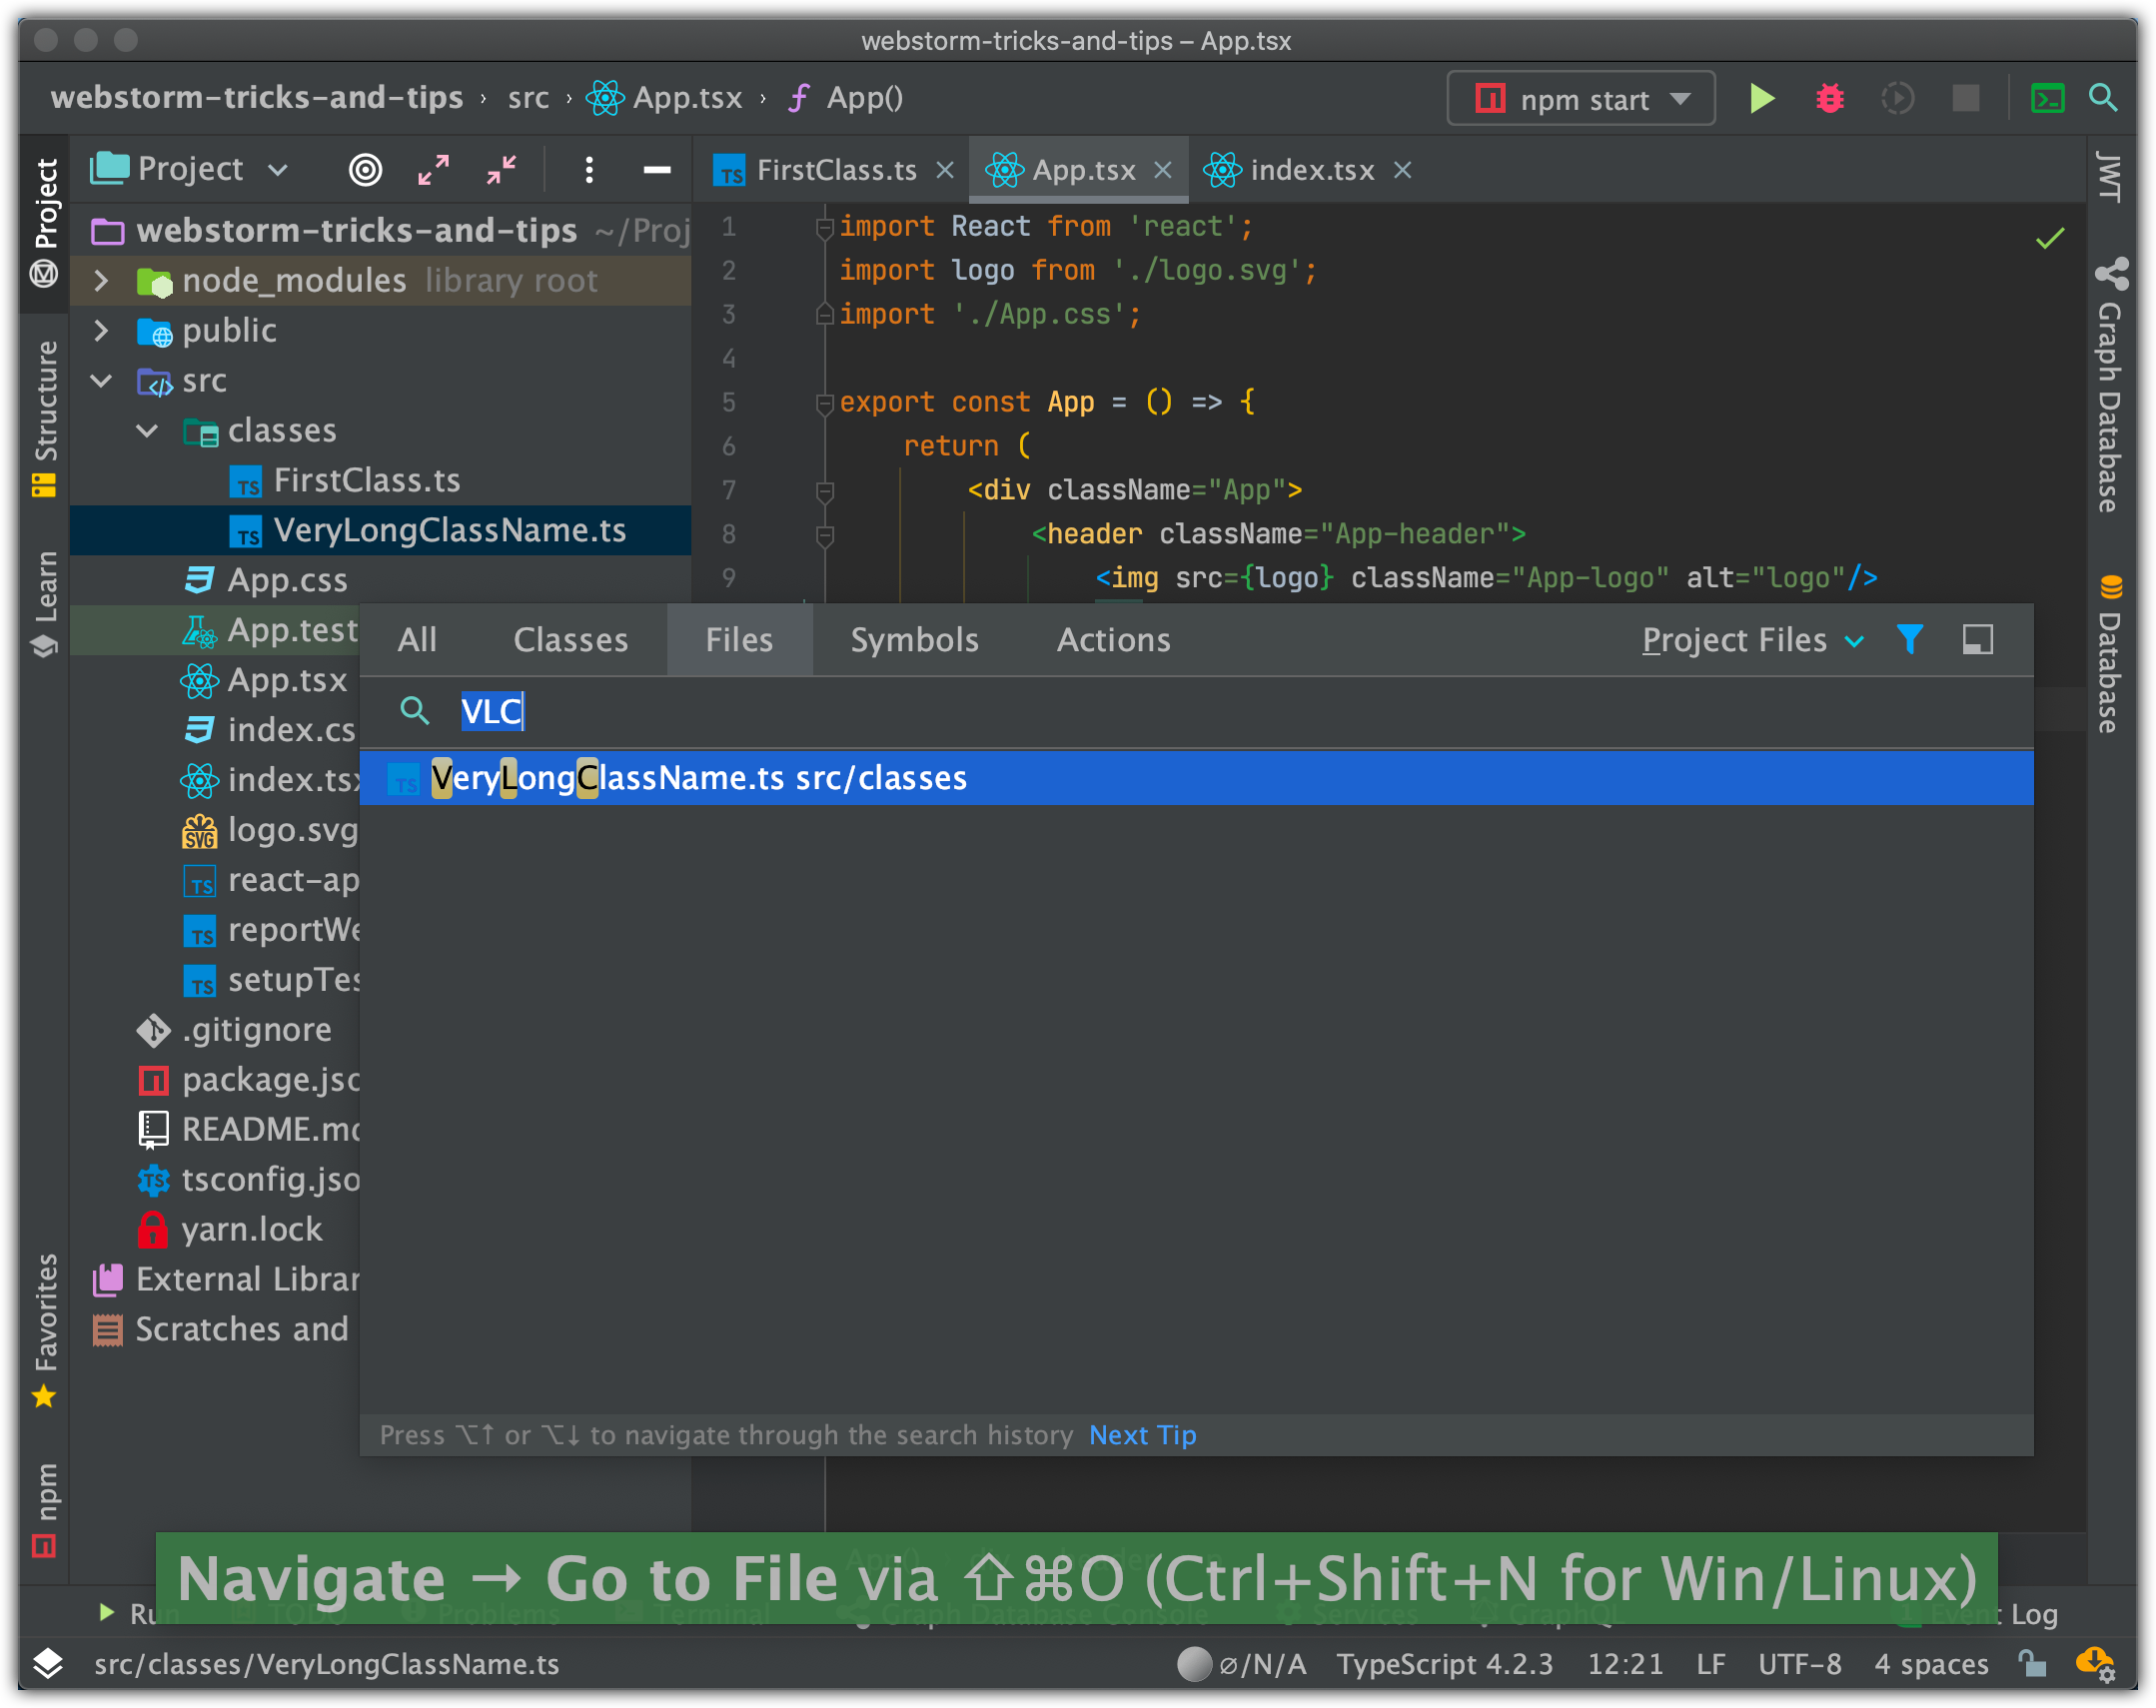
9. Go to File
[Shift+Command+O]
This option will search for a files, in this case it doesn’t matter what is in there:
10. Go to Folder
[Shift+Command+O]
If you will type a slash symbol before the searched name /SomeFolderName. IDE will search only folders, files will be excluded from a search result list:

11. Go to Symbol
[Option+Command+O]
This feature allows your search for functions and fields that are declared in a specific class name <ClassName>.<FunctionName>. It will show all hello functions and fields of a FirstClass or FirstClass TS files:

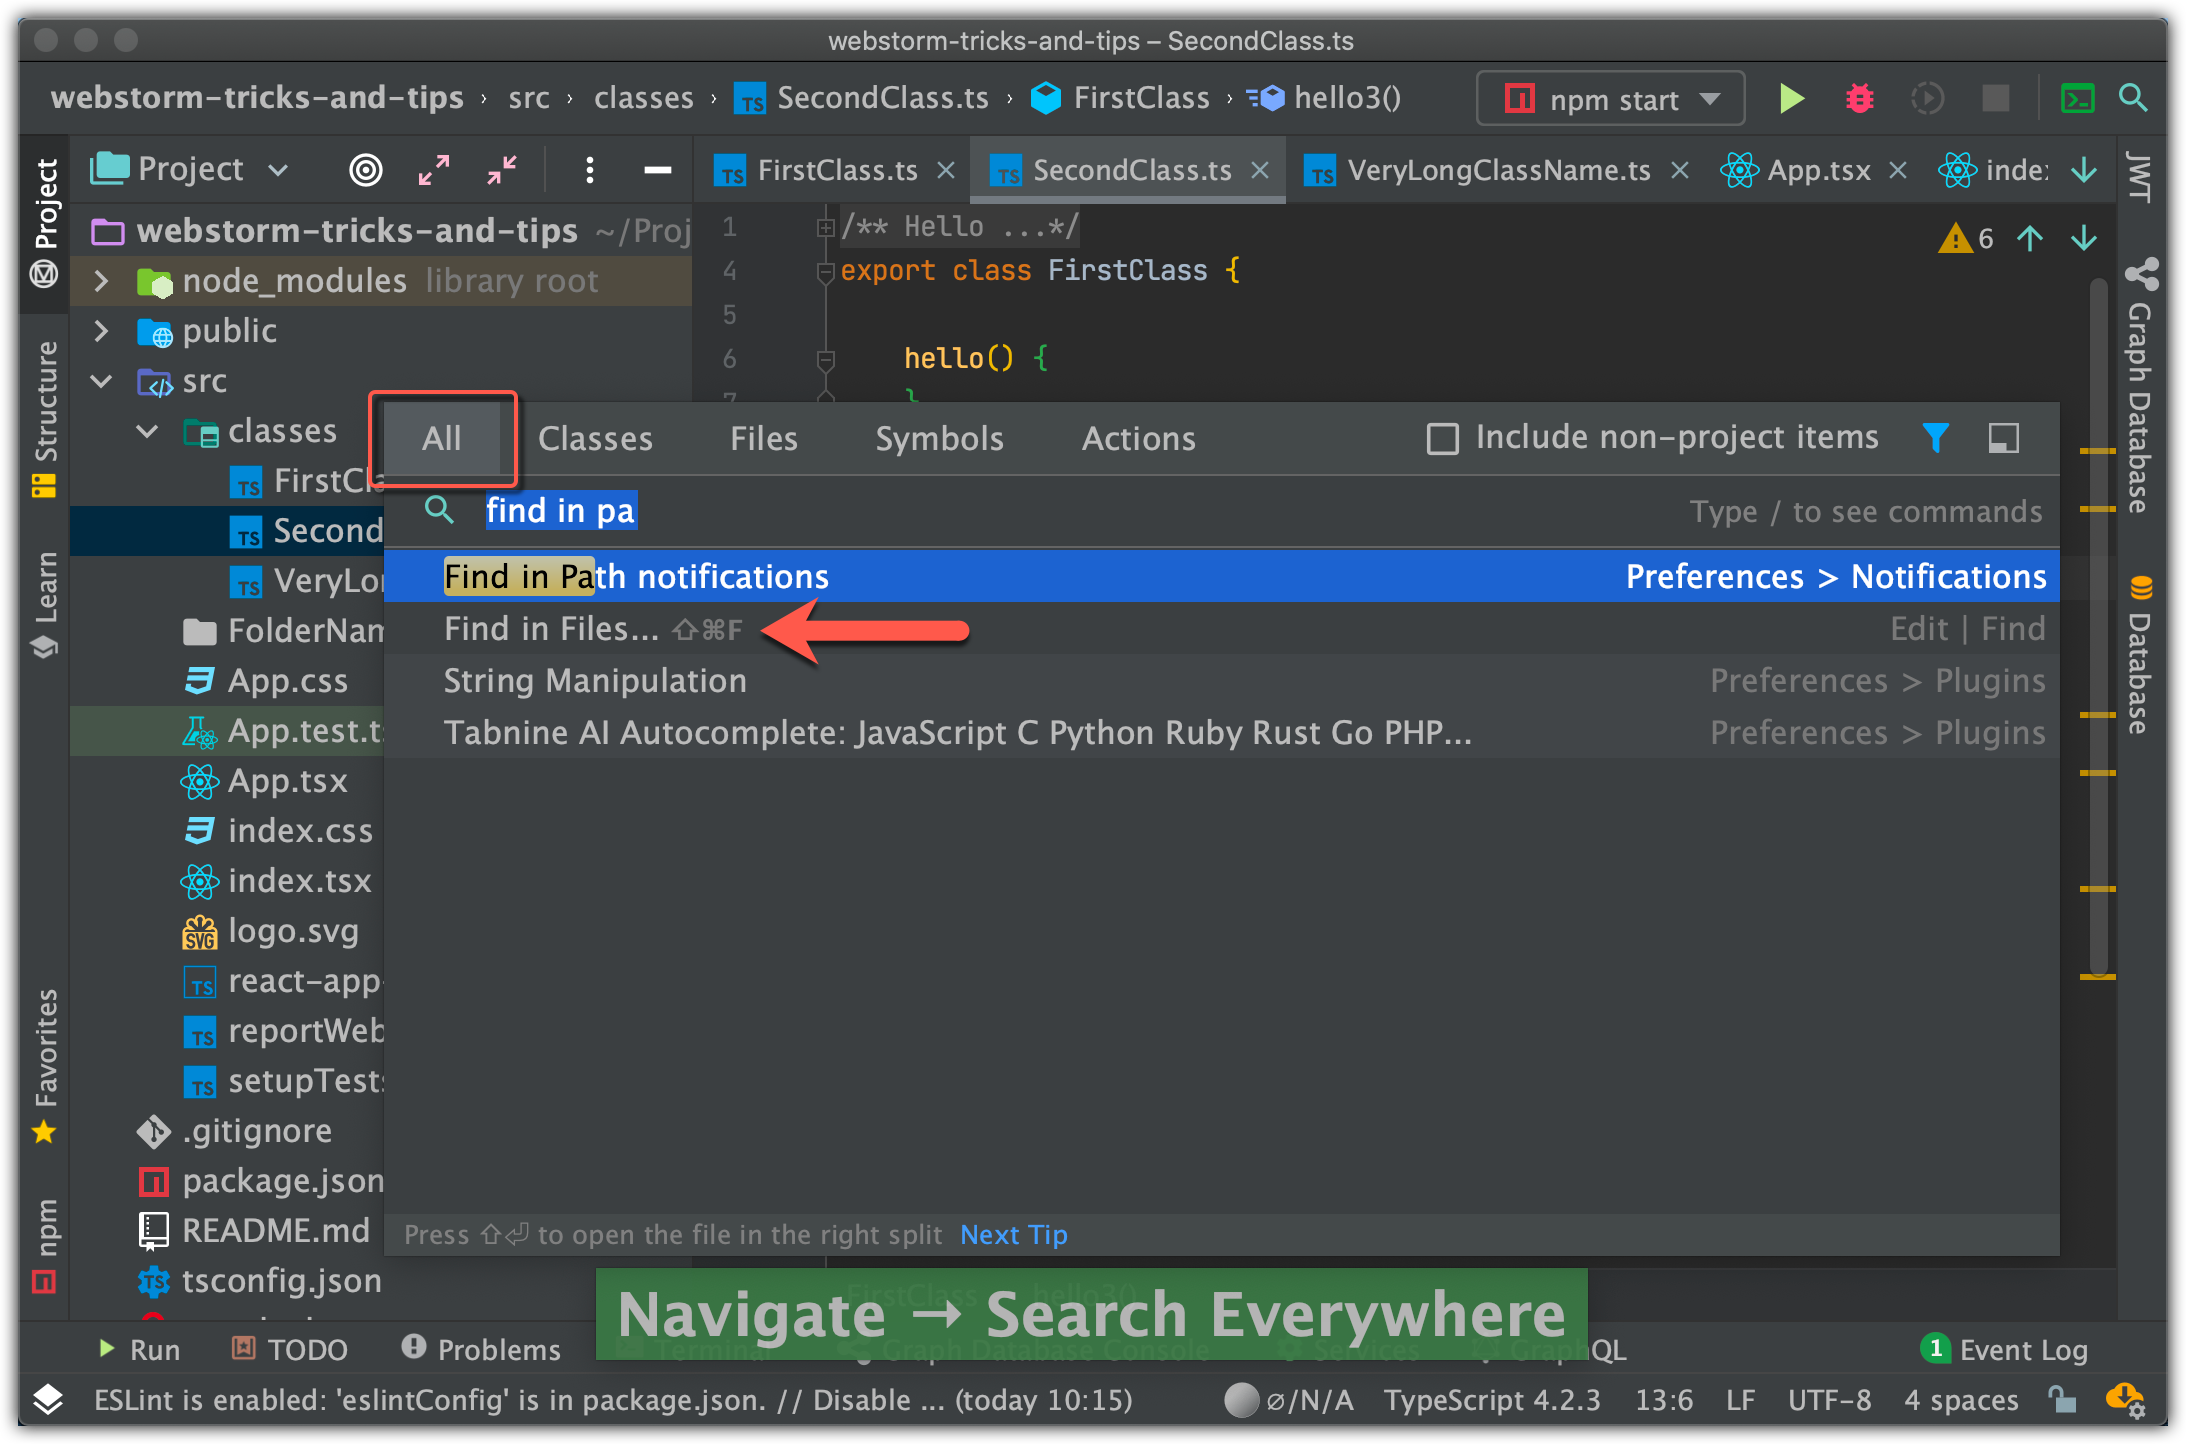
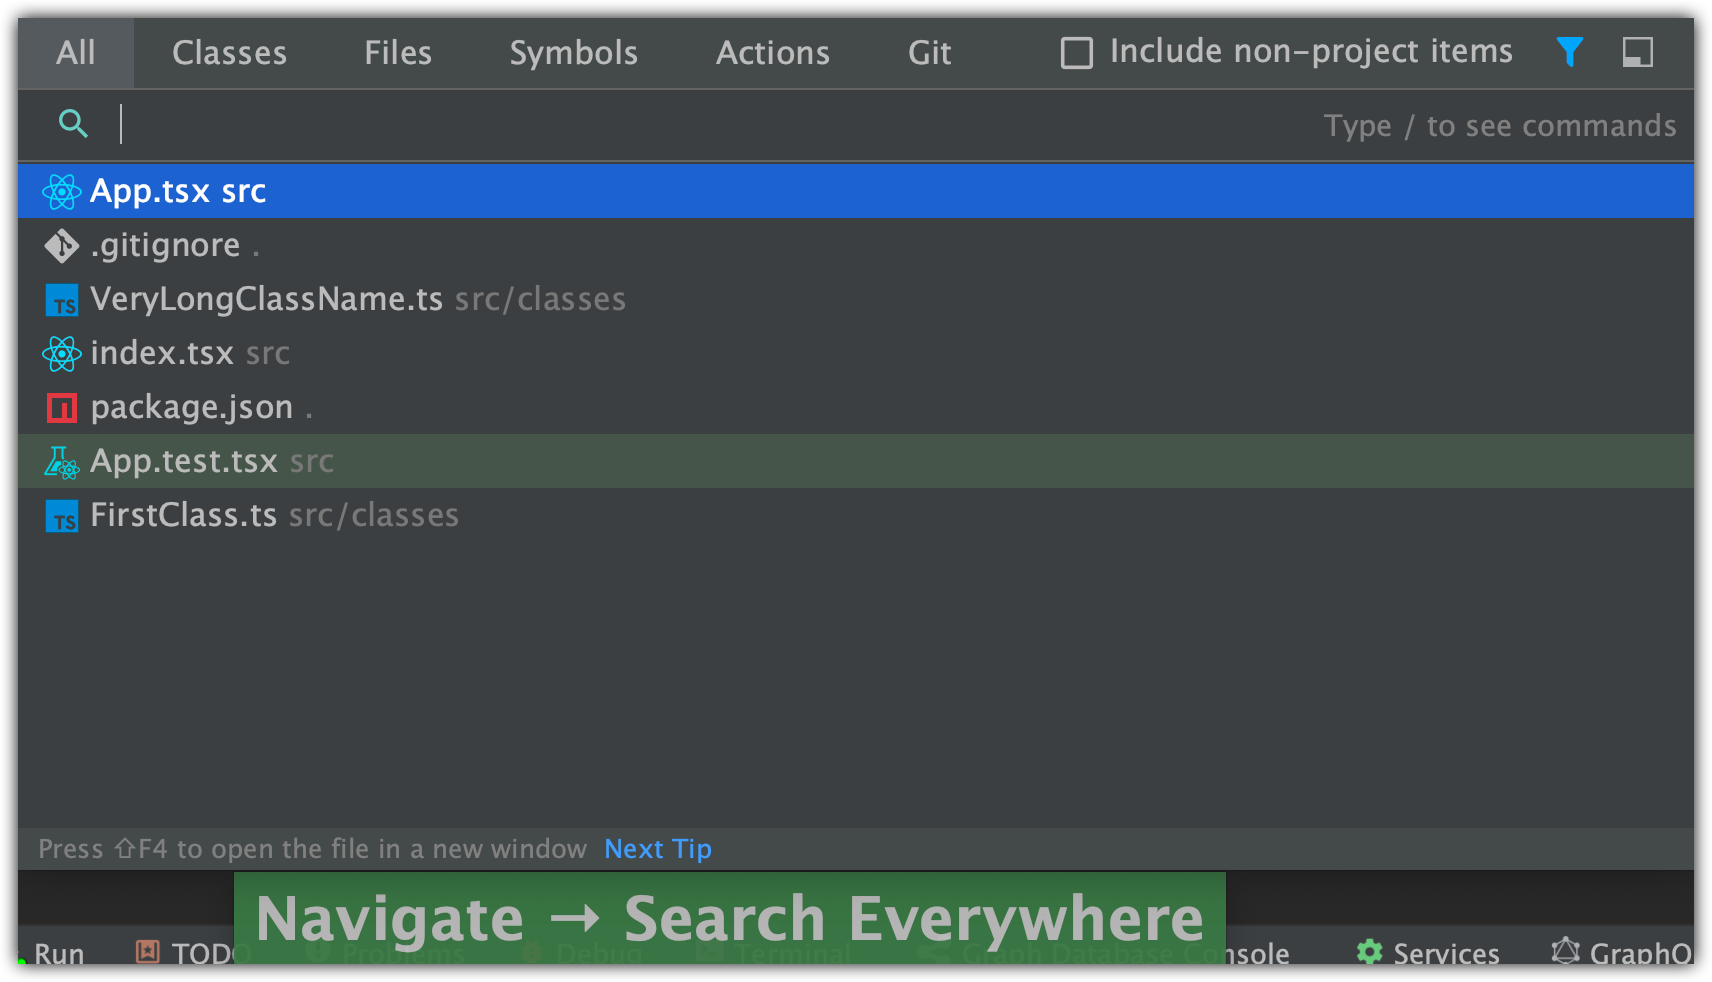
12. Search everywhere anything
[Double Shift]
This is the most powerful feature of JetBrains IDEs. It allows a developer to do almost anything:
- search class/files/folders;
- run scripts (will show later in this story);
- open preferences tabs;
- change theme;
- open menus/popups (will show later in this story)
- etc…
Functionality is almost limitless.
13. Navigate through search history
If you press [Option+Up/Down] keys inside “Search everywhere” you can navigate through your search history:
14. Problems window. Highlighted Errors navigation
You don’t need scroll down when you are looking for errors in your code. Just use the [ **F2** ] key and IDE will scroll to the Next Highlighted Error:

Previous Highlighted Error → [ **Shift+F2** ]

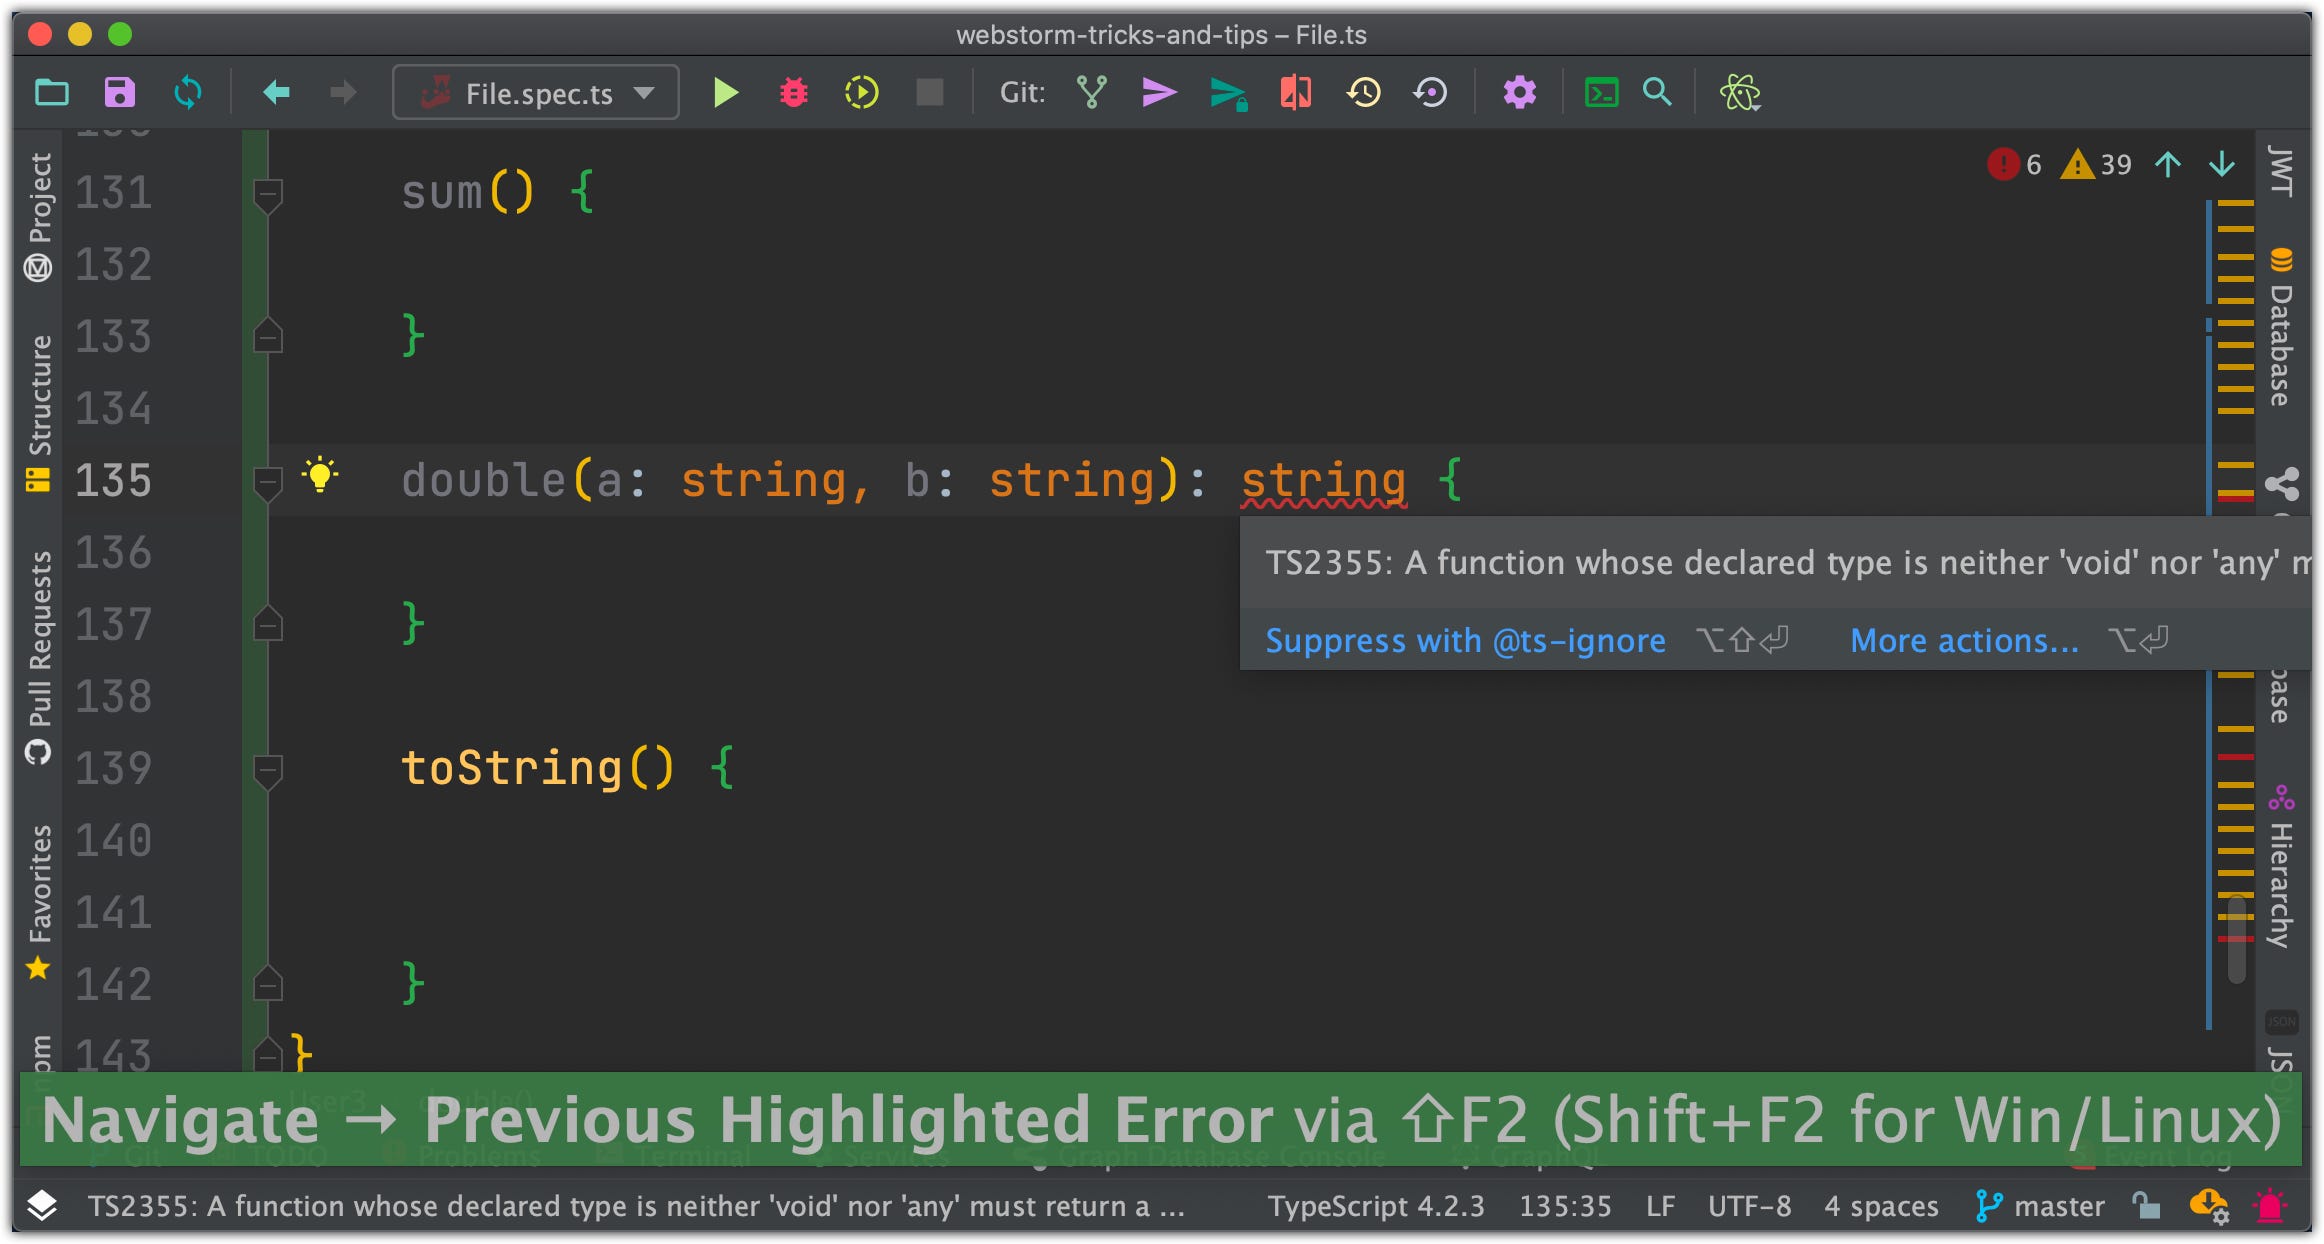
⚠️ NOTE: IDE will only navigate you through errors, not formatting issues. You can click at the top-right icon…

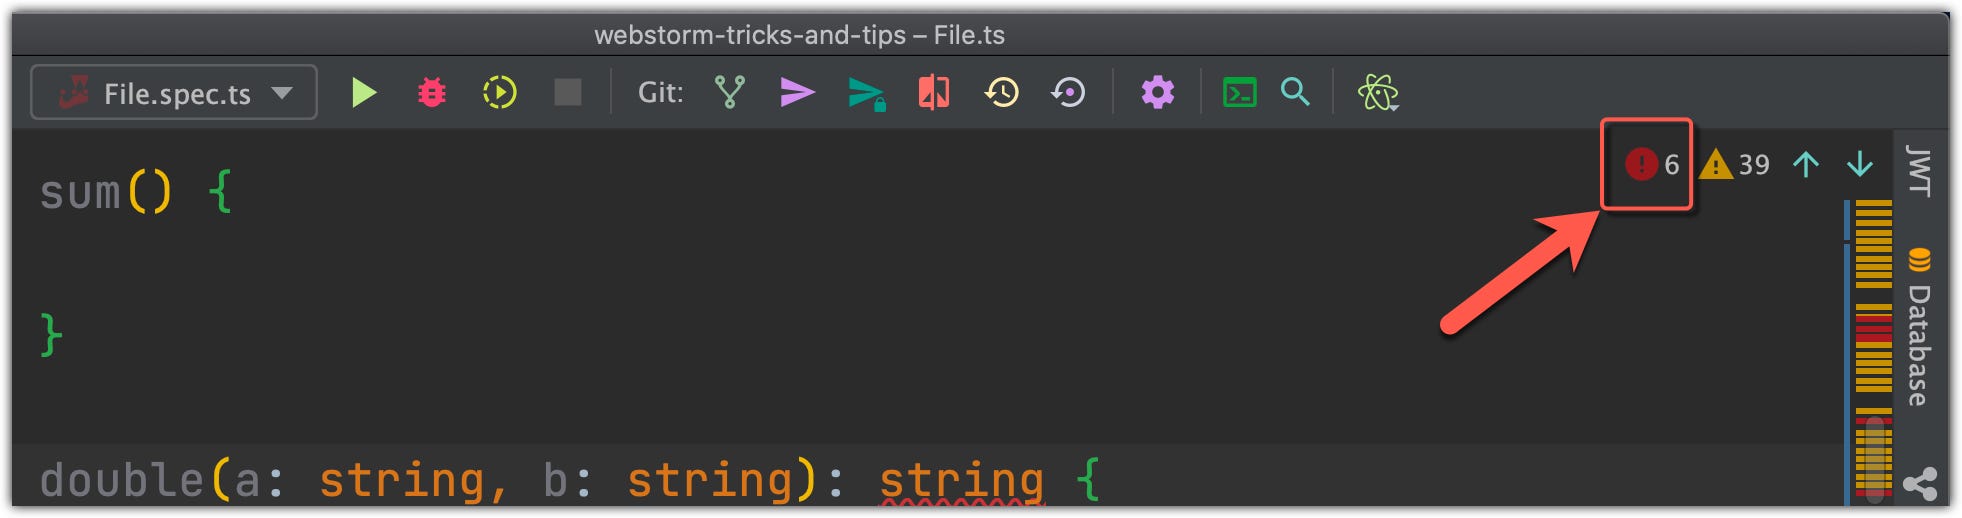
… or press [ **Command+6** ] for showing the “Problems” window:


15. Run scripts after search
You can even run commands from a search bar, **npm start** for example. Or maybe you have a test you want to run, you can do that without opening your tests file. But you must remember that you can run only that files/tests/scripts that were previously added to the IDE configuration scripts:
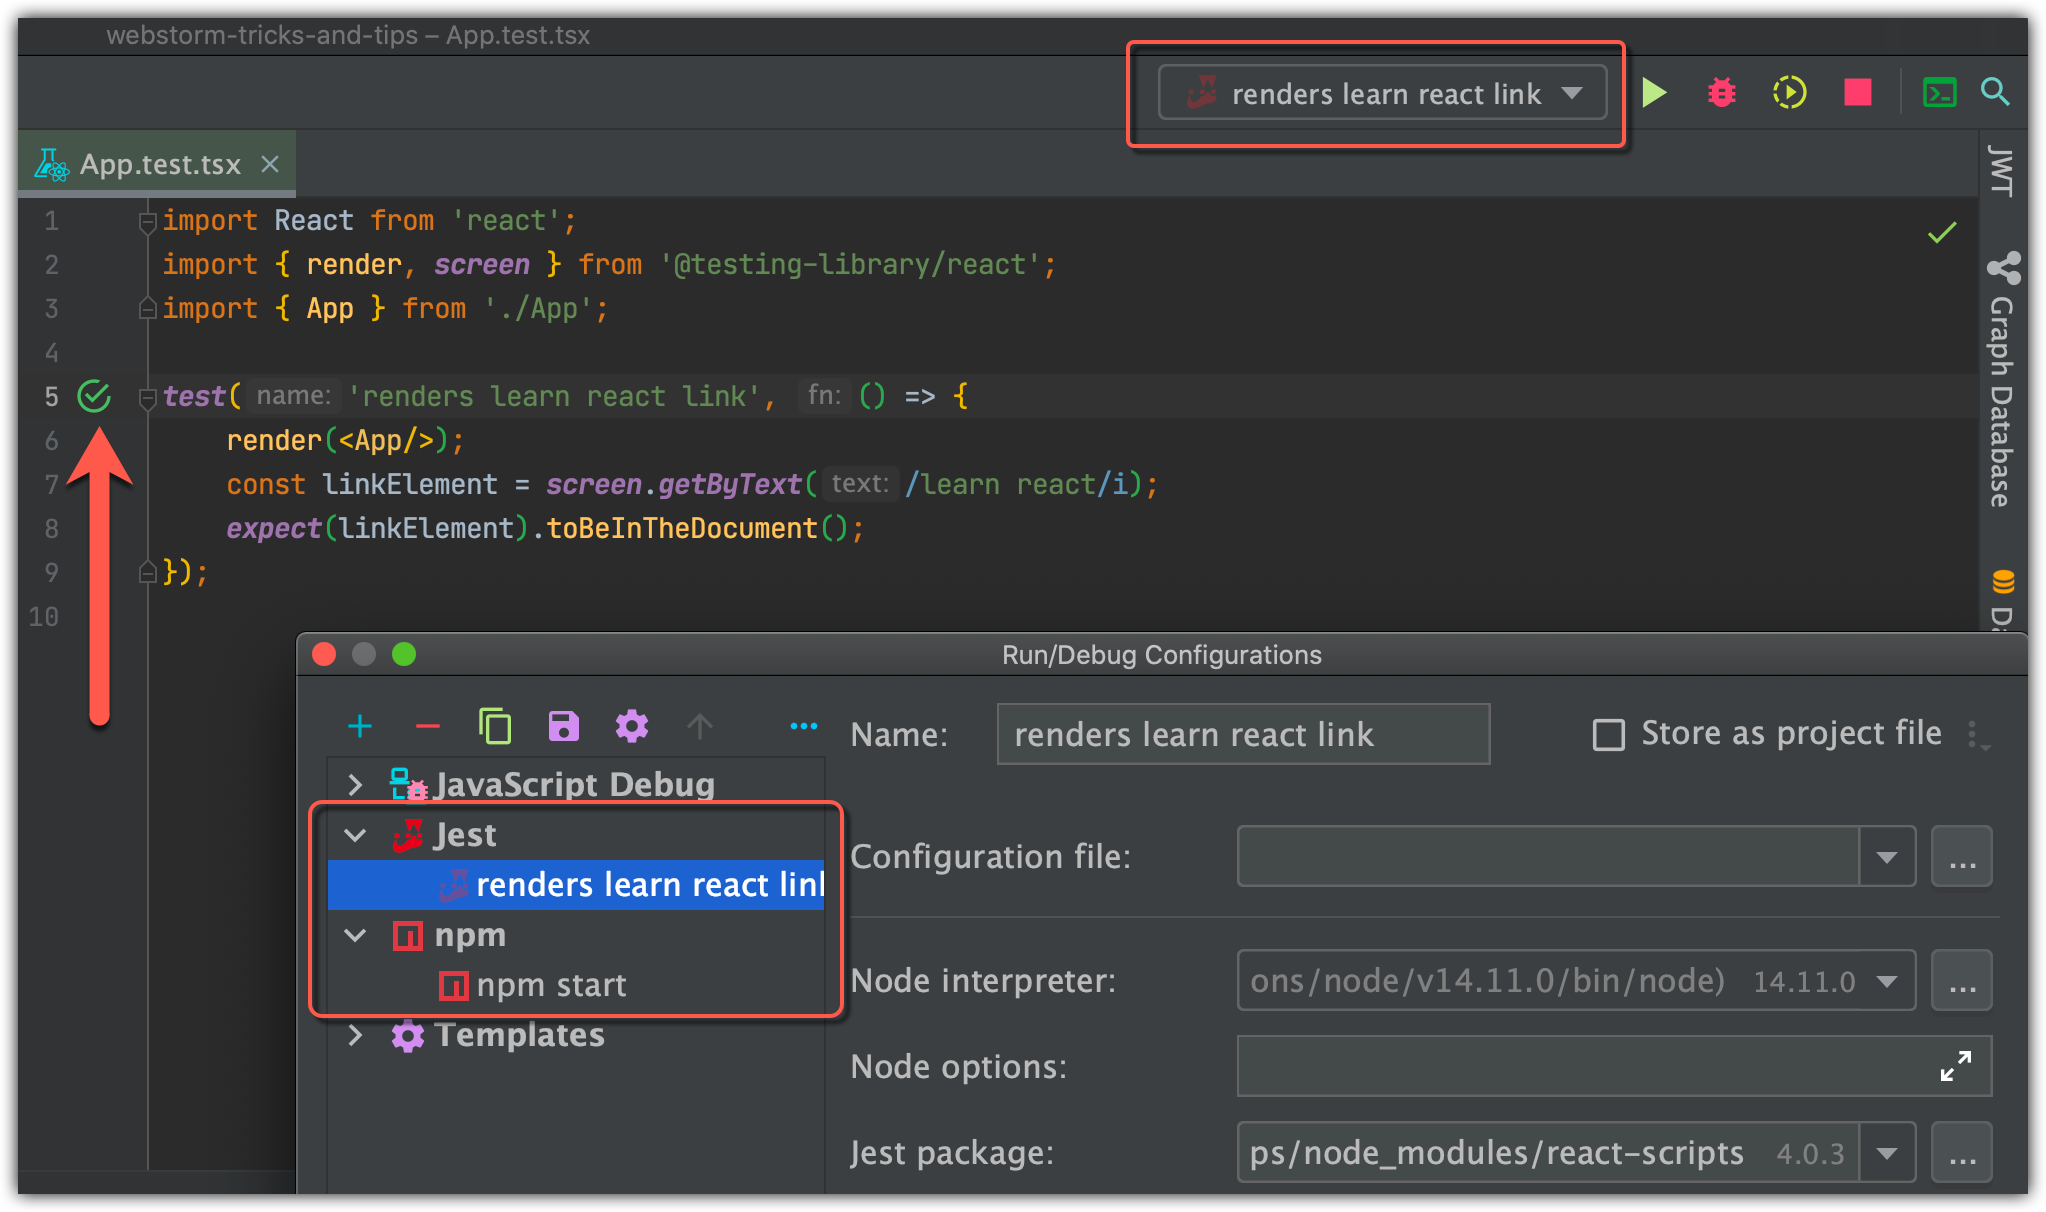
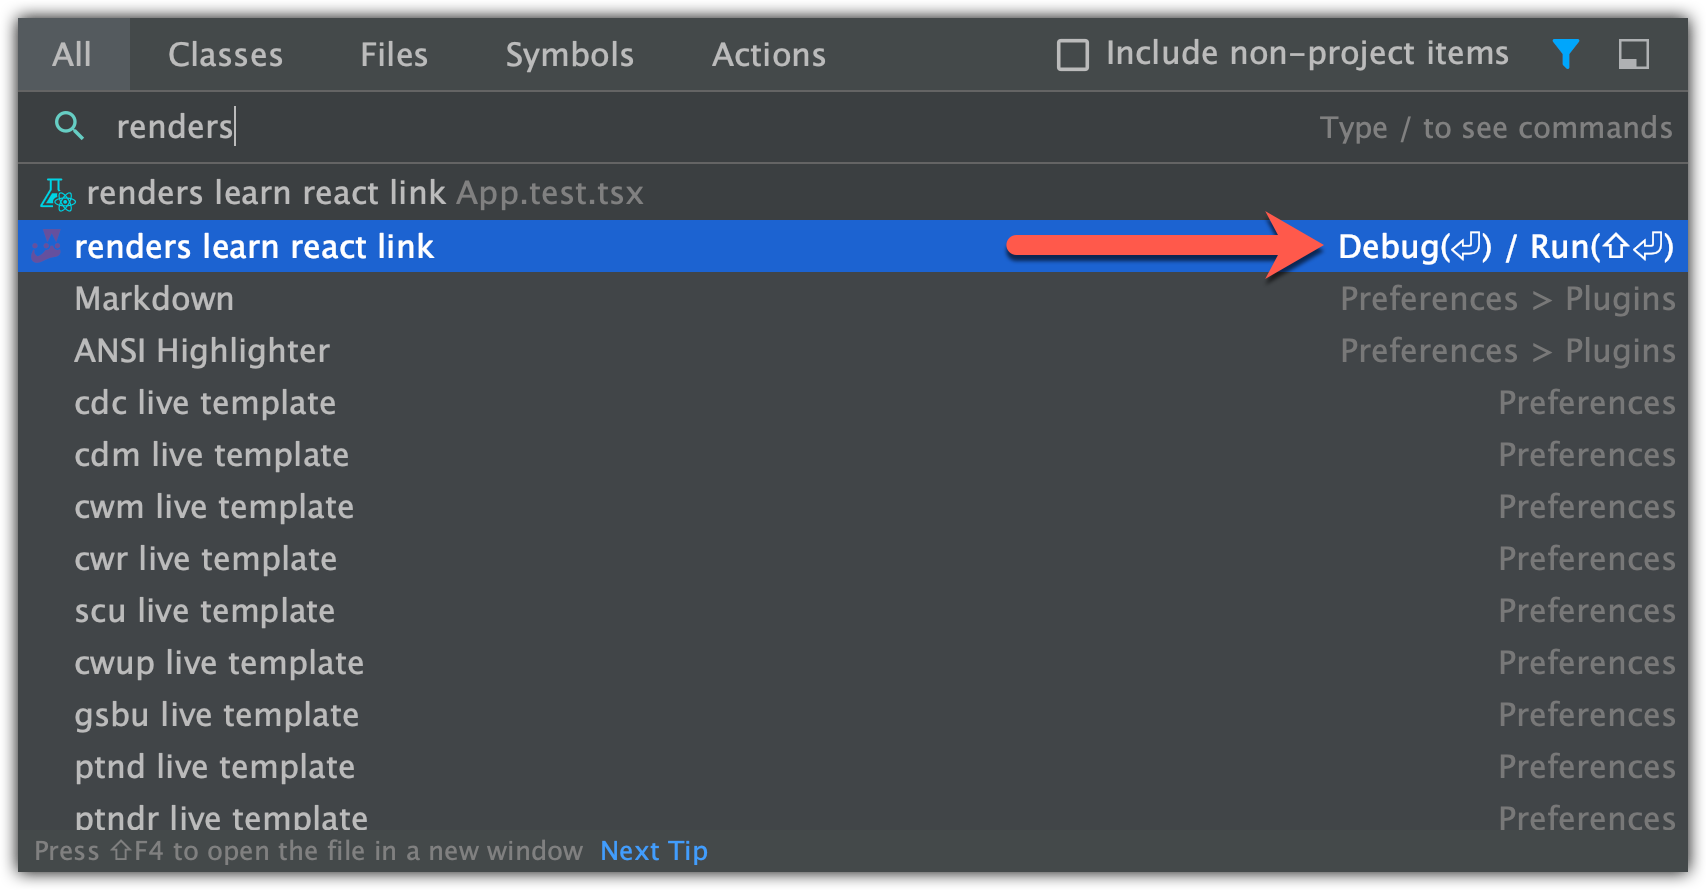
Take a look at how it works:
You can even commit your changes by typing commit:

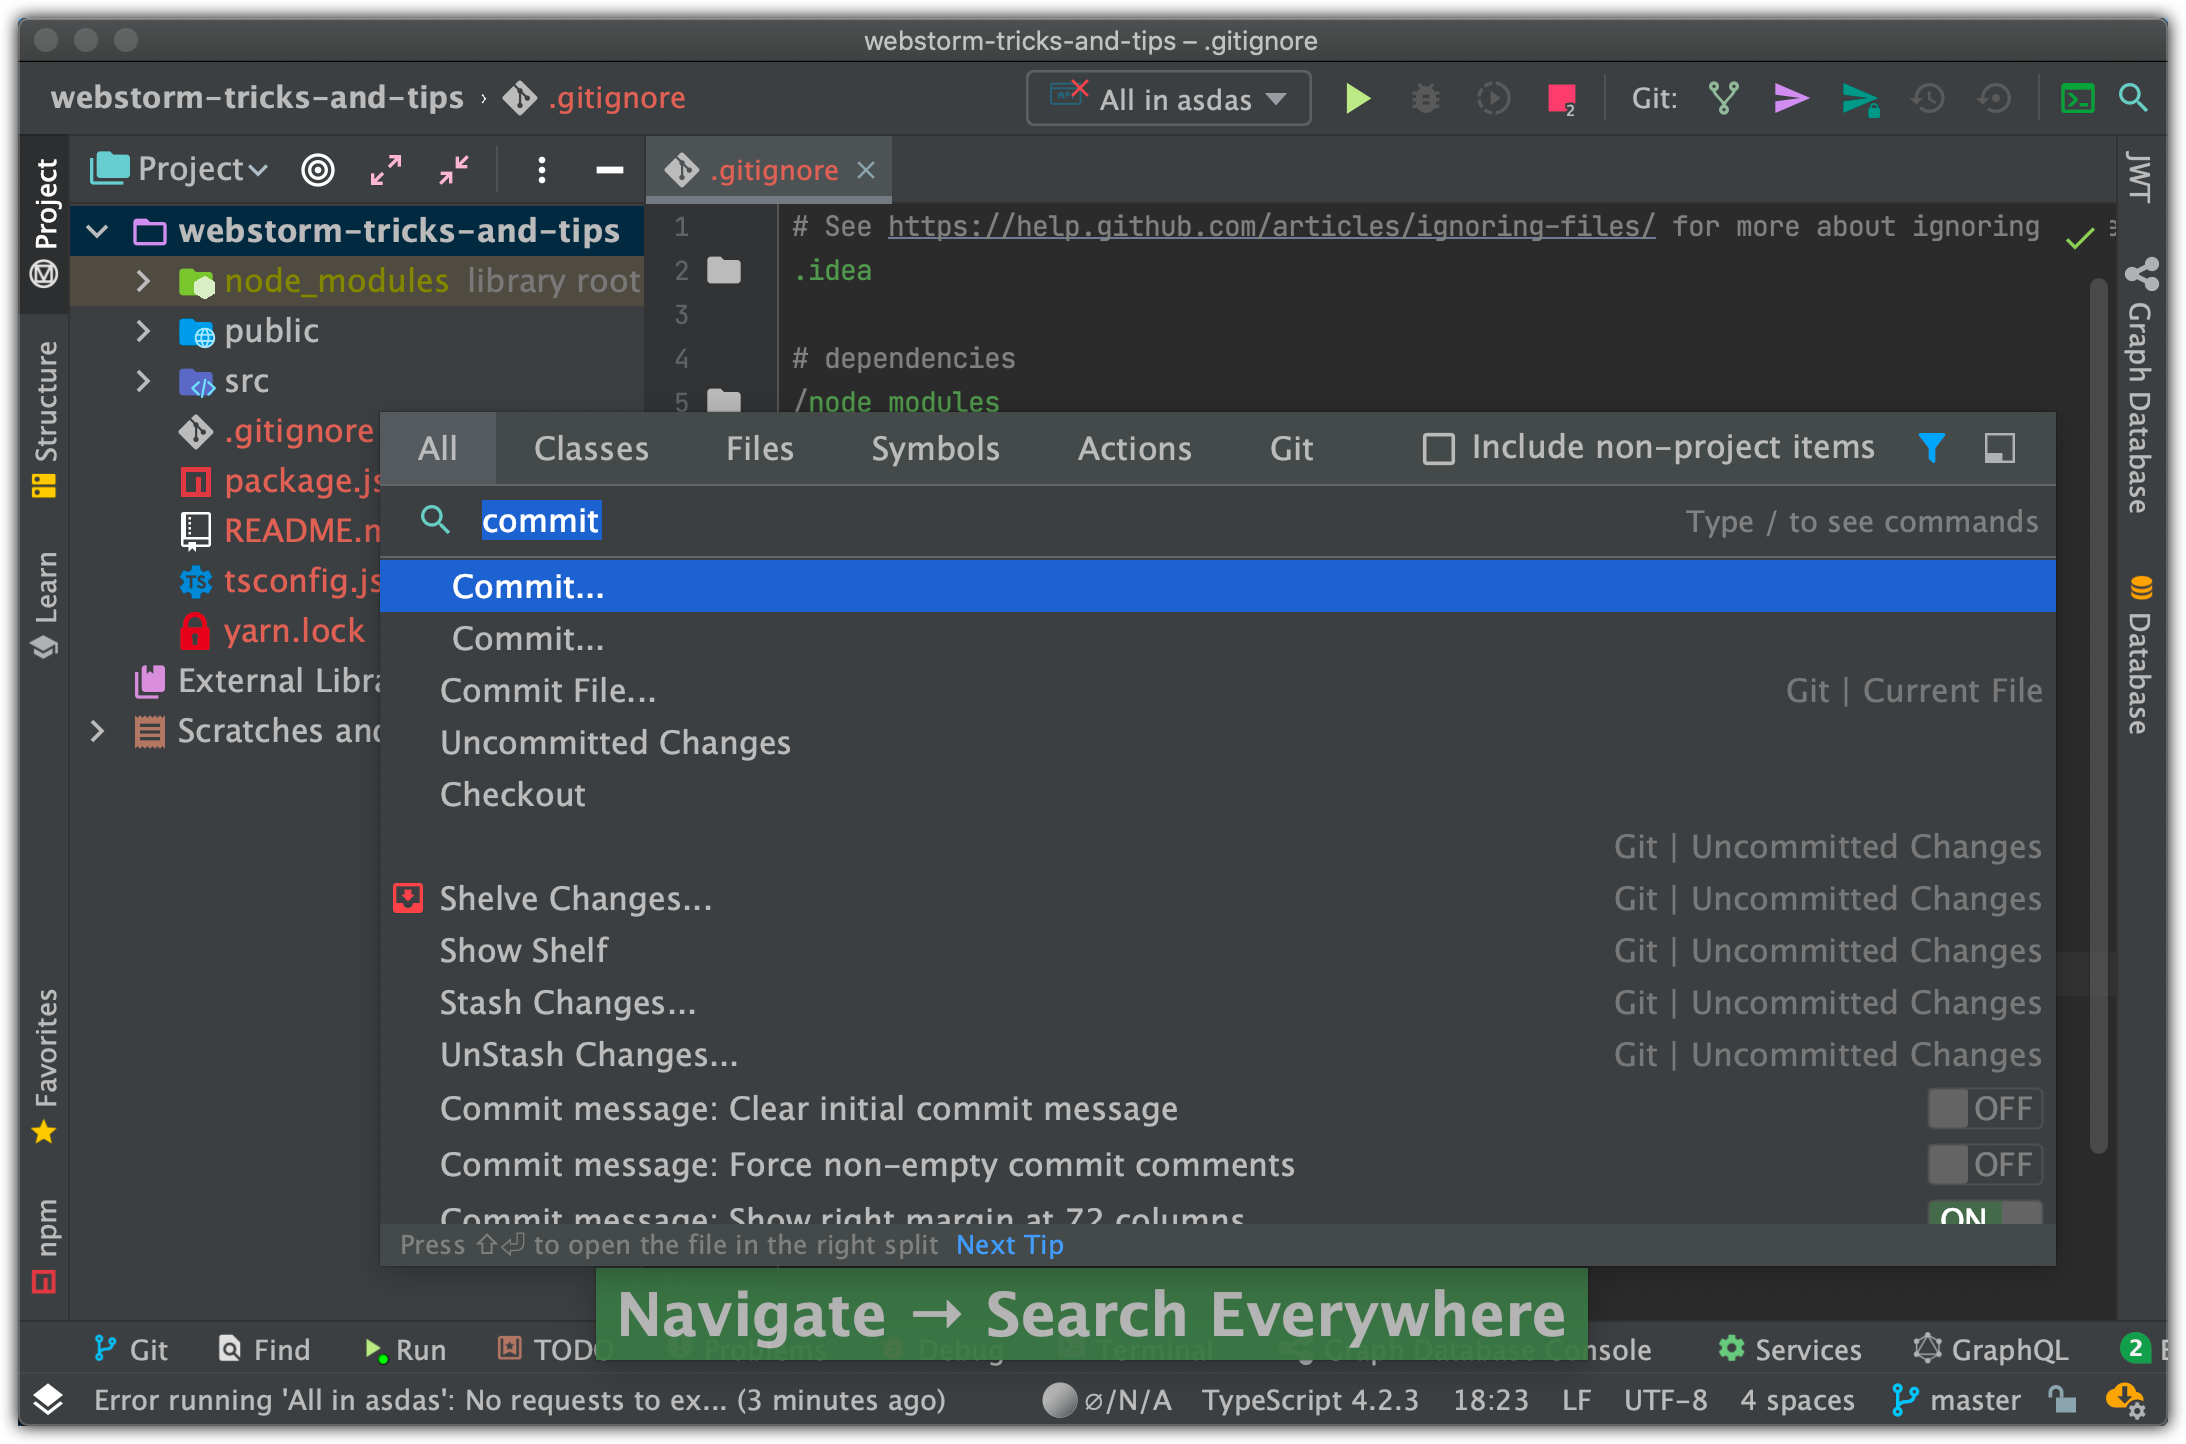
👍 So, as you can see “Search Everywhere” action allows you to not just find something, but execute as well.
16. Commit without “add”
IDE is smart enough to tell you that you have “Unversioned files” and you need to add them first before the commit, but…
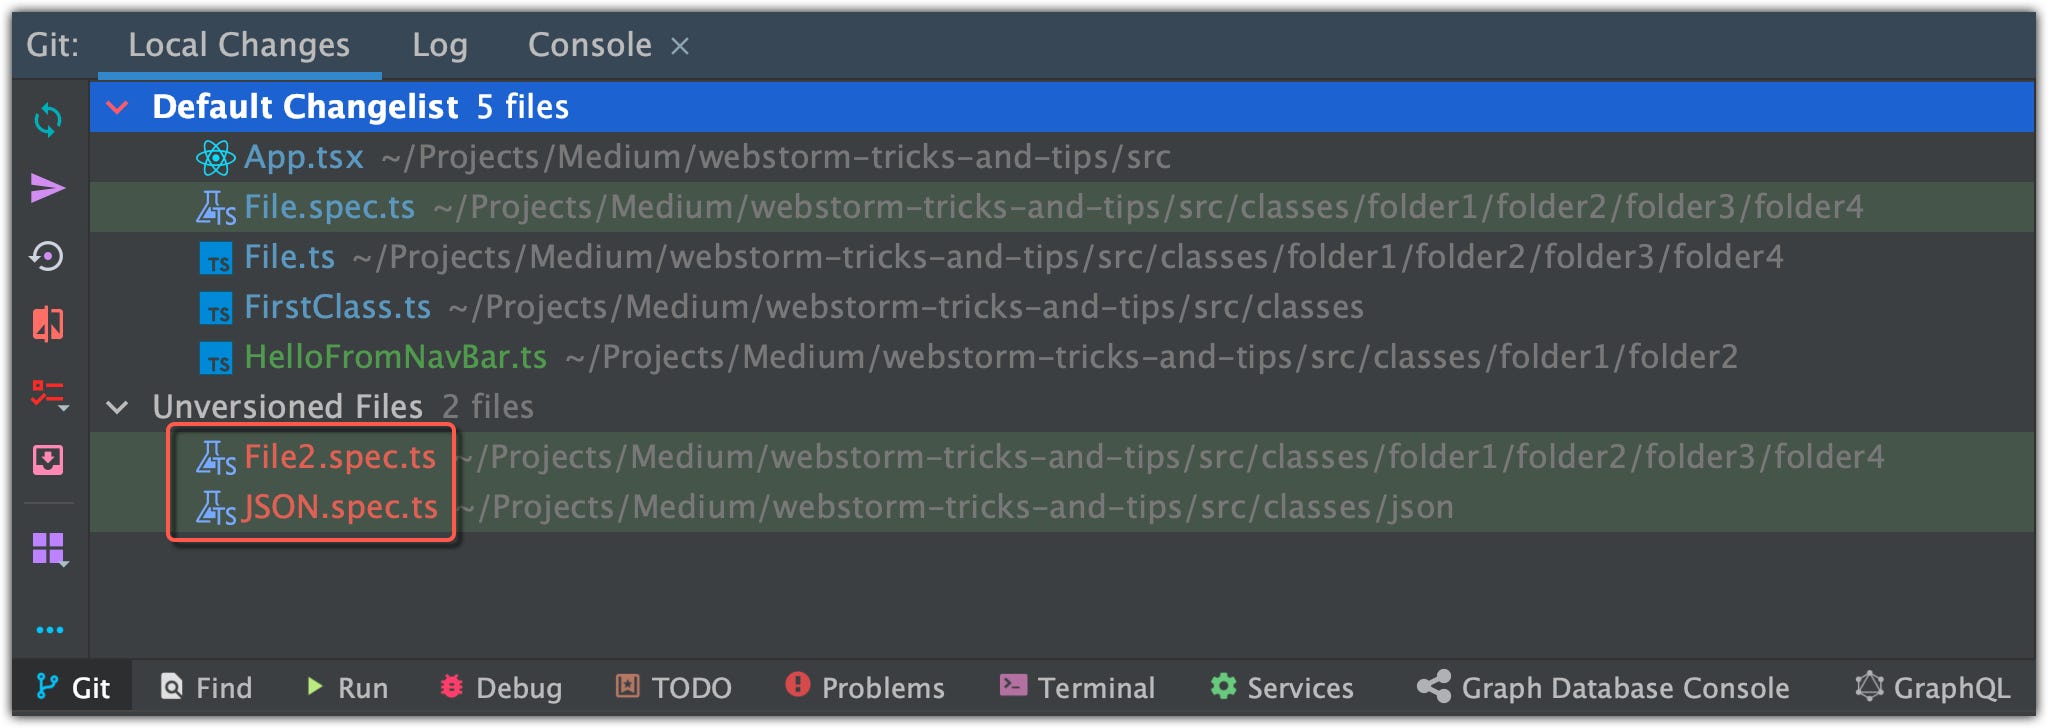
… you can add “Unversioned files” you can add them in the “Commit changes” window by clicking the checkbox:

!]can just click [**Control+Option+O** / ⌃⌥O] and IDE will do that for you

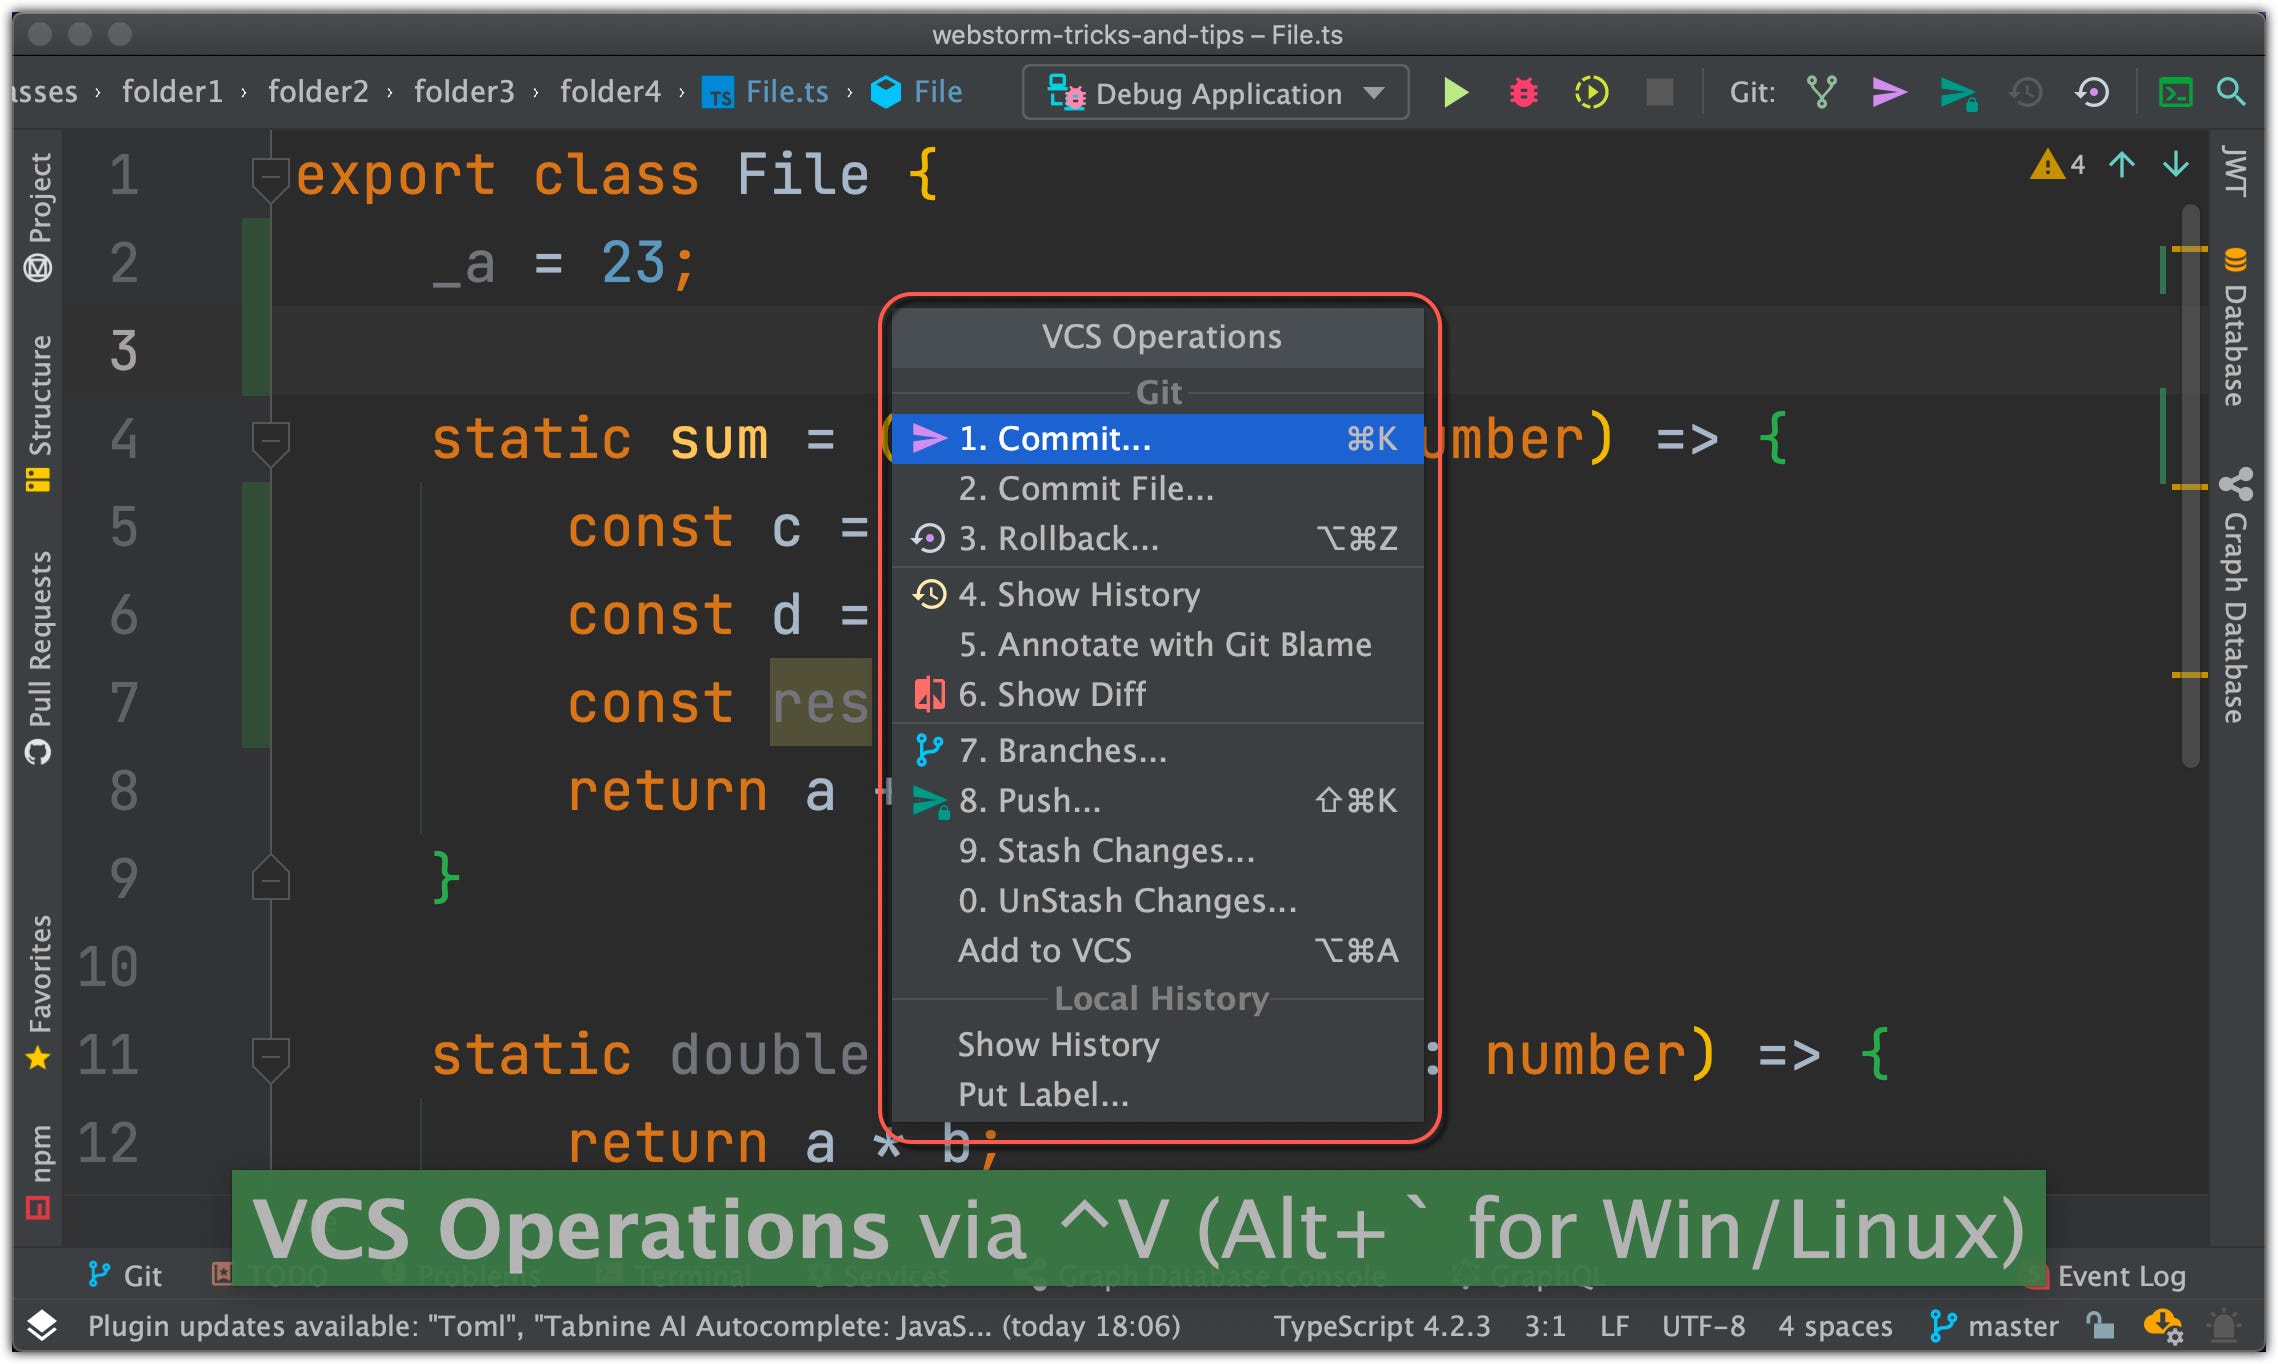
19. VCS Operations
You can open the VCS (Version Control System) menu by pressing [**Control+V** ], so you don’t have to remember all VCS commands like commit , push , etc…
20. Open in a split tab
You can open the searched file in a new Tab by clicking **Enter**, or you can open the searched file in a split tab if you press **Shift+Enter** :
21. Evaluate mathematical expressions
In the “Search everywhere” window you can quickly type and evaluate simple mathematical expressions.
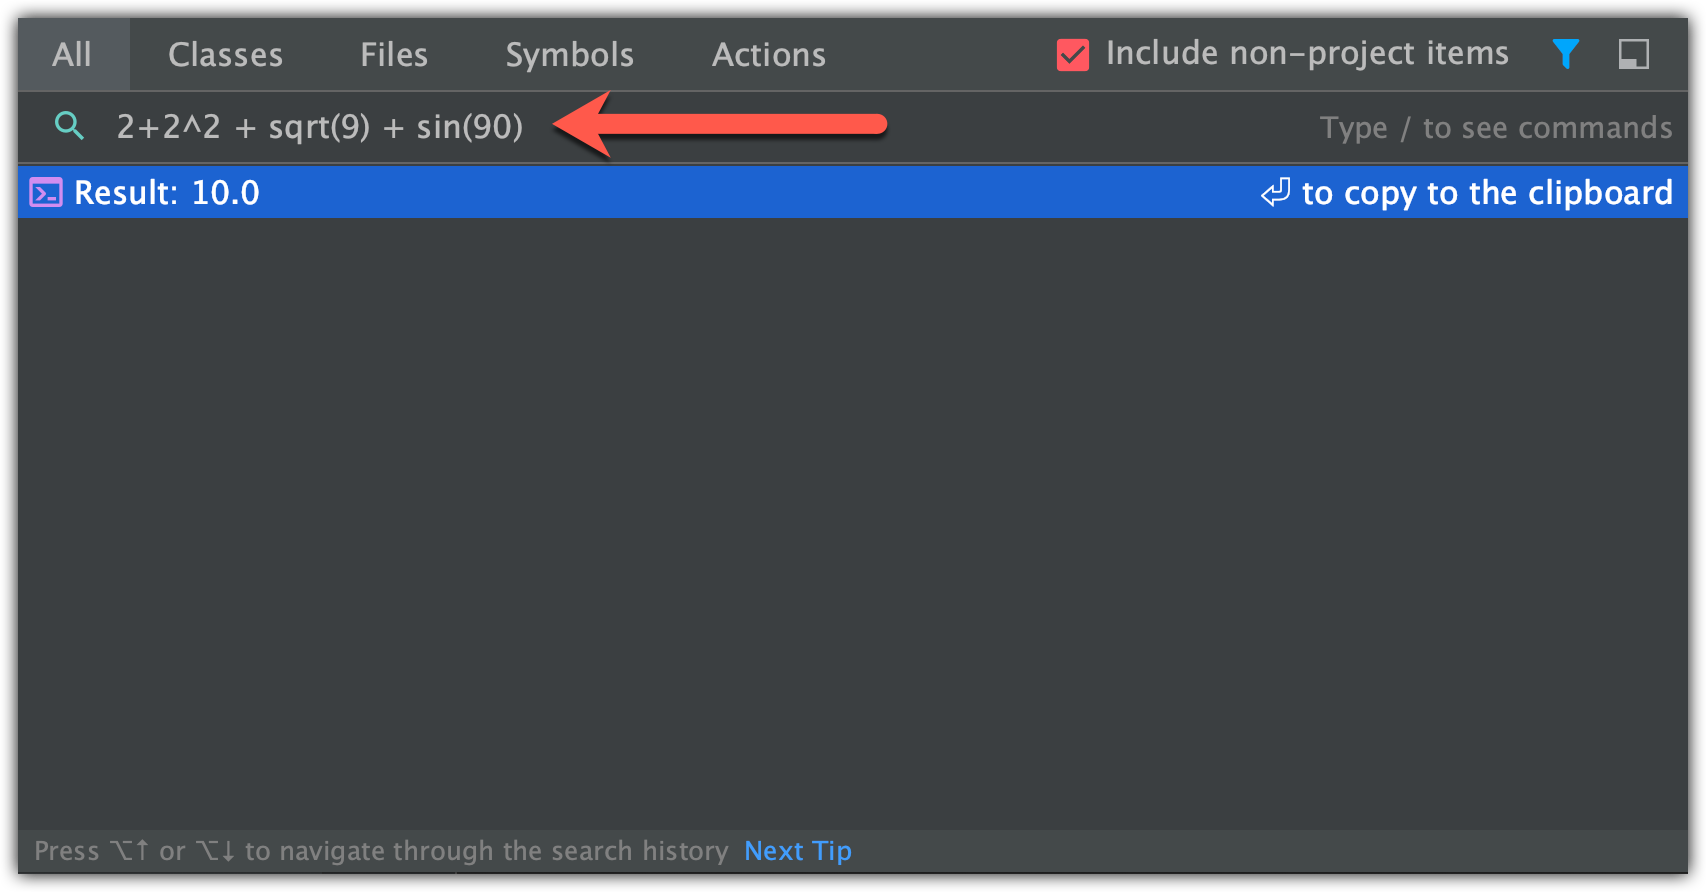
You can use basic arithmetic operators — +, -, *, /, as well as ^ for power — and basic math functions: sqrt(), sin(), cos(), tan().
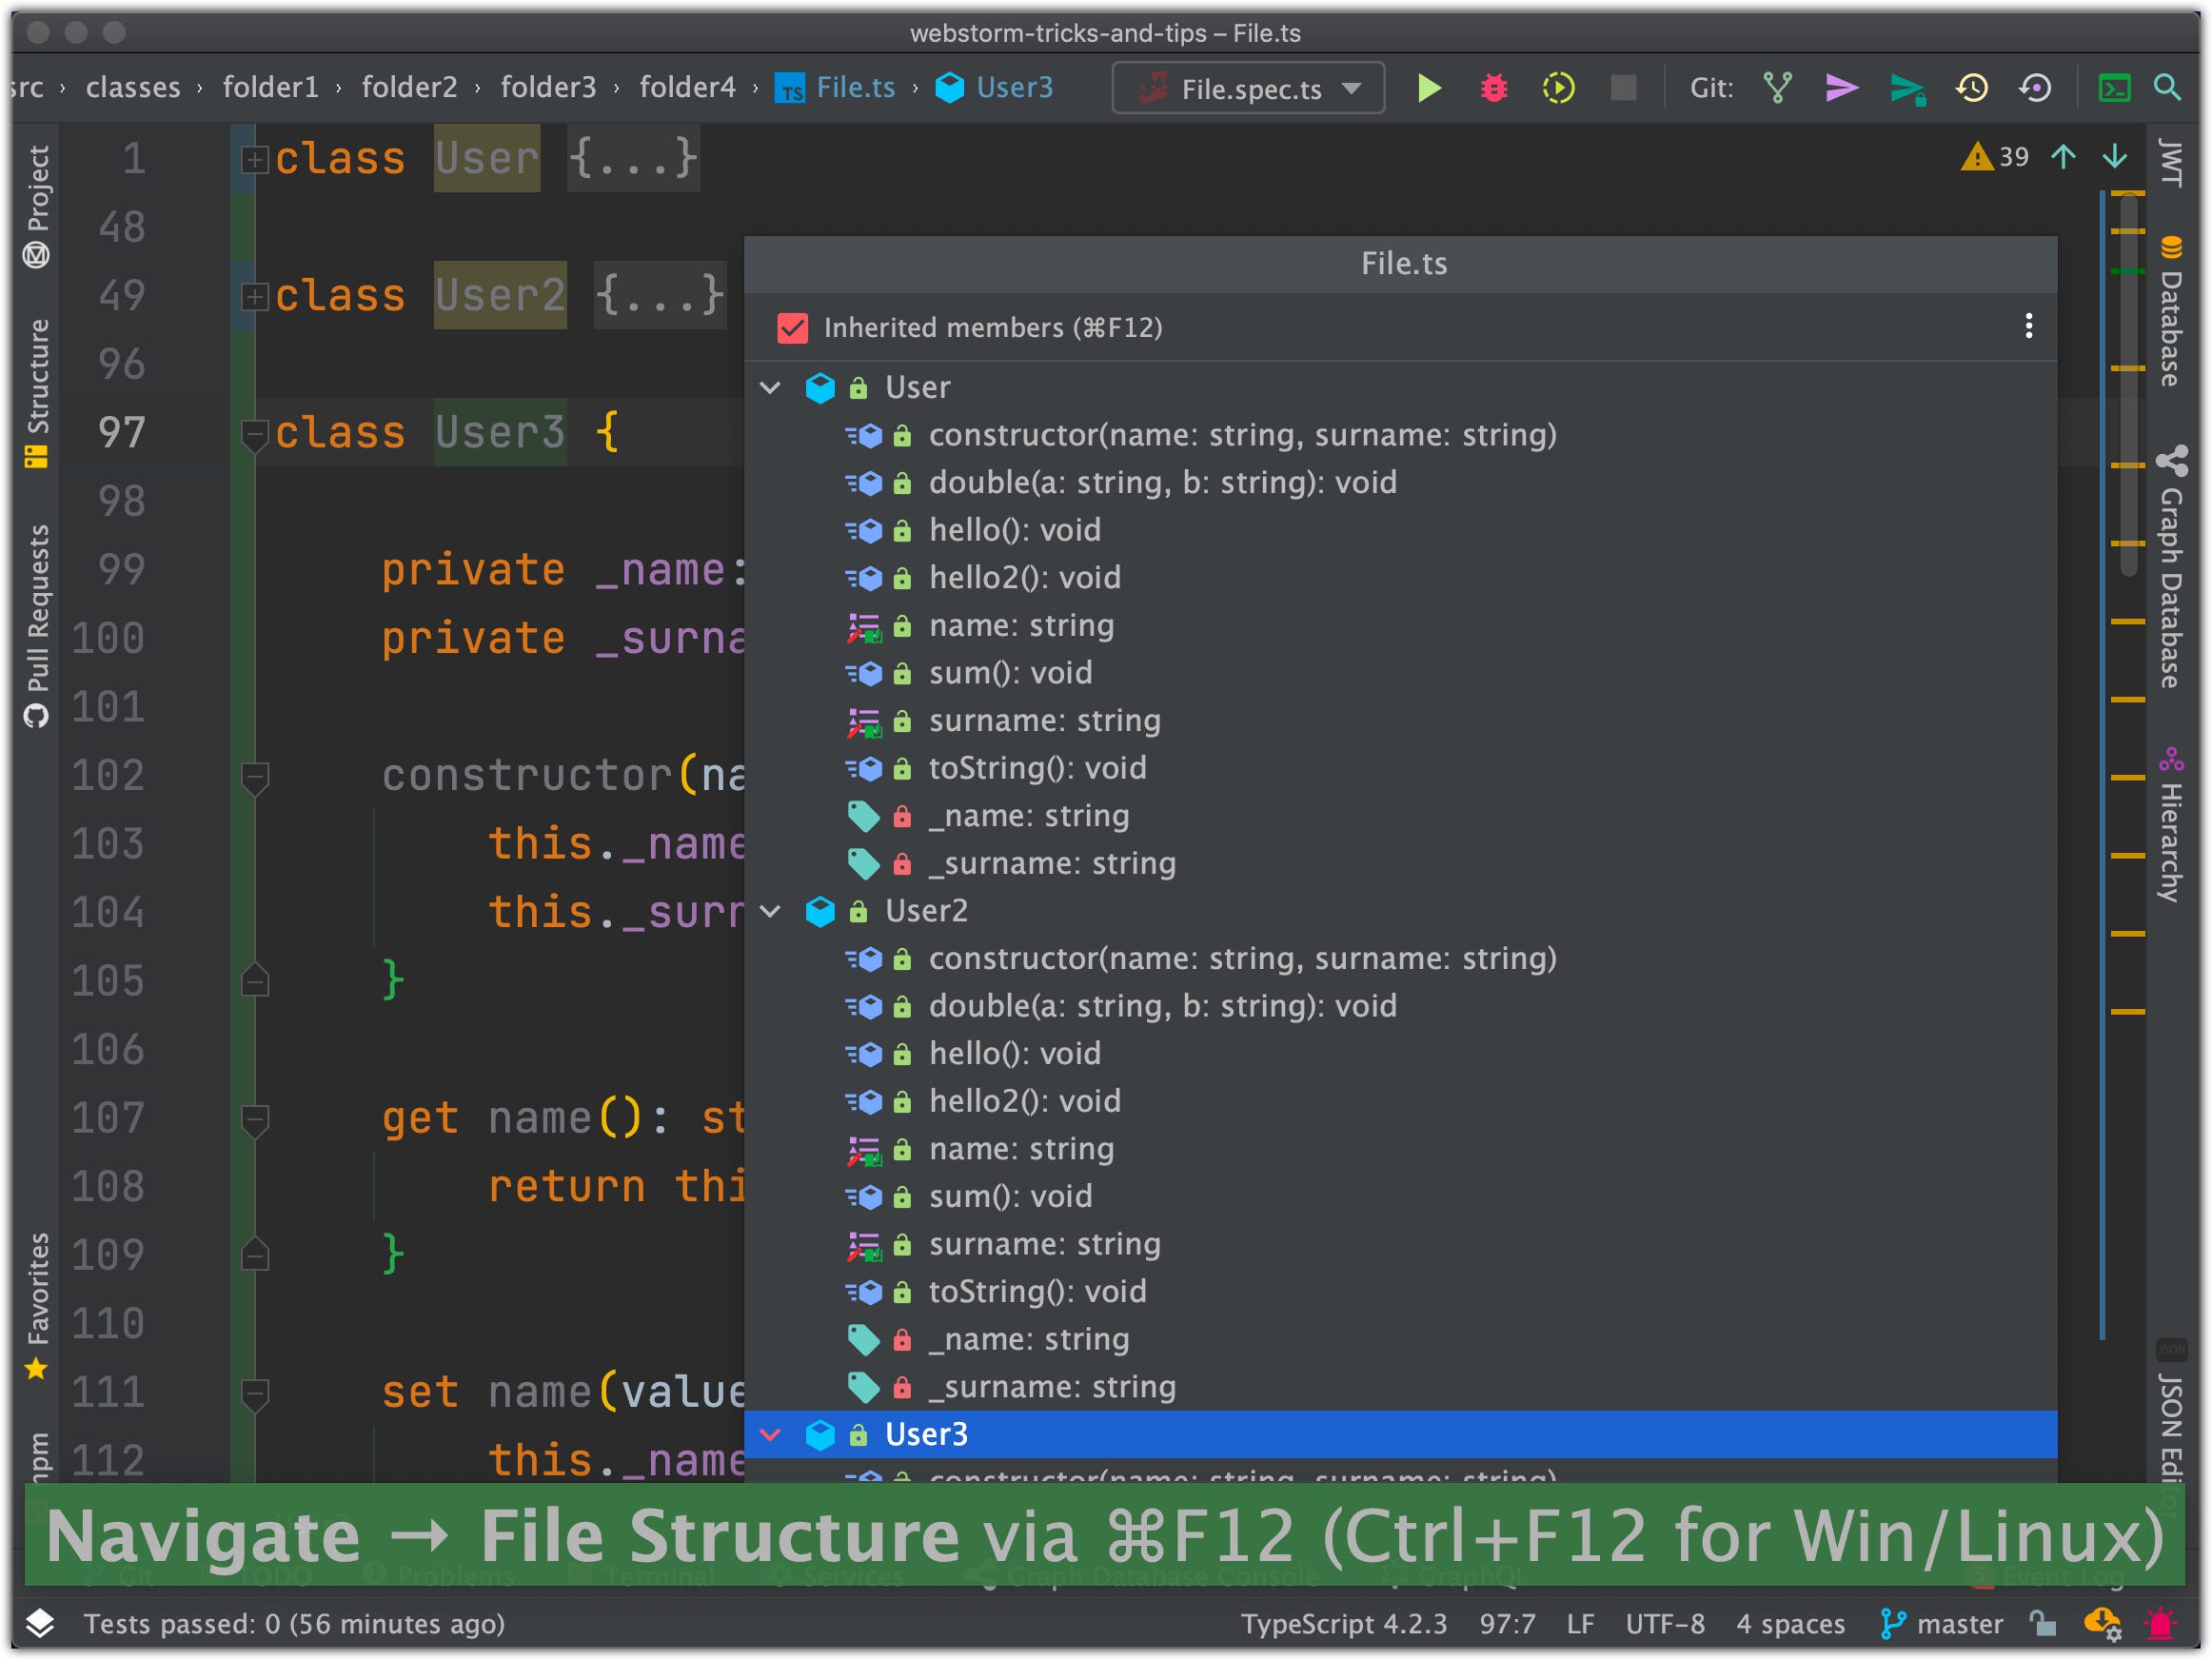
22. File structure
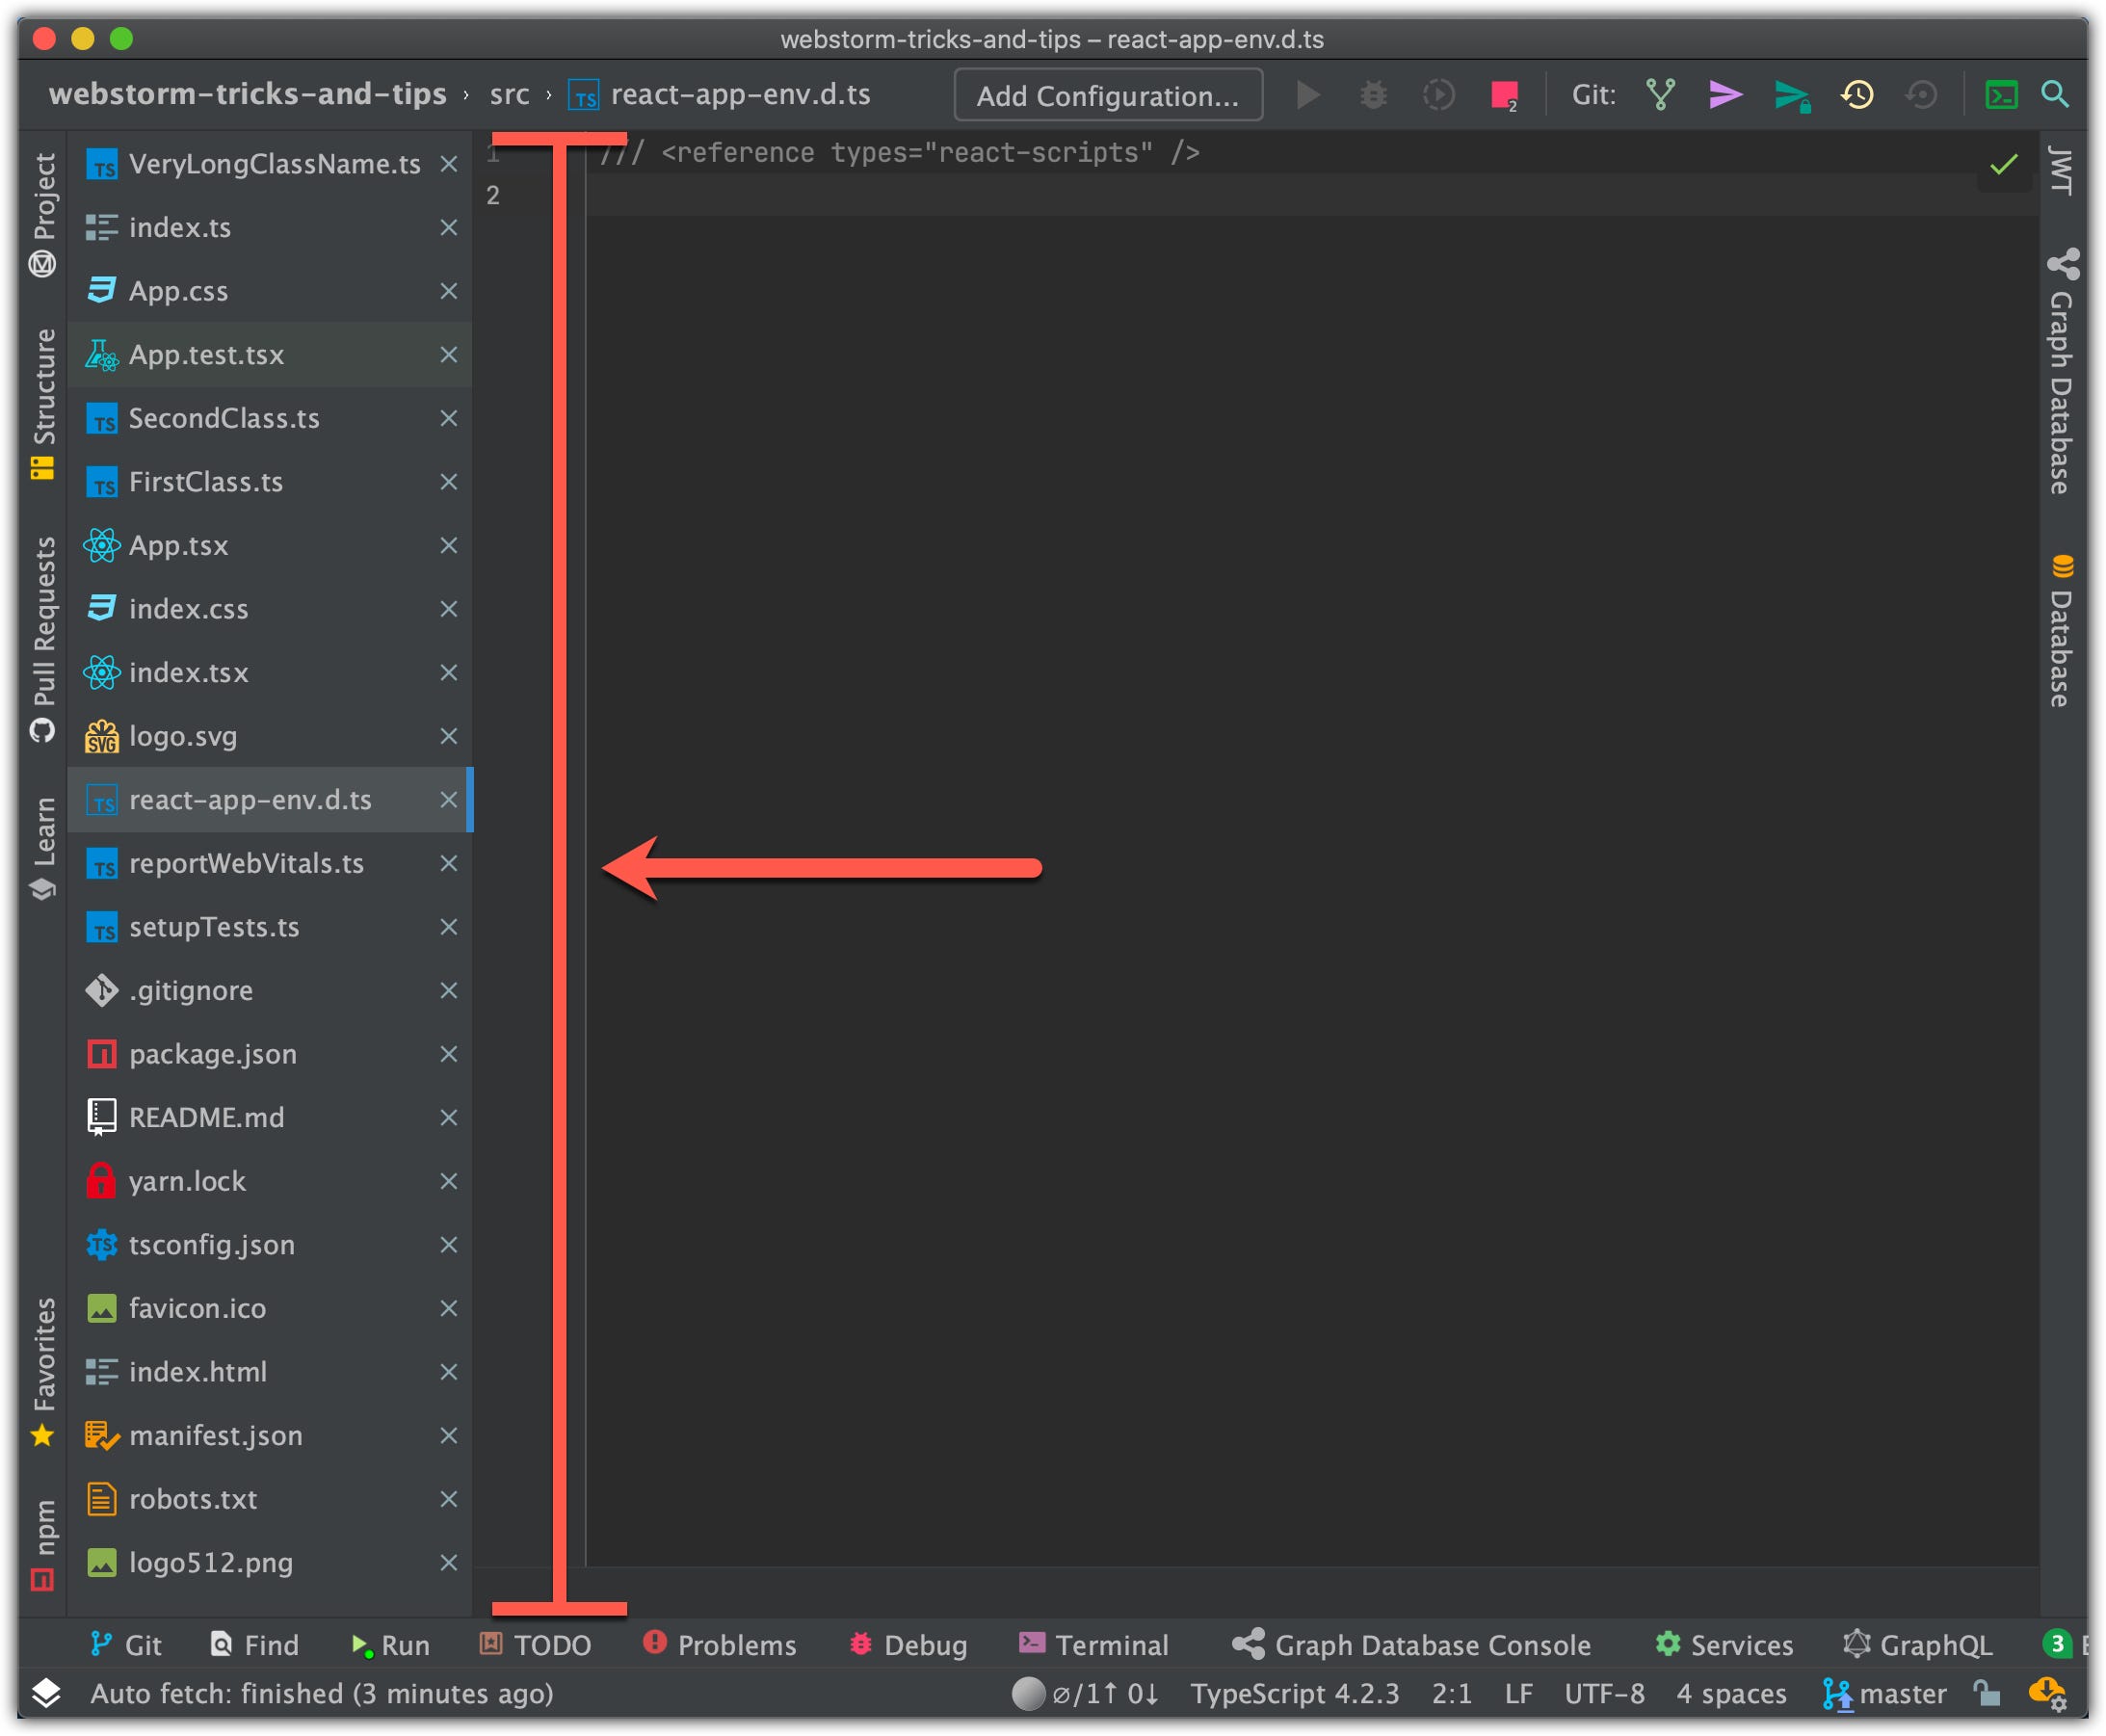
Probably you noticed Structure window that you can show/hide by clicking on it or by pressing [ **Command+7** ] keys:
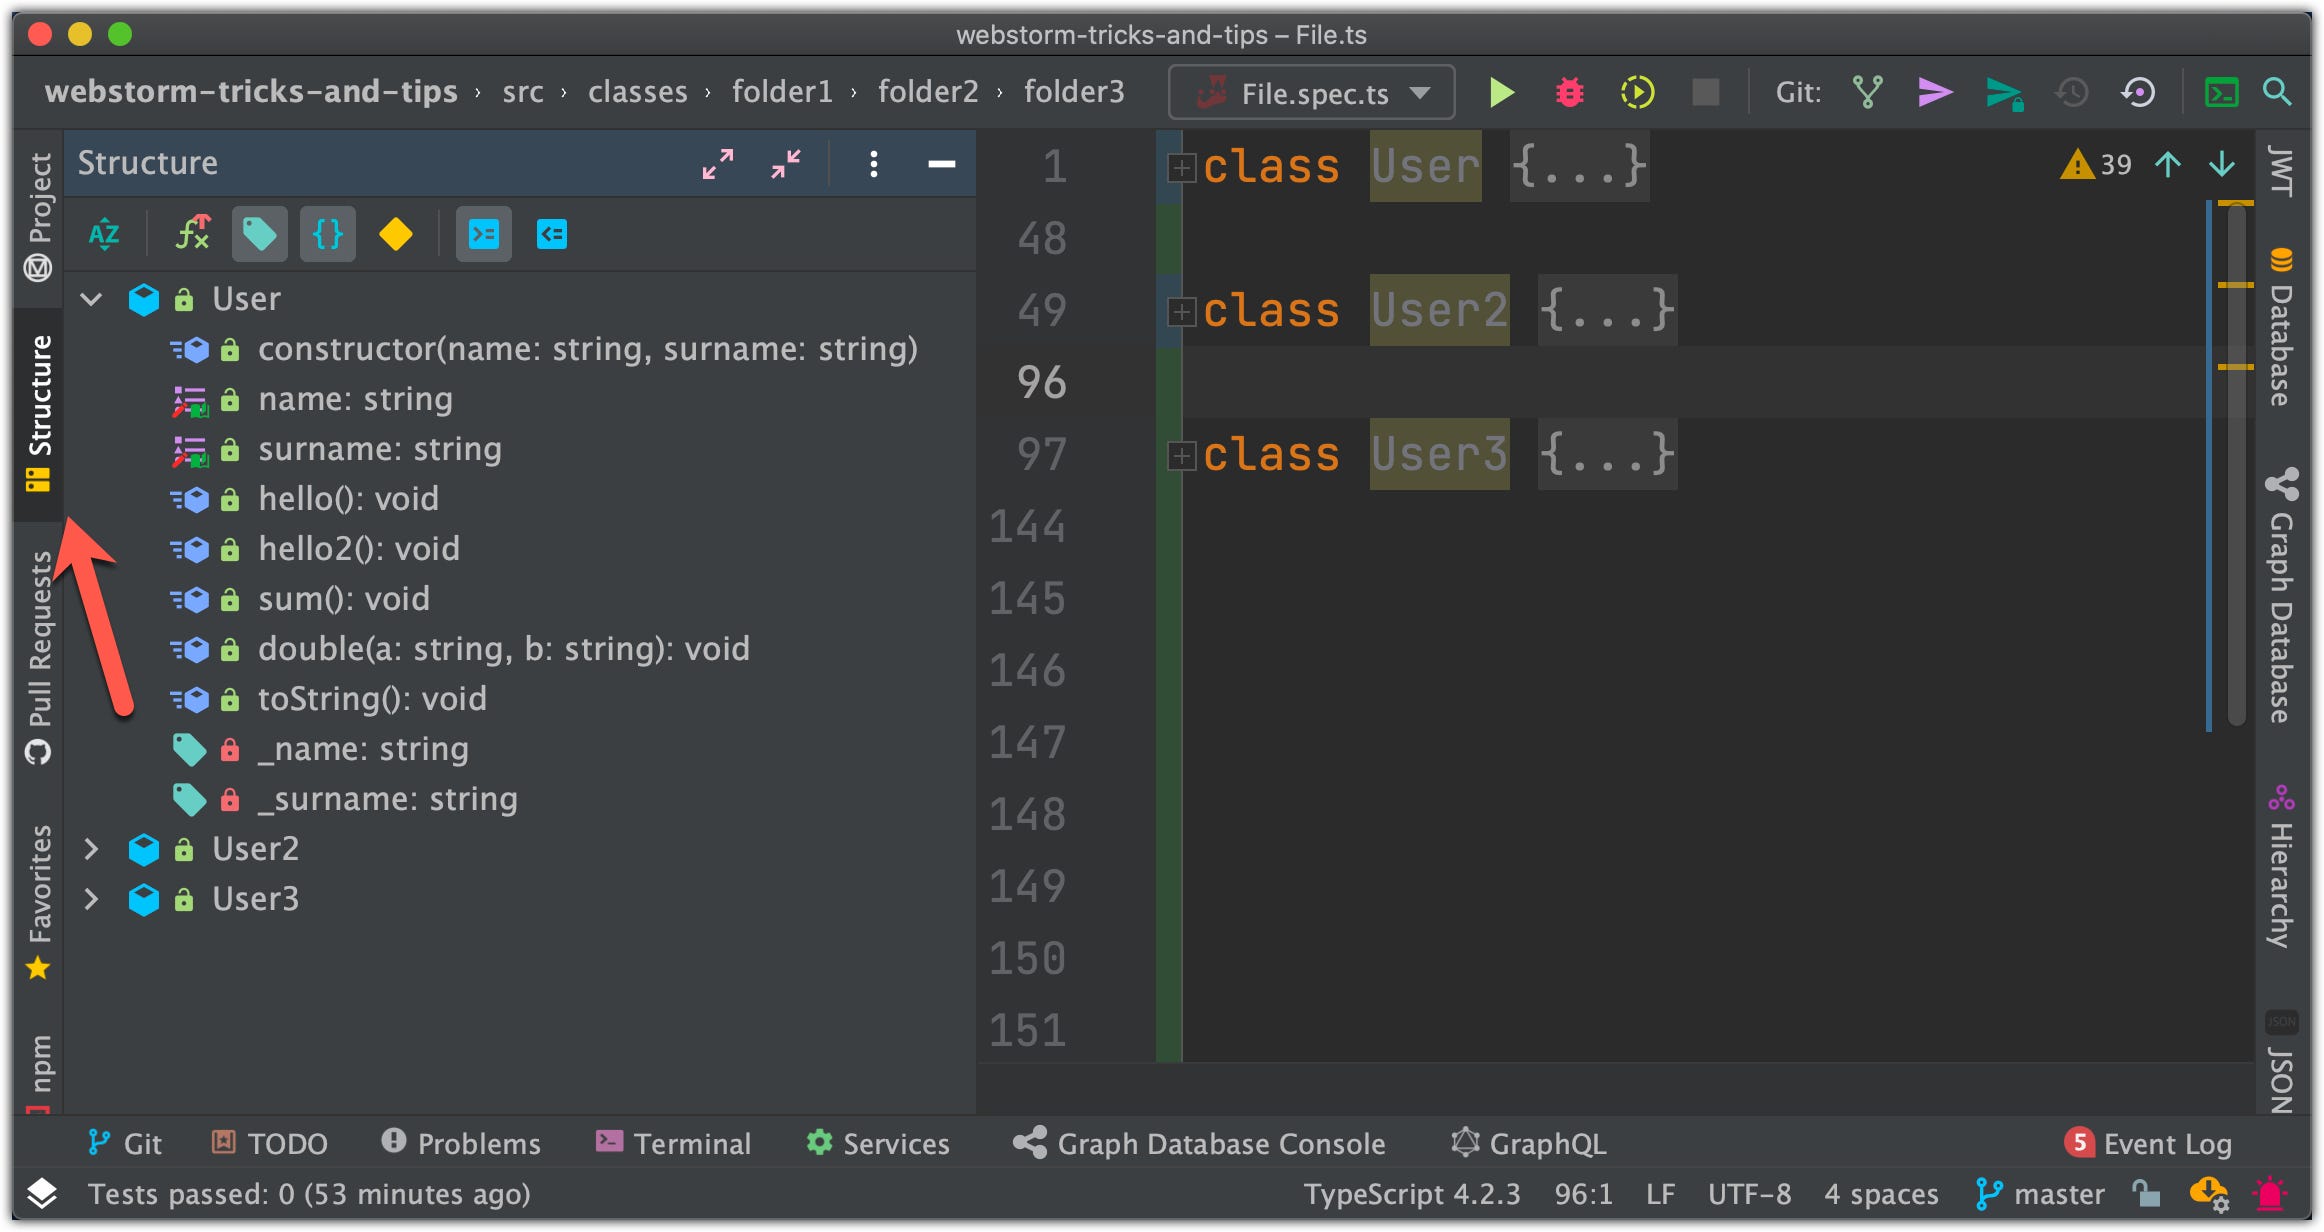
But the cool thing is that you can open it without messing with your editor tabs in a popup window by pressing [ **Command+F12** ] hotkey:
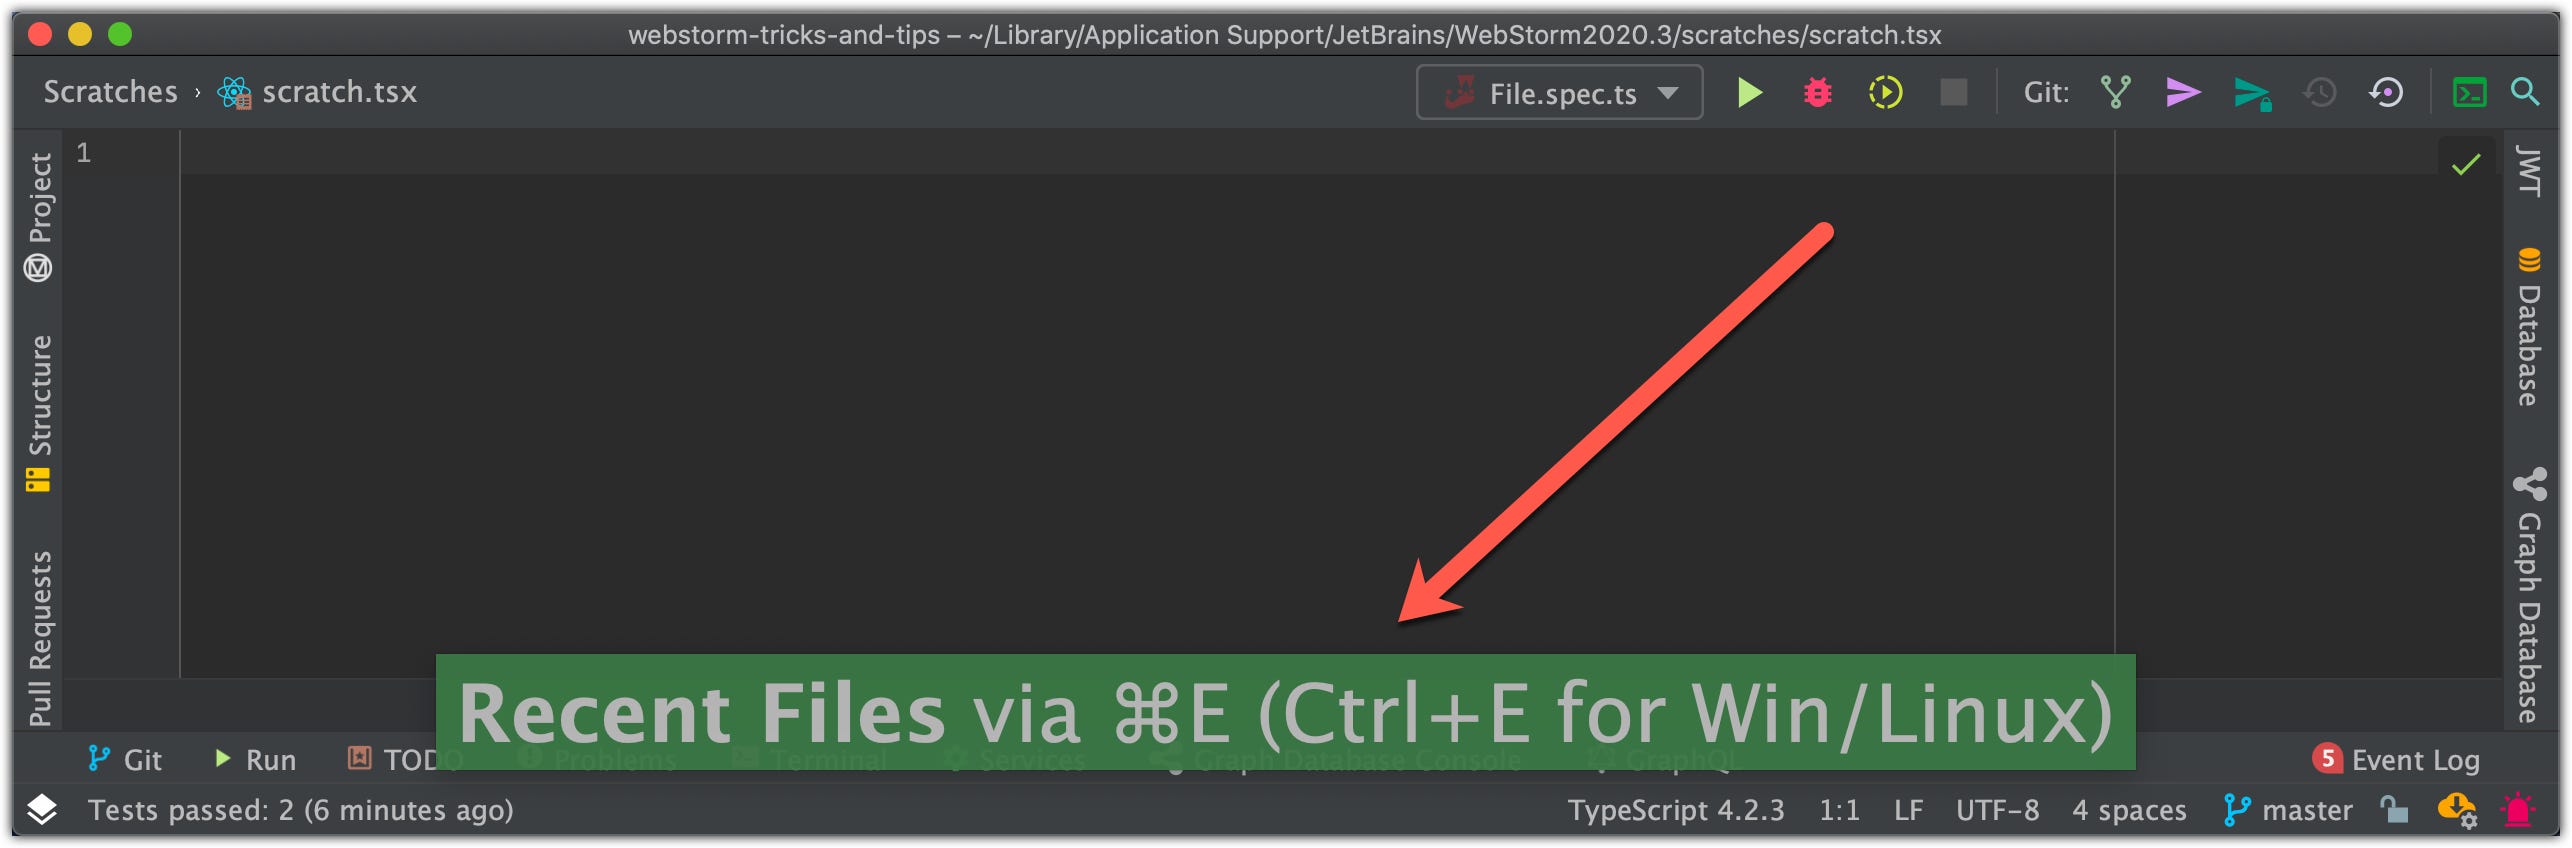
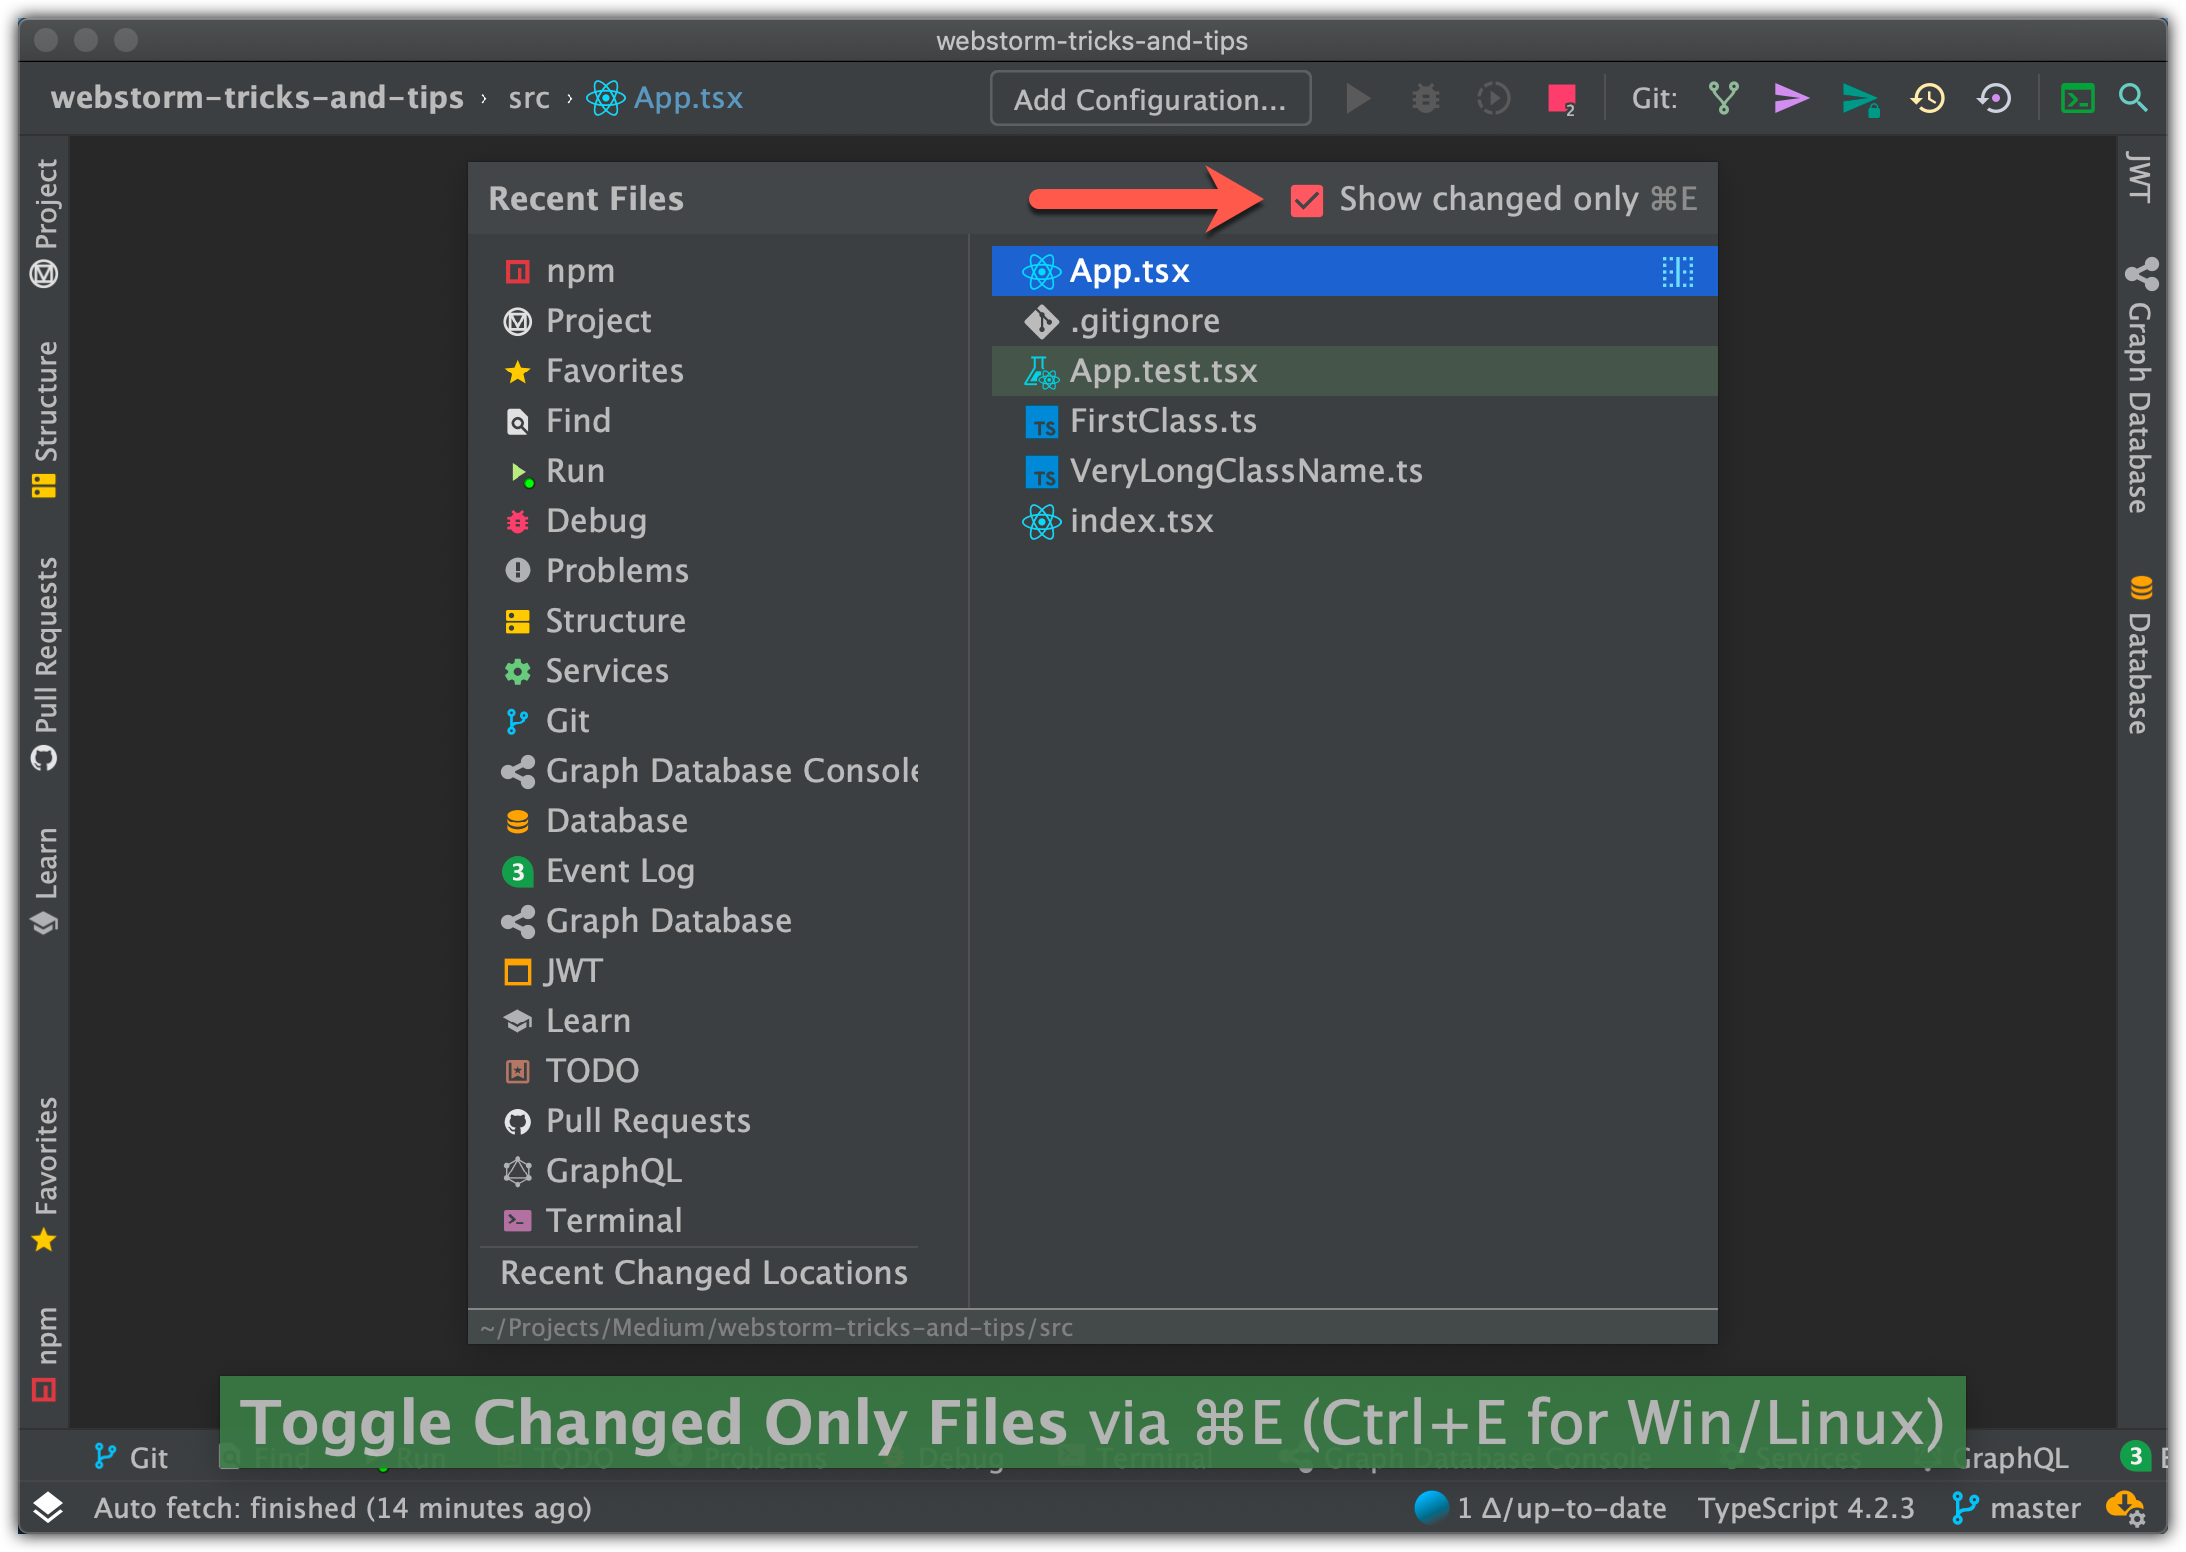
23. See recent files
If your search input field is empty, “Search everywhere” will show your recent files:
You can see exactly the same list by using [ **Command+E**/ ⌘E] hotkey → Recent Files window will show up.

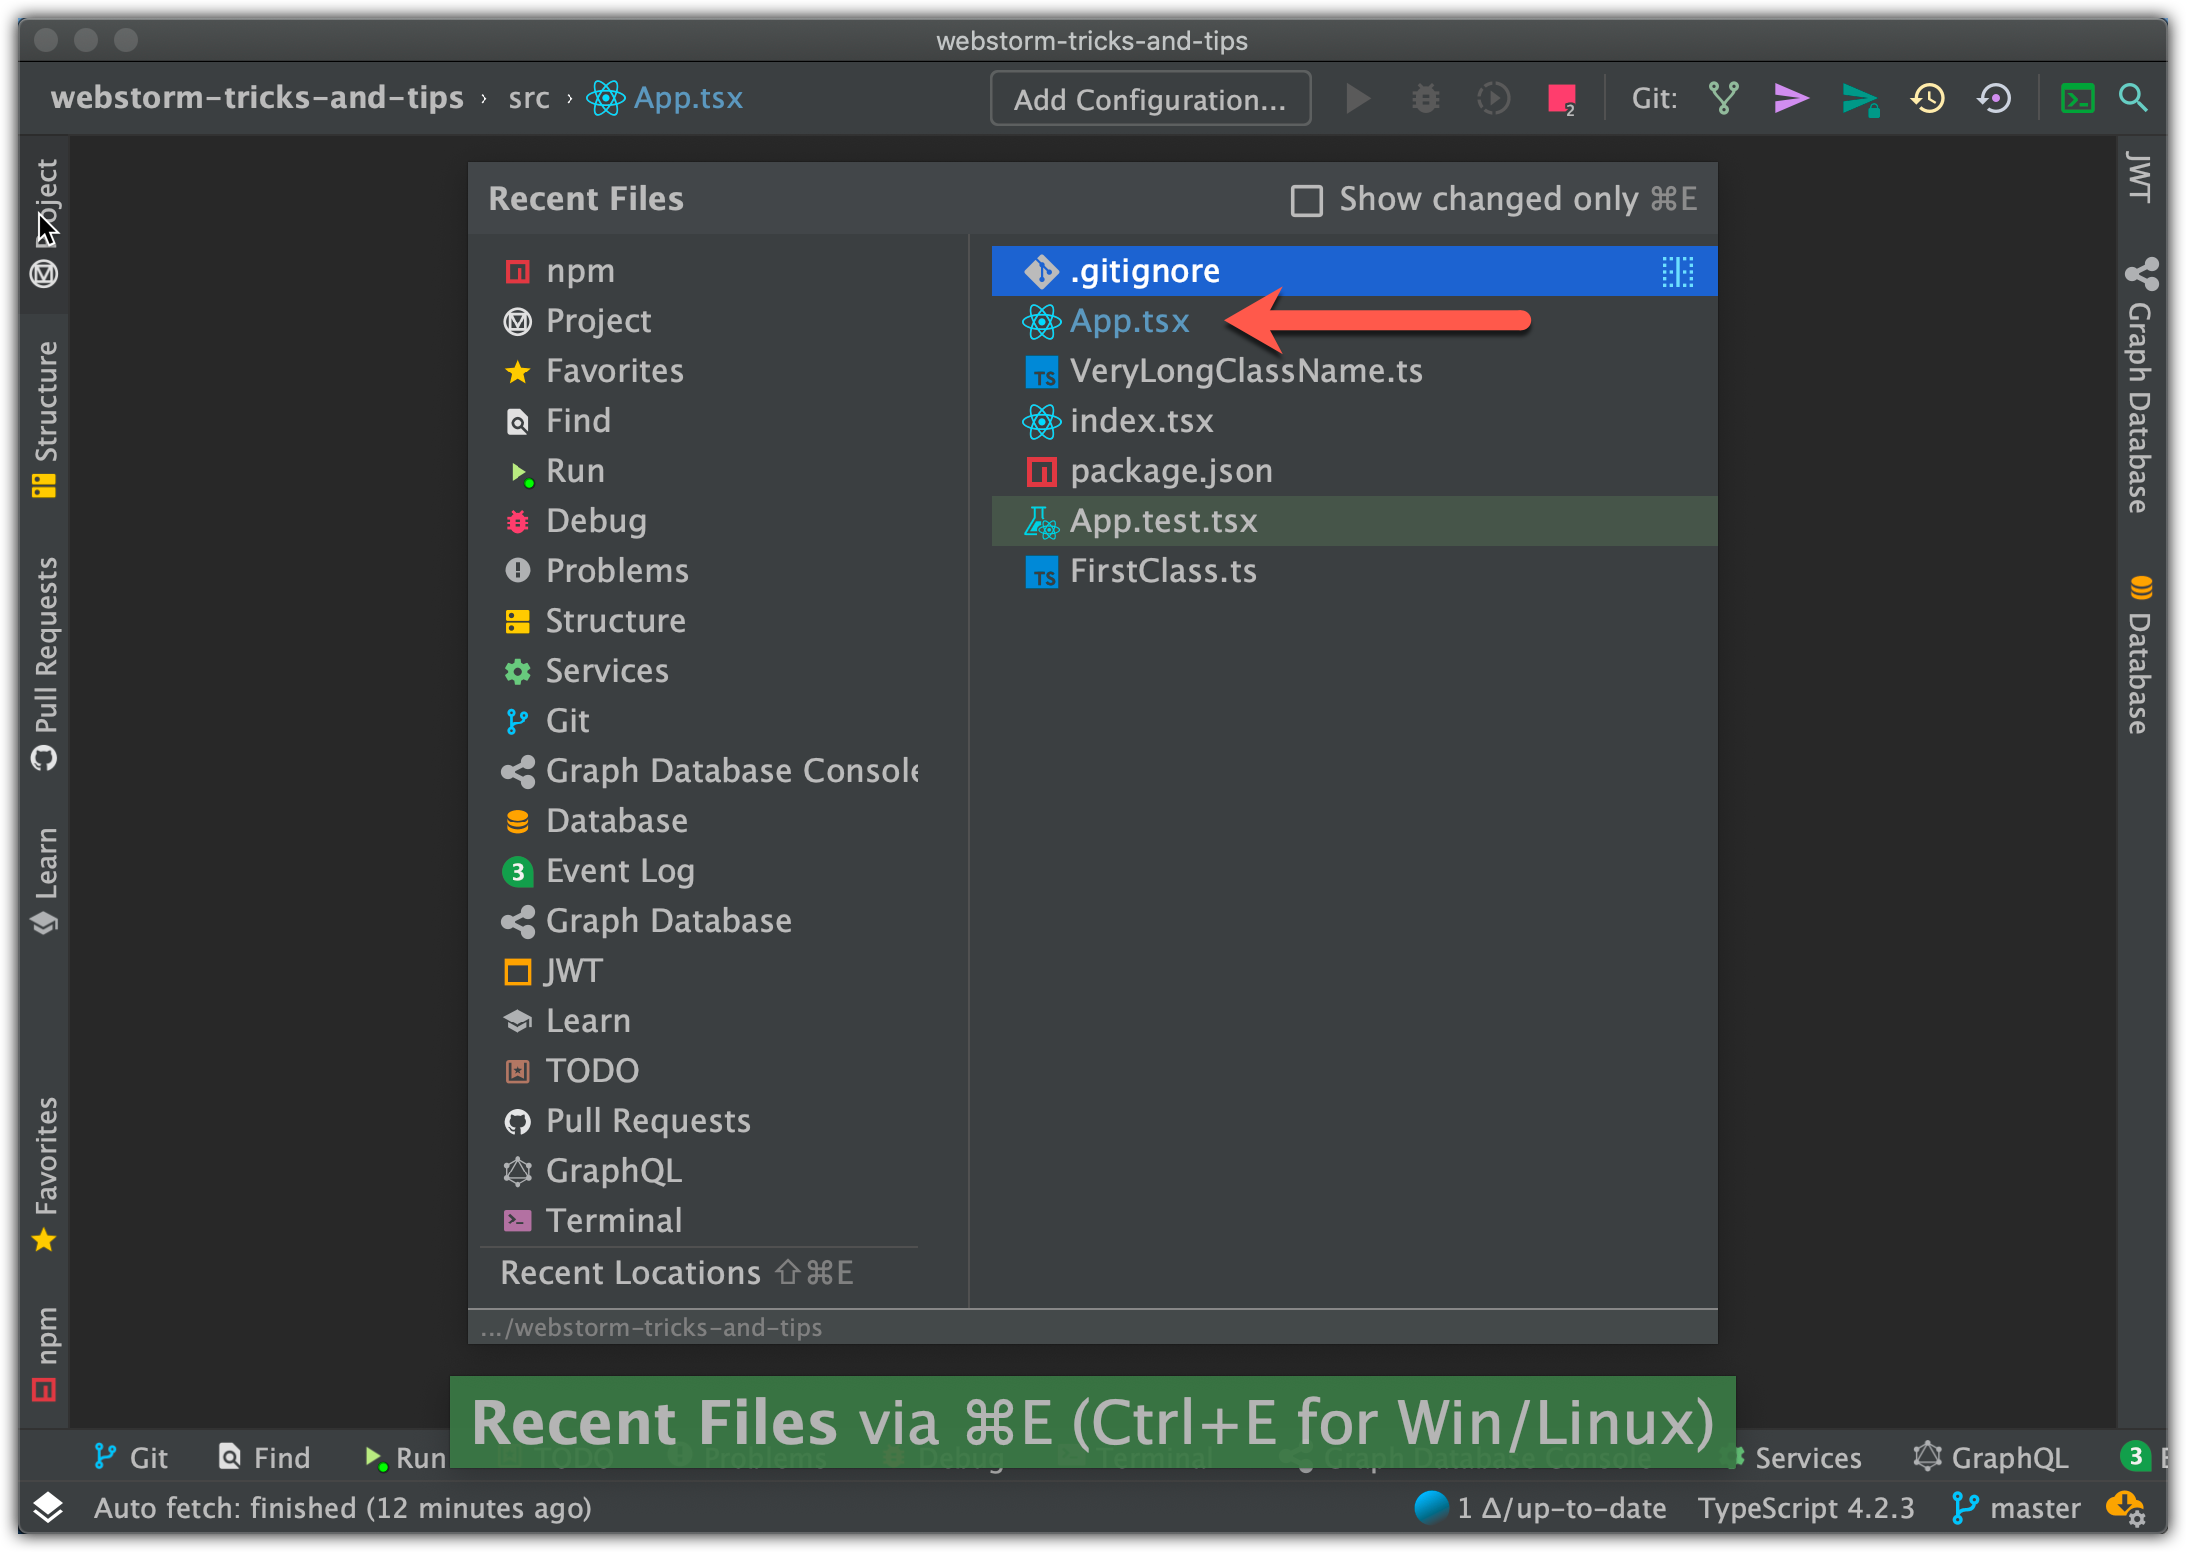
⚠️ NOTE: If you delete recent files from this list, they will be gone from the recent list of a **Search Everywhere** too
Recent Files will show you only changed files if you press [ Command+E / ⌘E ] hotkey:

24. Structural search and replace
WebStorm treats your code as regular text. The structural search and replace (SSR) actions let you search for a particular code pattern
WebStorm finds and replaces fragments of source code, based on the search templates that you create and conditions you apply.
This feature is very useful when you need to refactor the code structure.
Select Edit > Find > **Search Structurally** from the main menu, or just type the required name in the “Search everywhere” window:

It will open the Structural Search window:


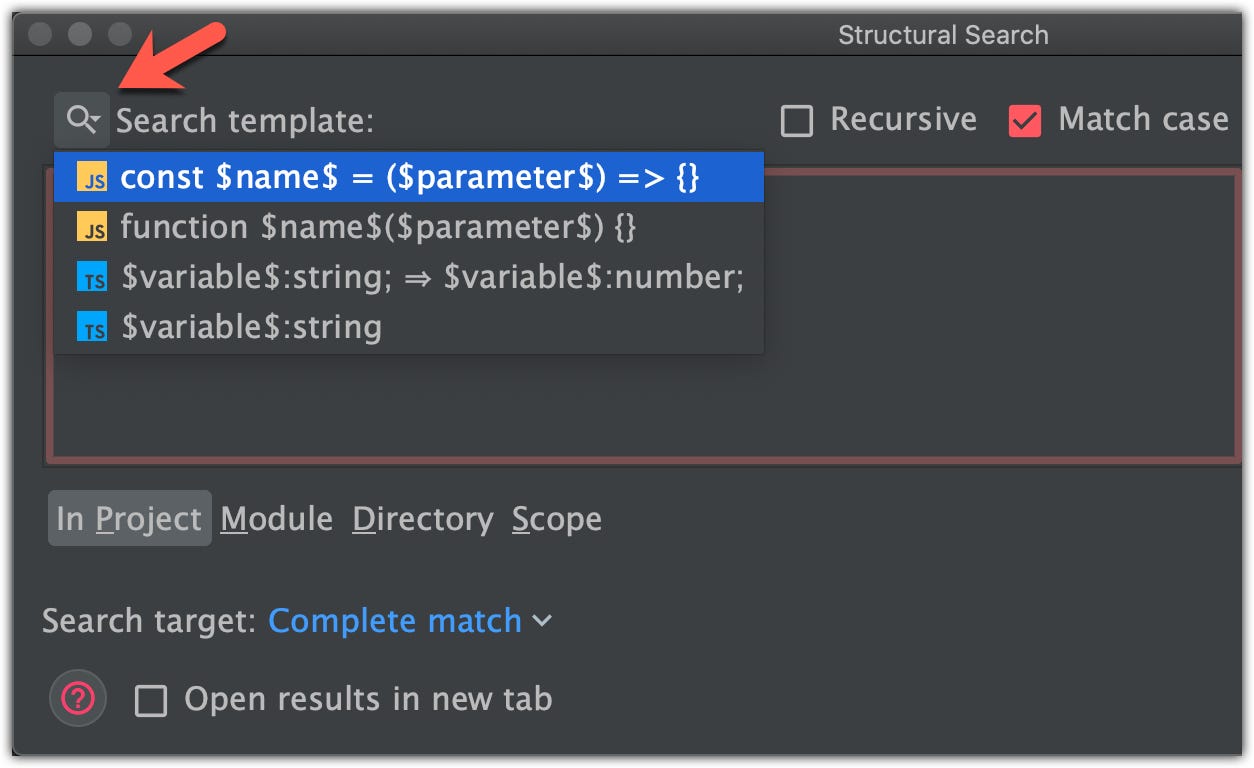
You can use Existing Templates predefined in IDE by clicking on settings icon:


You can edit those templates and save them as your own:

You can check the history of your changes by clicking the **search** icon:

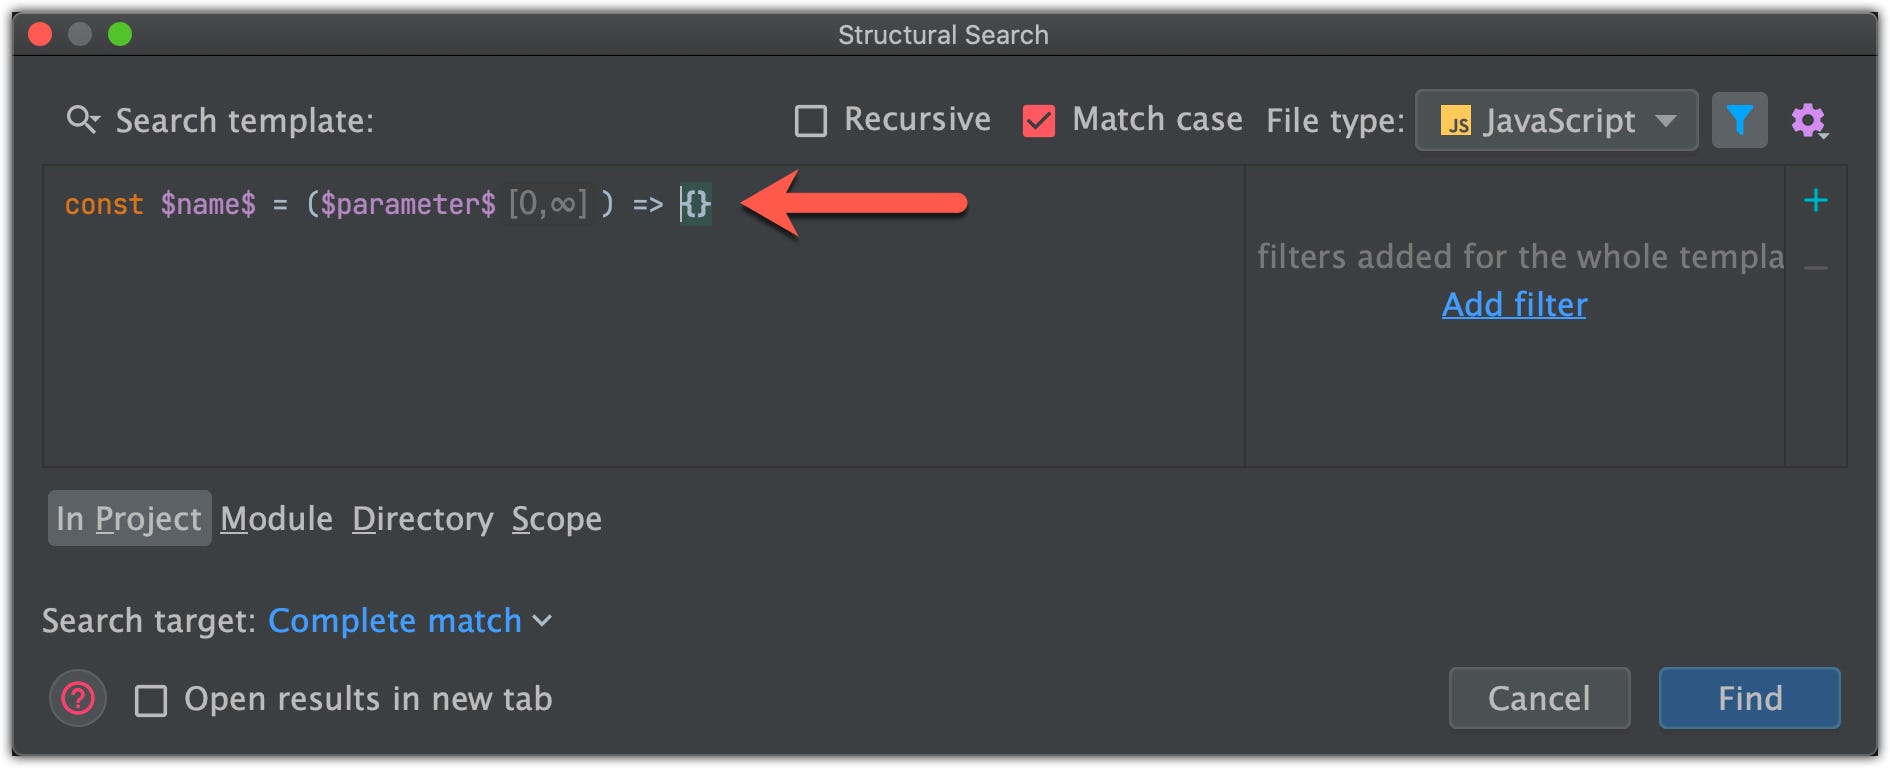
Here I will show you a simple example because Structural Search uses its own syntax (I will tell more about it next time).
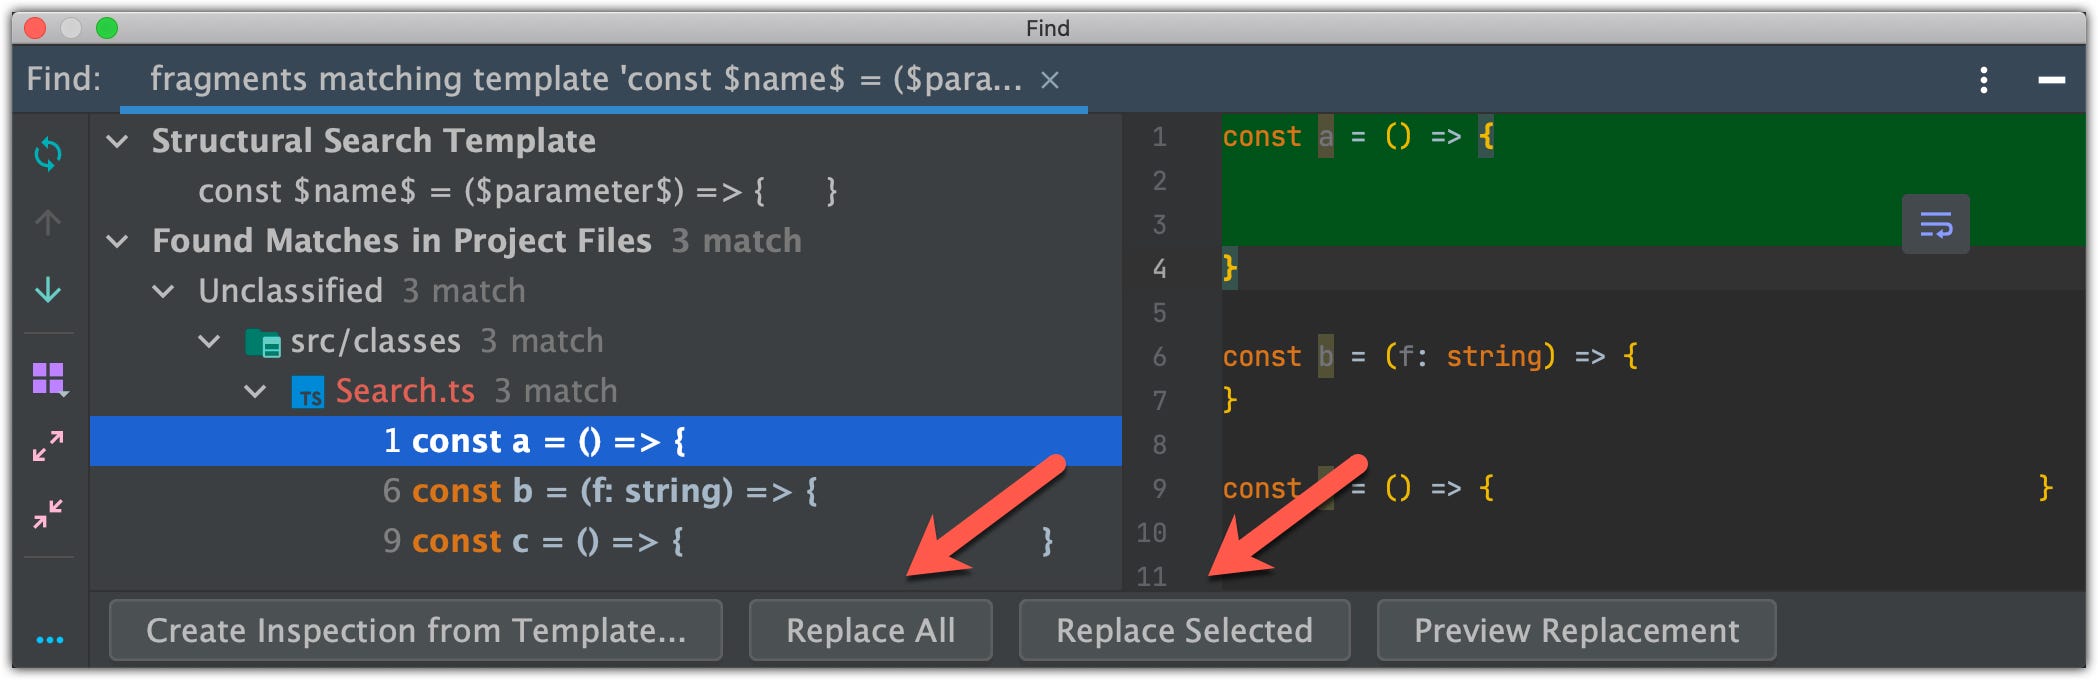
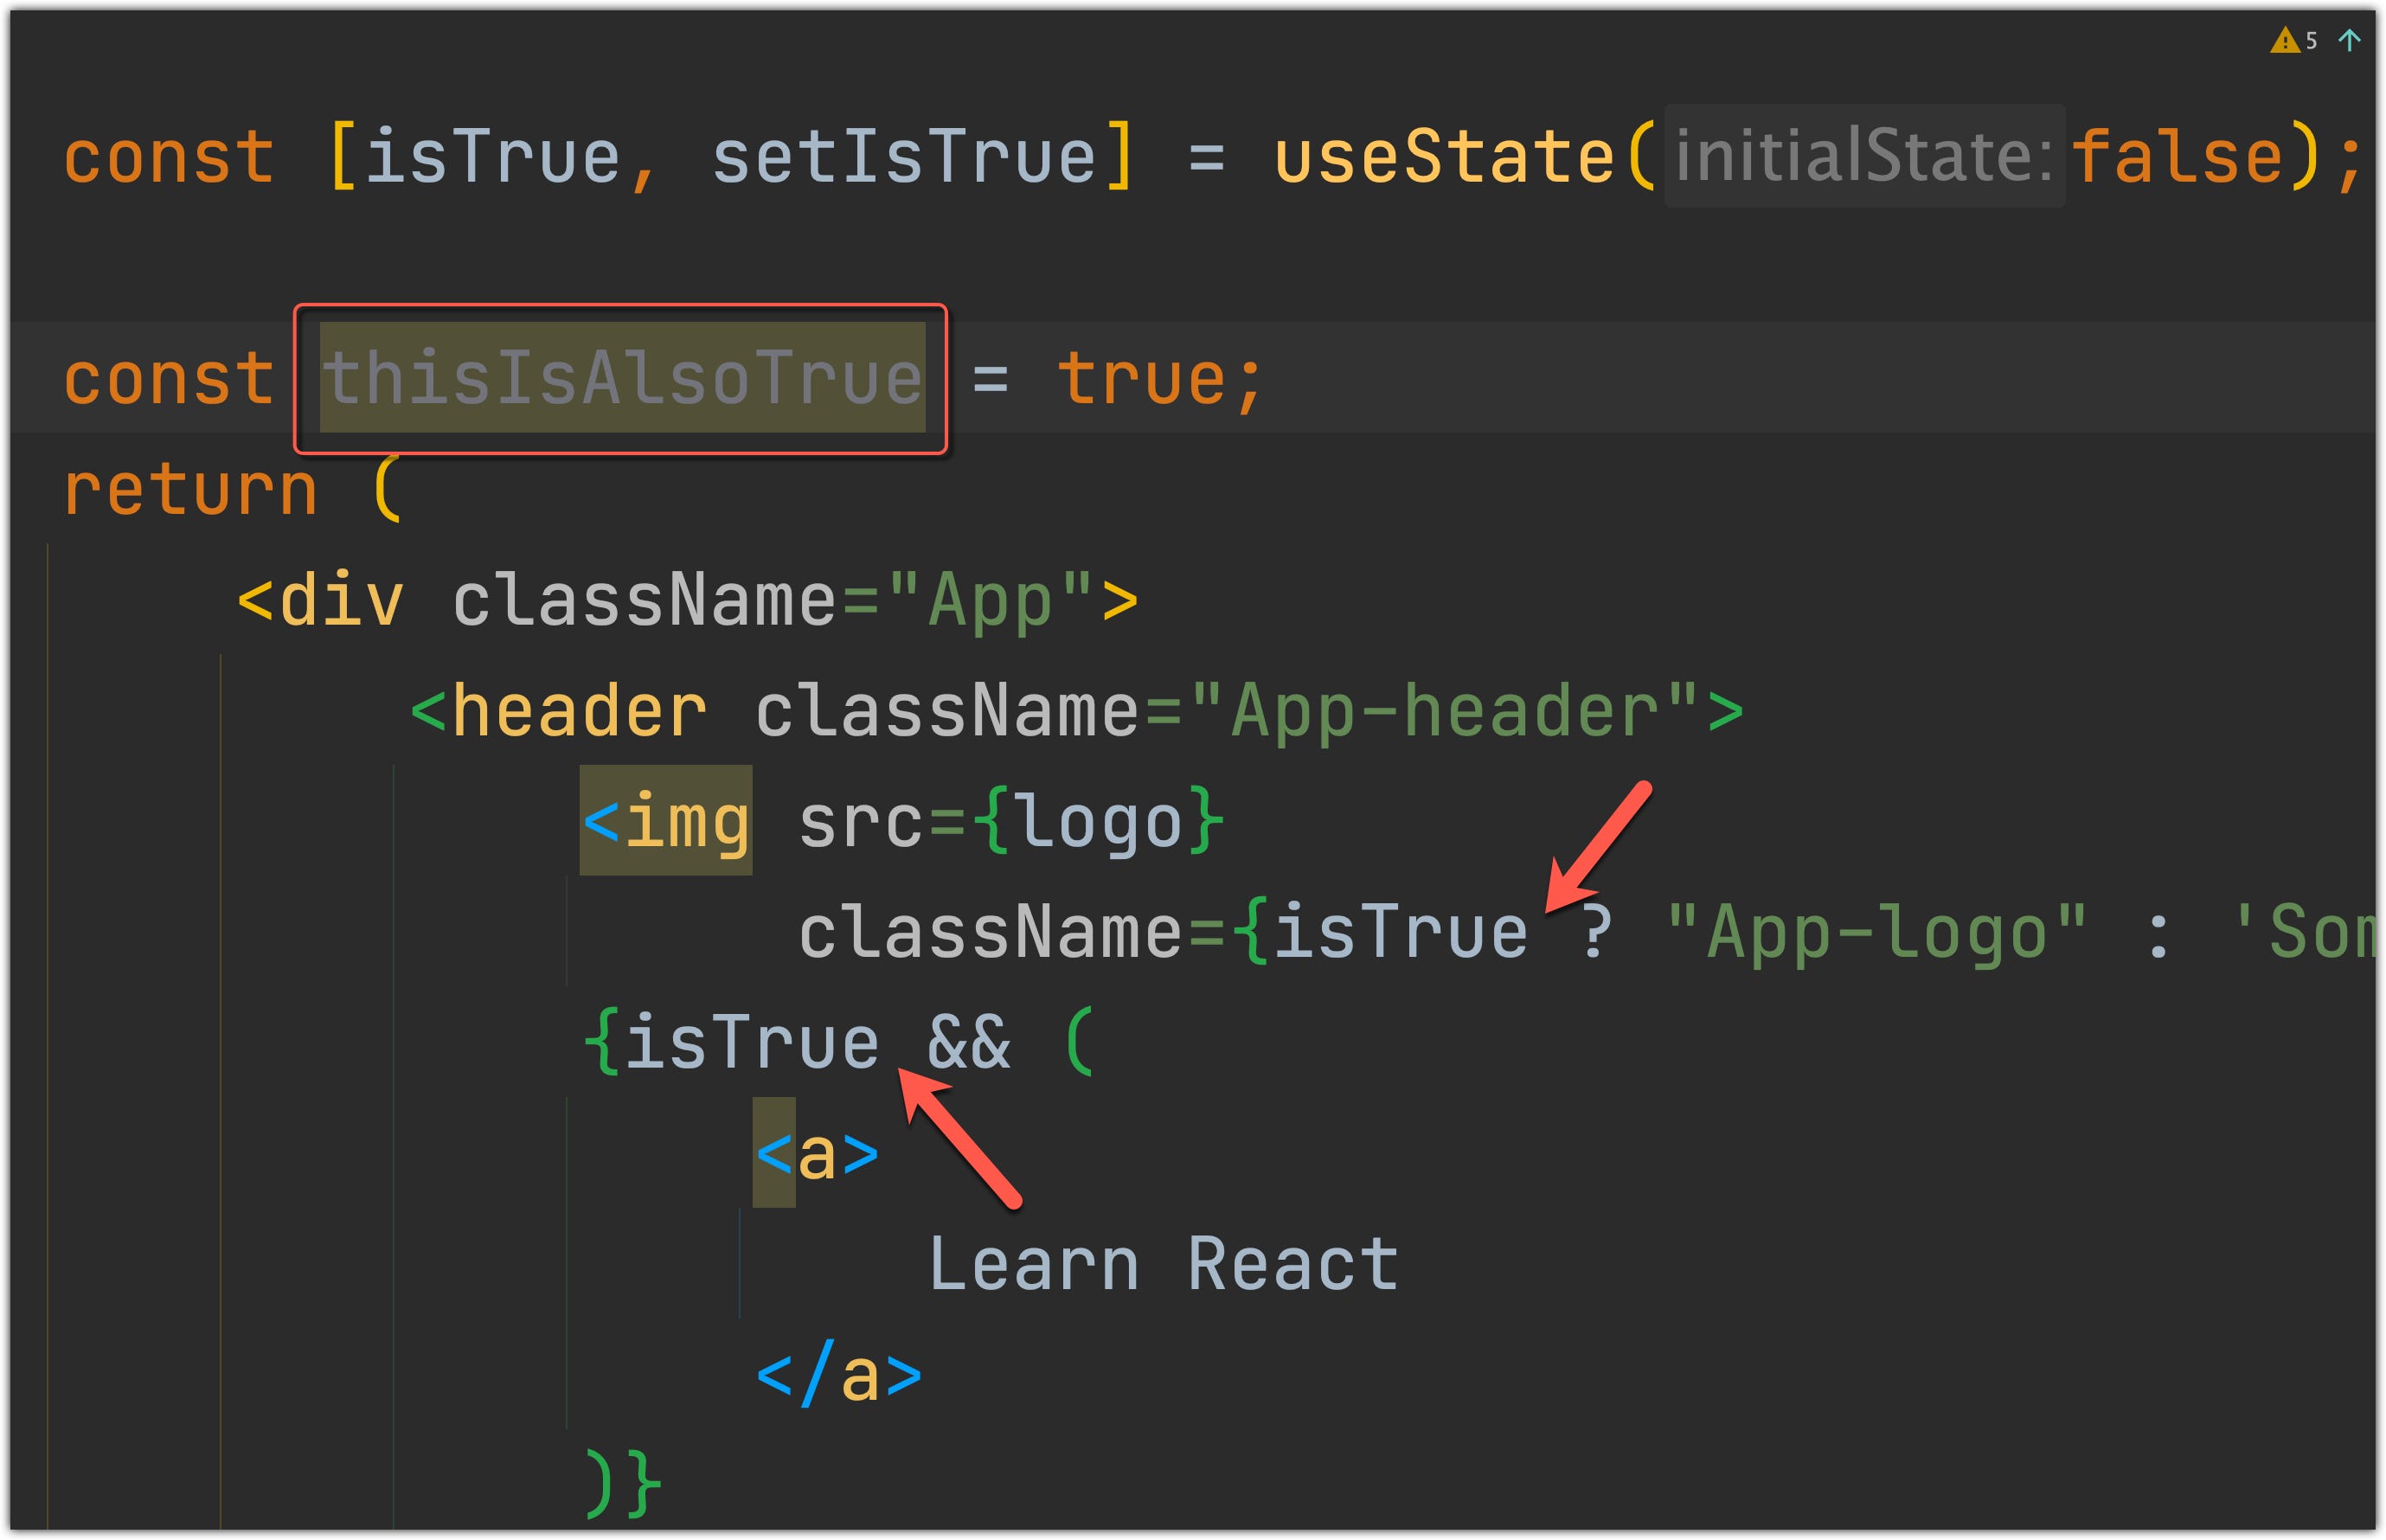
Let’s imaging that we have empty functions defined in our code, and search by text will not help you find all of them:


We can define our search template…
const $name$ = ($parameter$) => {
}…and replace template:
const $name$ = ($parameter$) => {
// TODO: This should be fixed, or removed
}
IDE will highlight elements that match this pattern. Click “Find”:
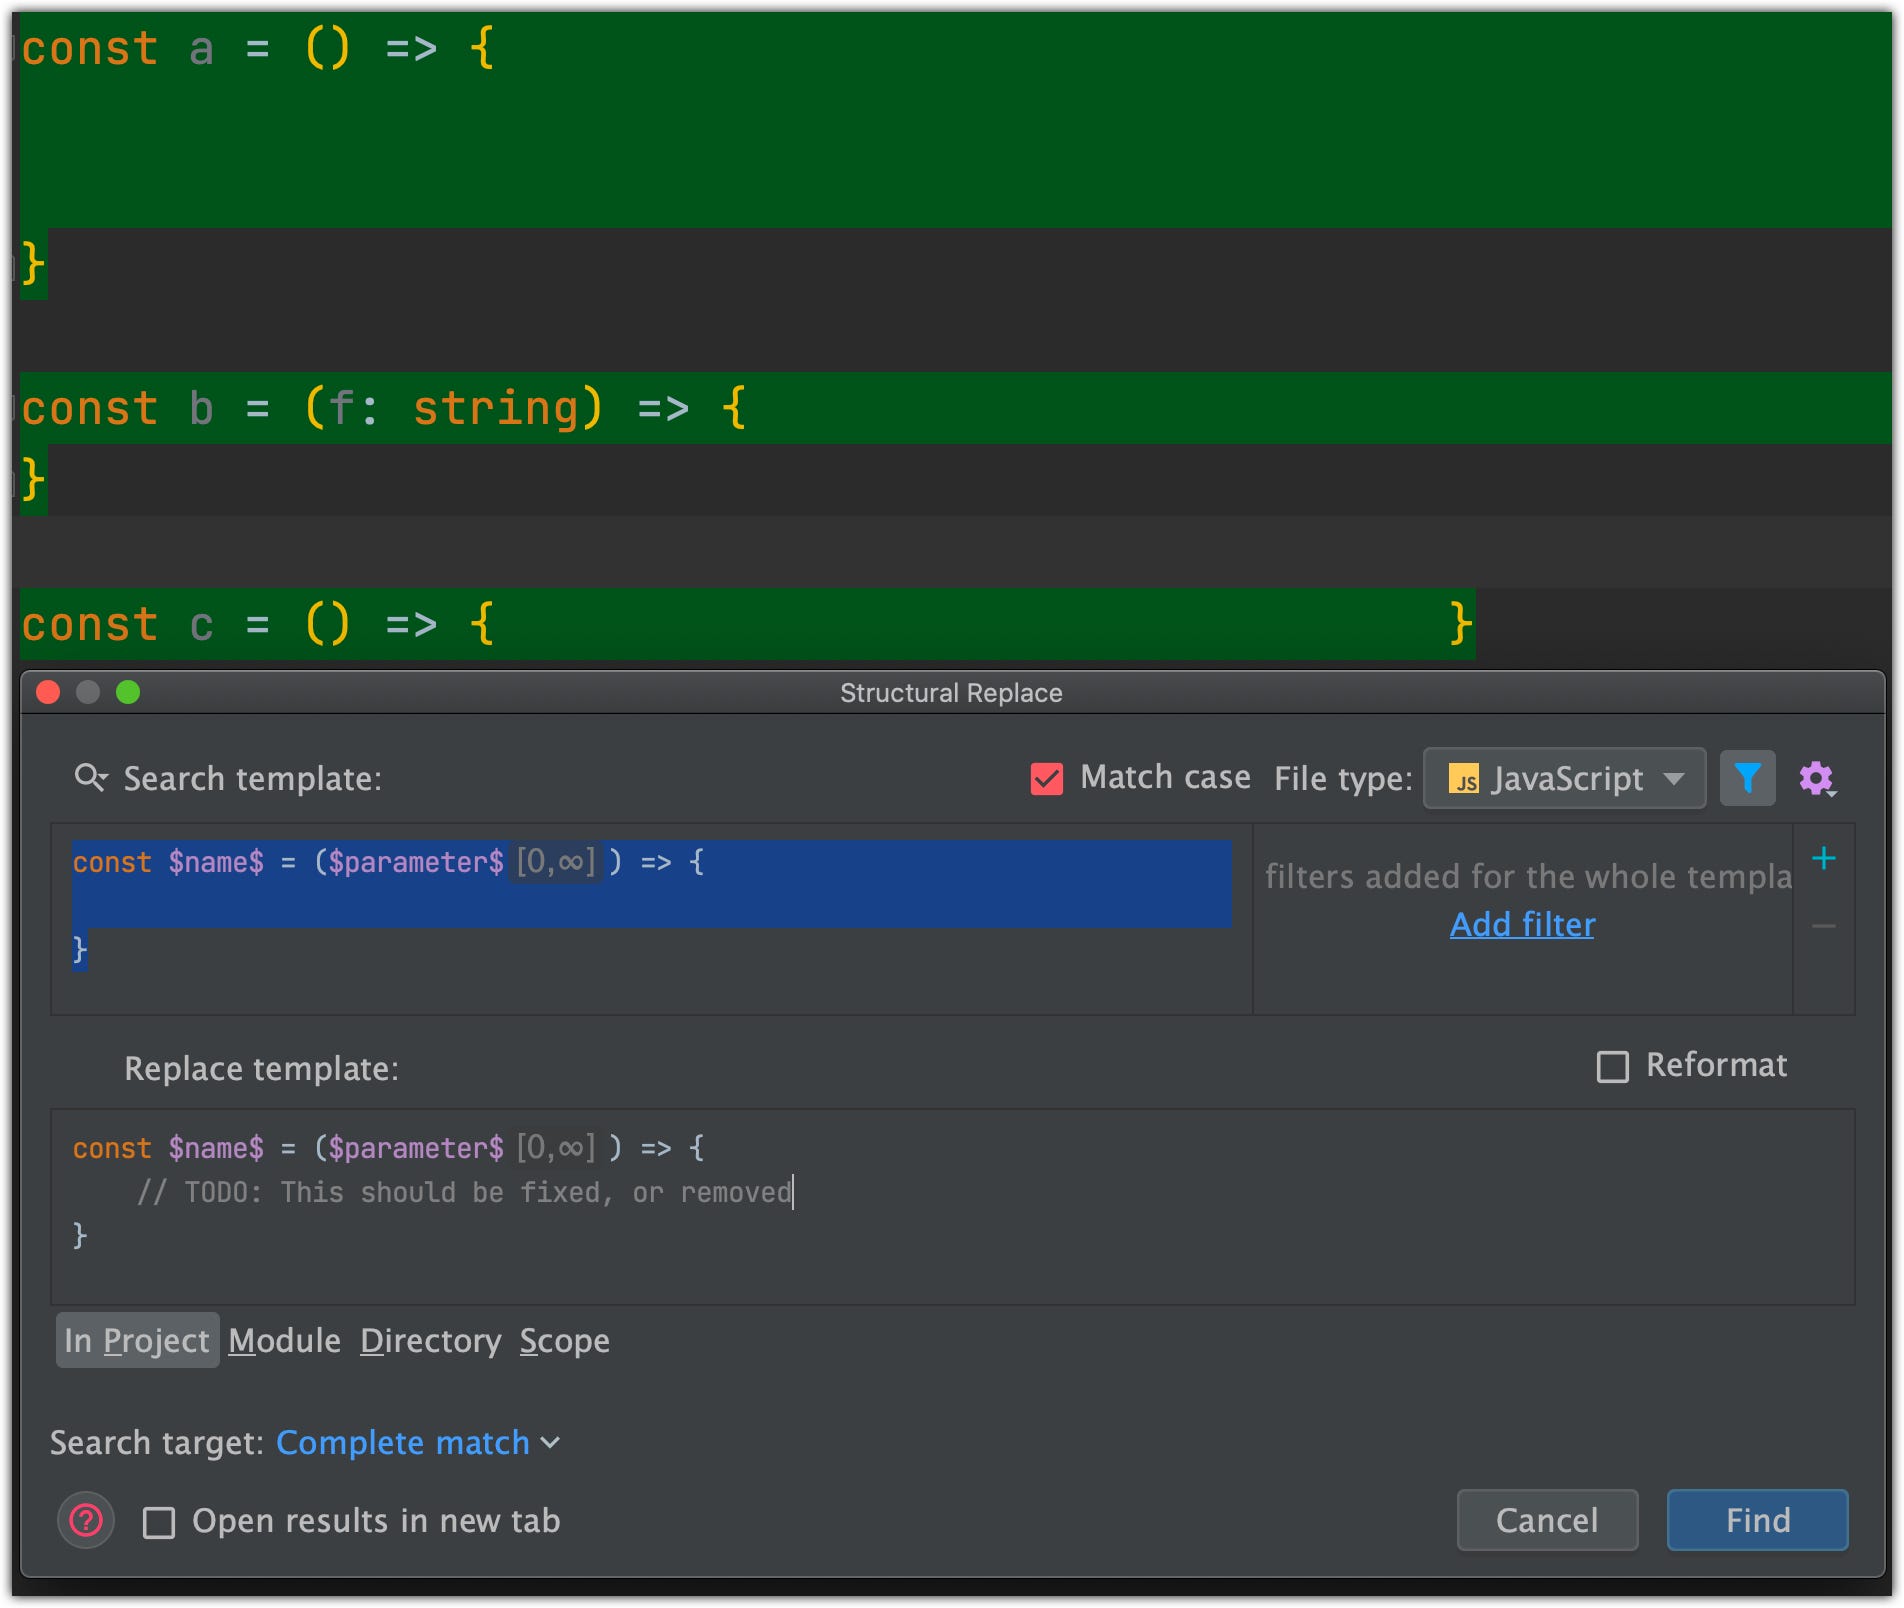
‘Find Window’ will be shown after the ‘Find’ click. You can check if all results are correct. After that, you can click Replace All (don’t recommend this approach, especially if you are not using VCS) or Replace Selected:
Also, you can ‘Preview Replacement’ that will show you what your code fragment will look like after replacement:

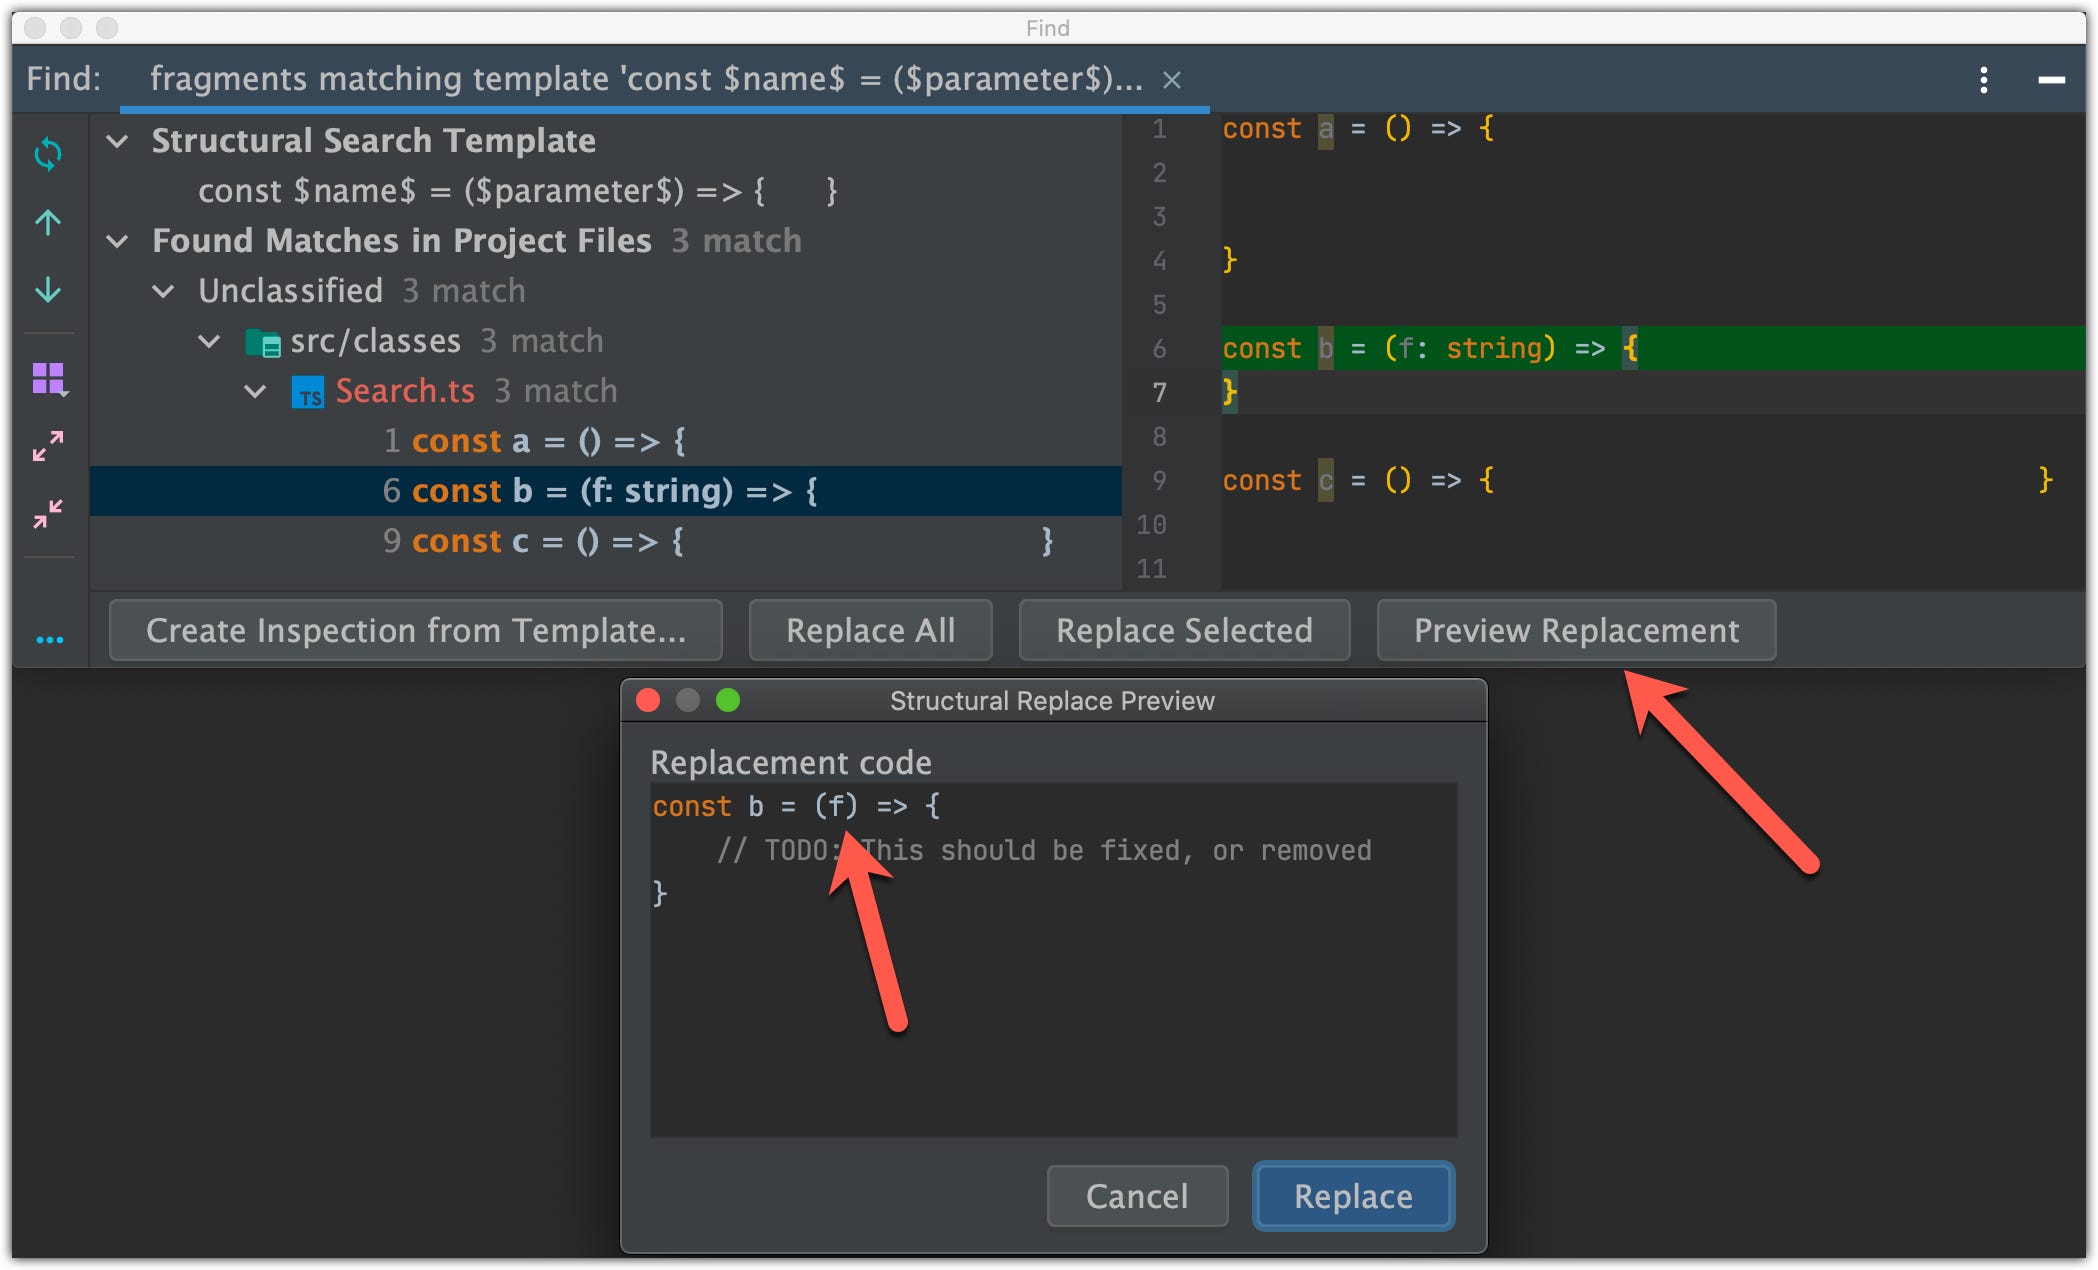
You probably noticed that we made a mistake when we specified replace template. It will use only use parameter name but will exclude the parameter’s type.
But for educational purposes, I will click “Replace All” 🙂. Let’s see what we will get:

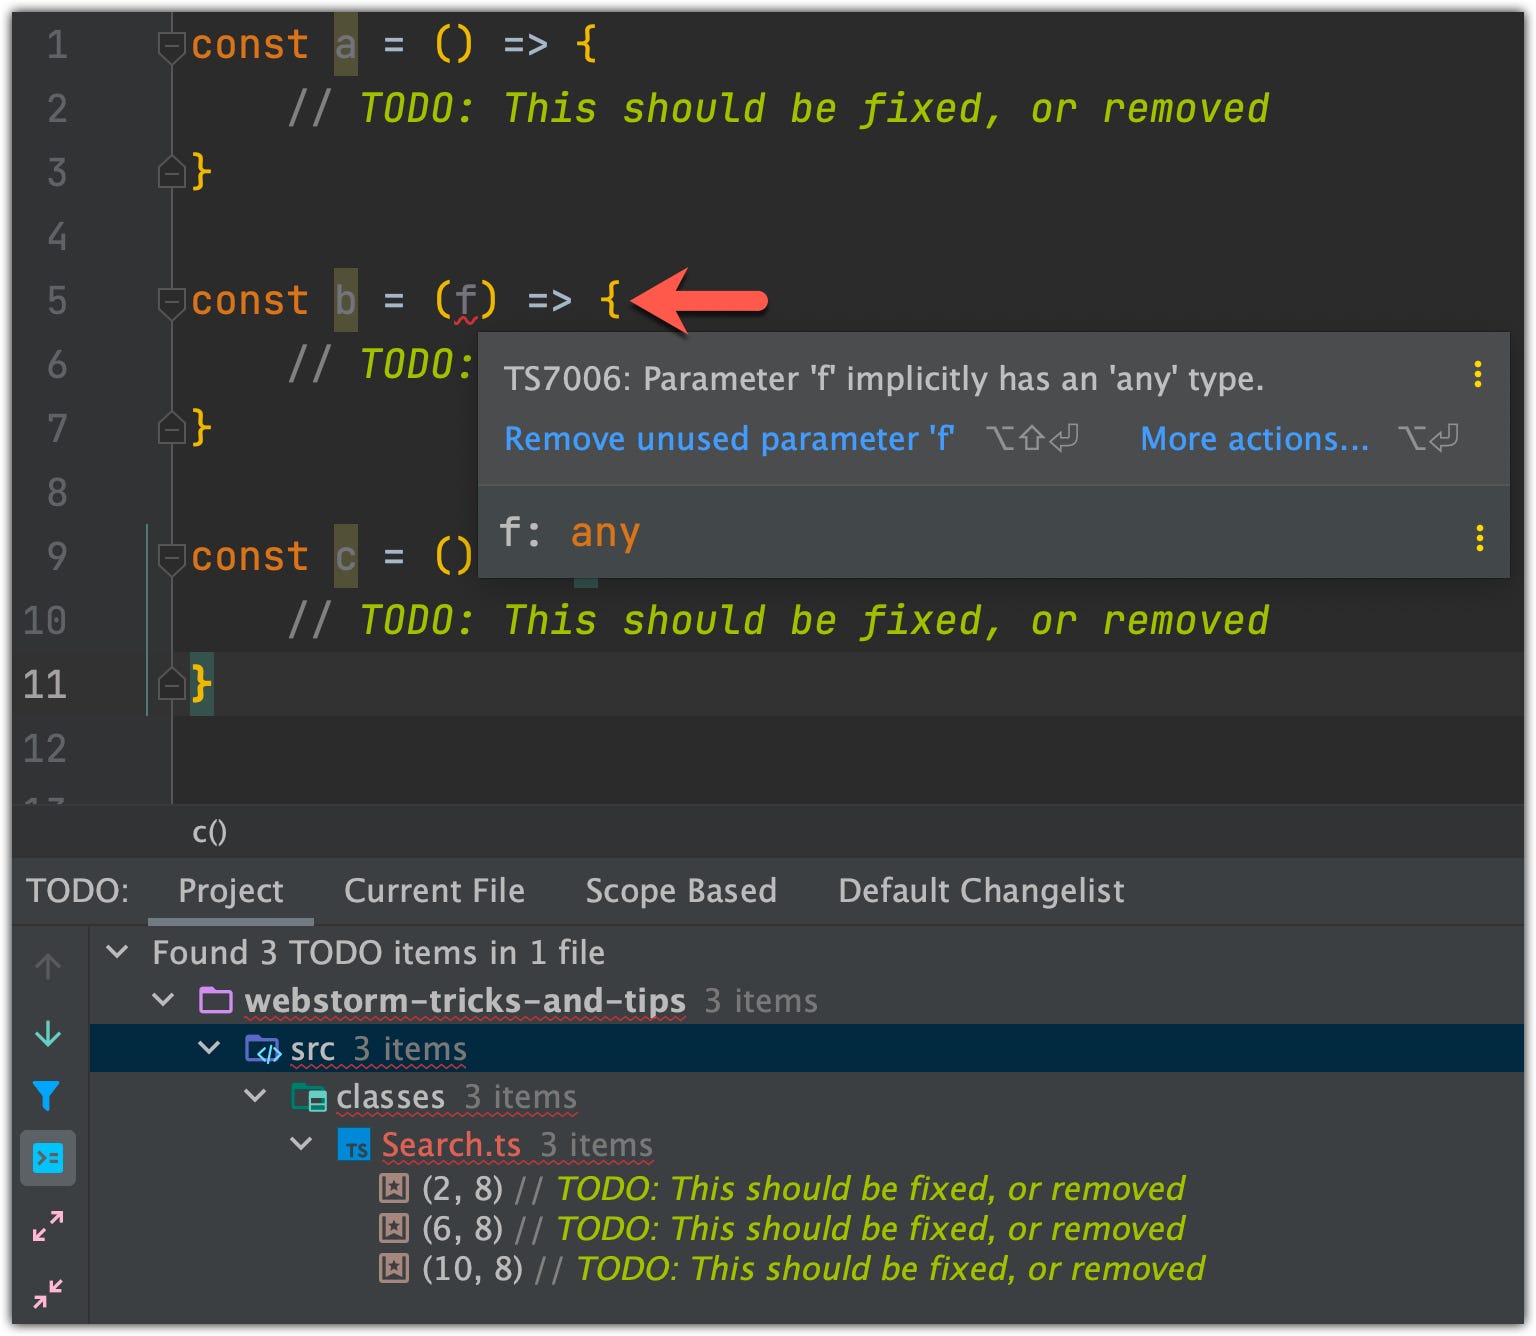
Now at least we have TODO markers in our Project that say to us that we should do something about it.
25. Adding a custom hotkey
As you noticed there are no hotkeys assigned to the “Structural search and replace”, let’s change that. Open IDE preferences Command+, and type structural in the preference’s search field, find Search Structurally…and click the Right button:
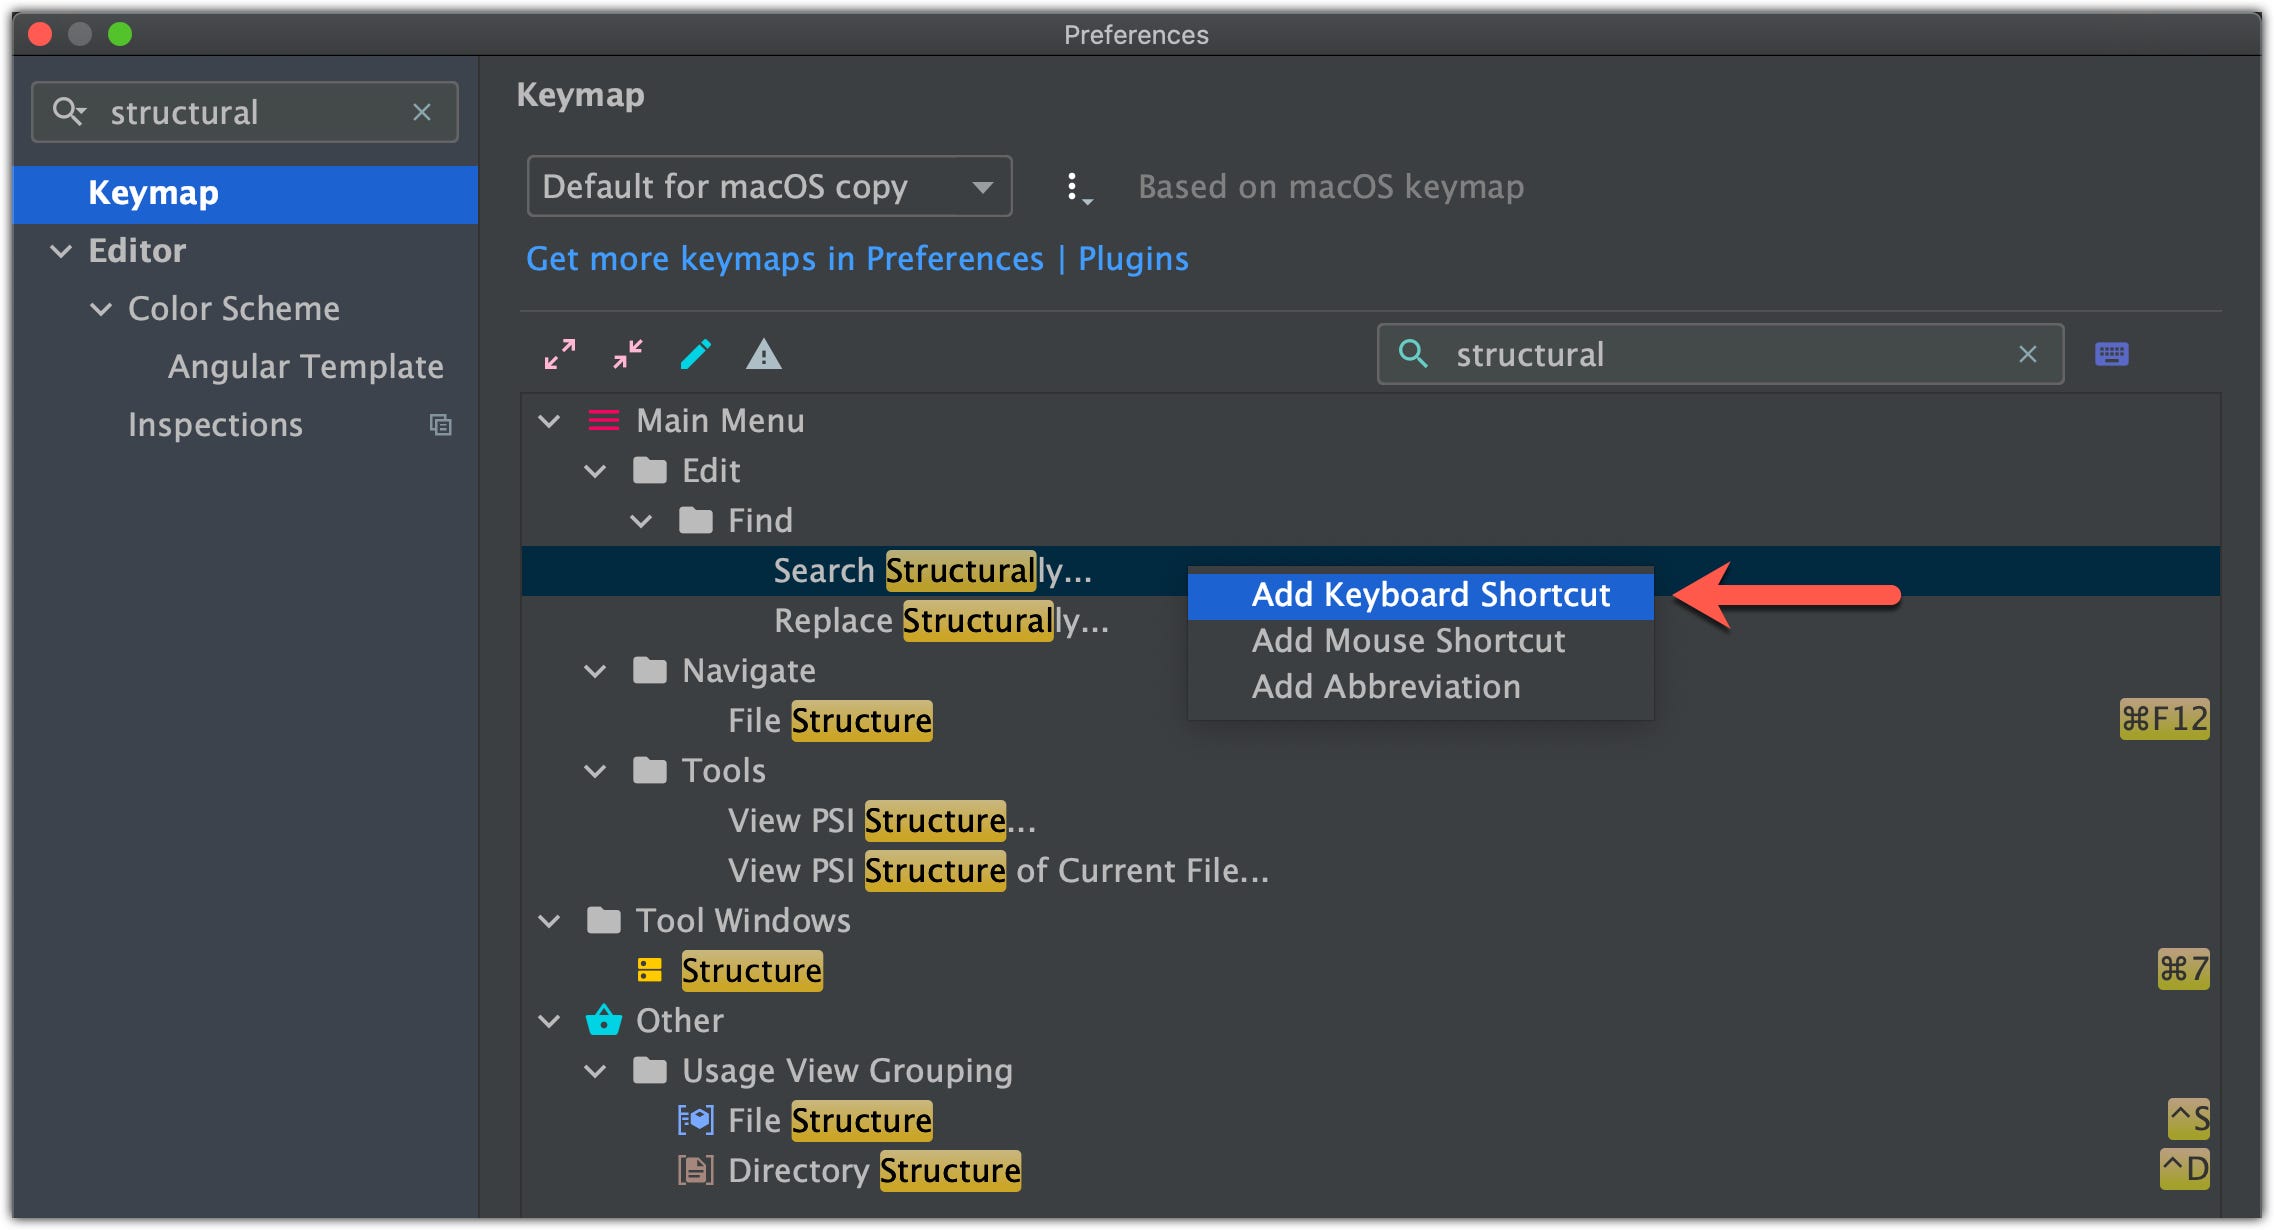
Just type keys you want to use and press **Ok**.
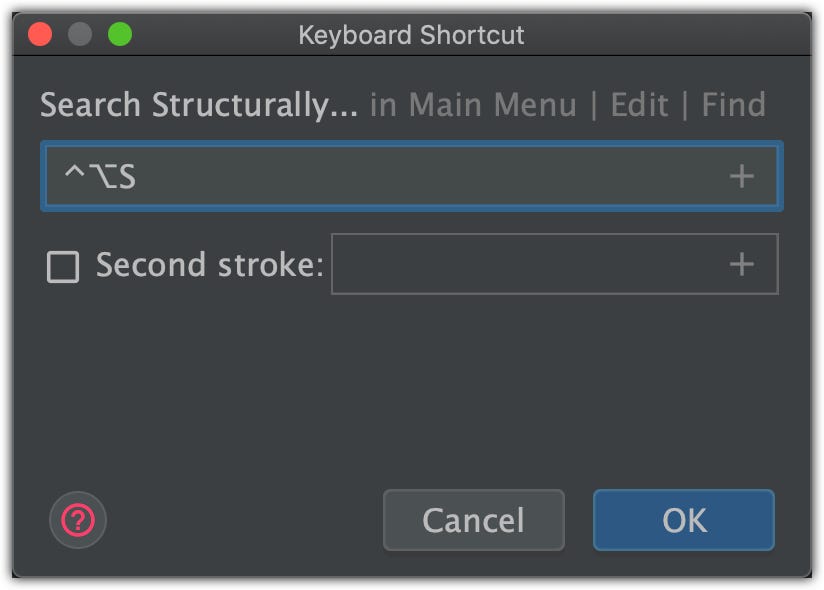
If there will be collisions with some other hotkeys, don’t worry, IDE will tell you about it:

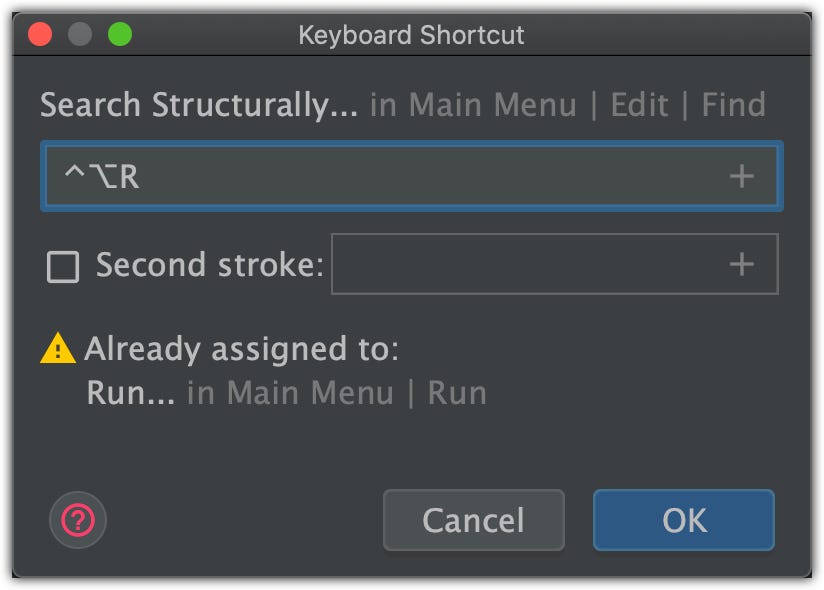
⚠️ NOTE: Don’t try to type keys separately from each other like Control, Option, S. It will not work that way. Just use a combination like you are trying to use it already, like [Control+Option+S ] hotkey.
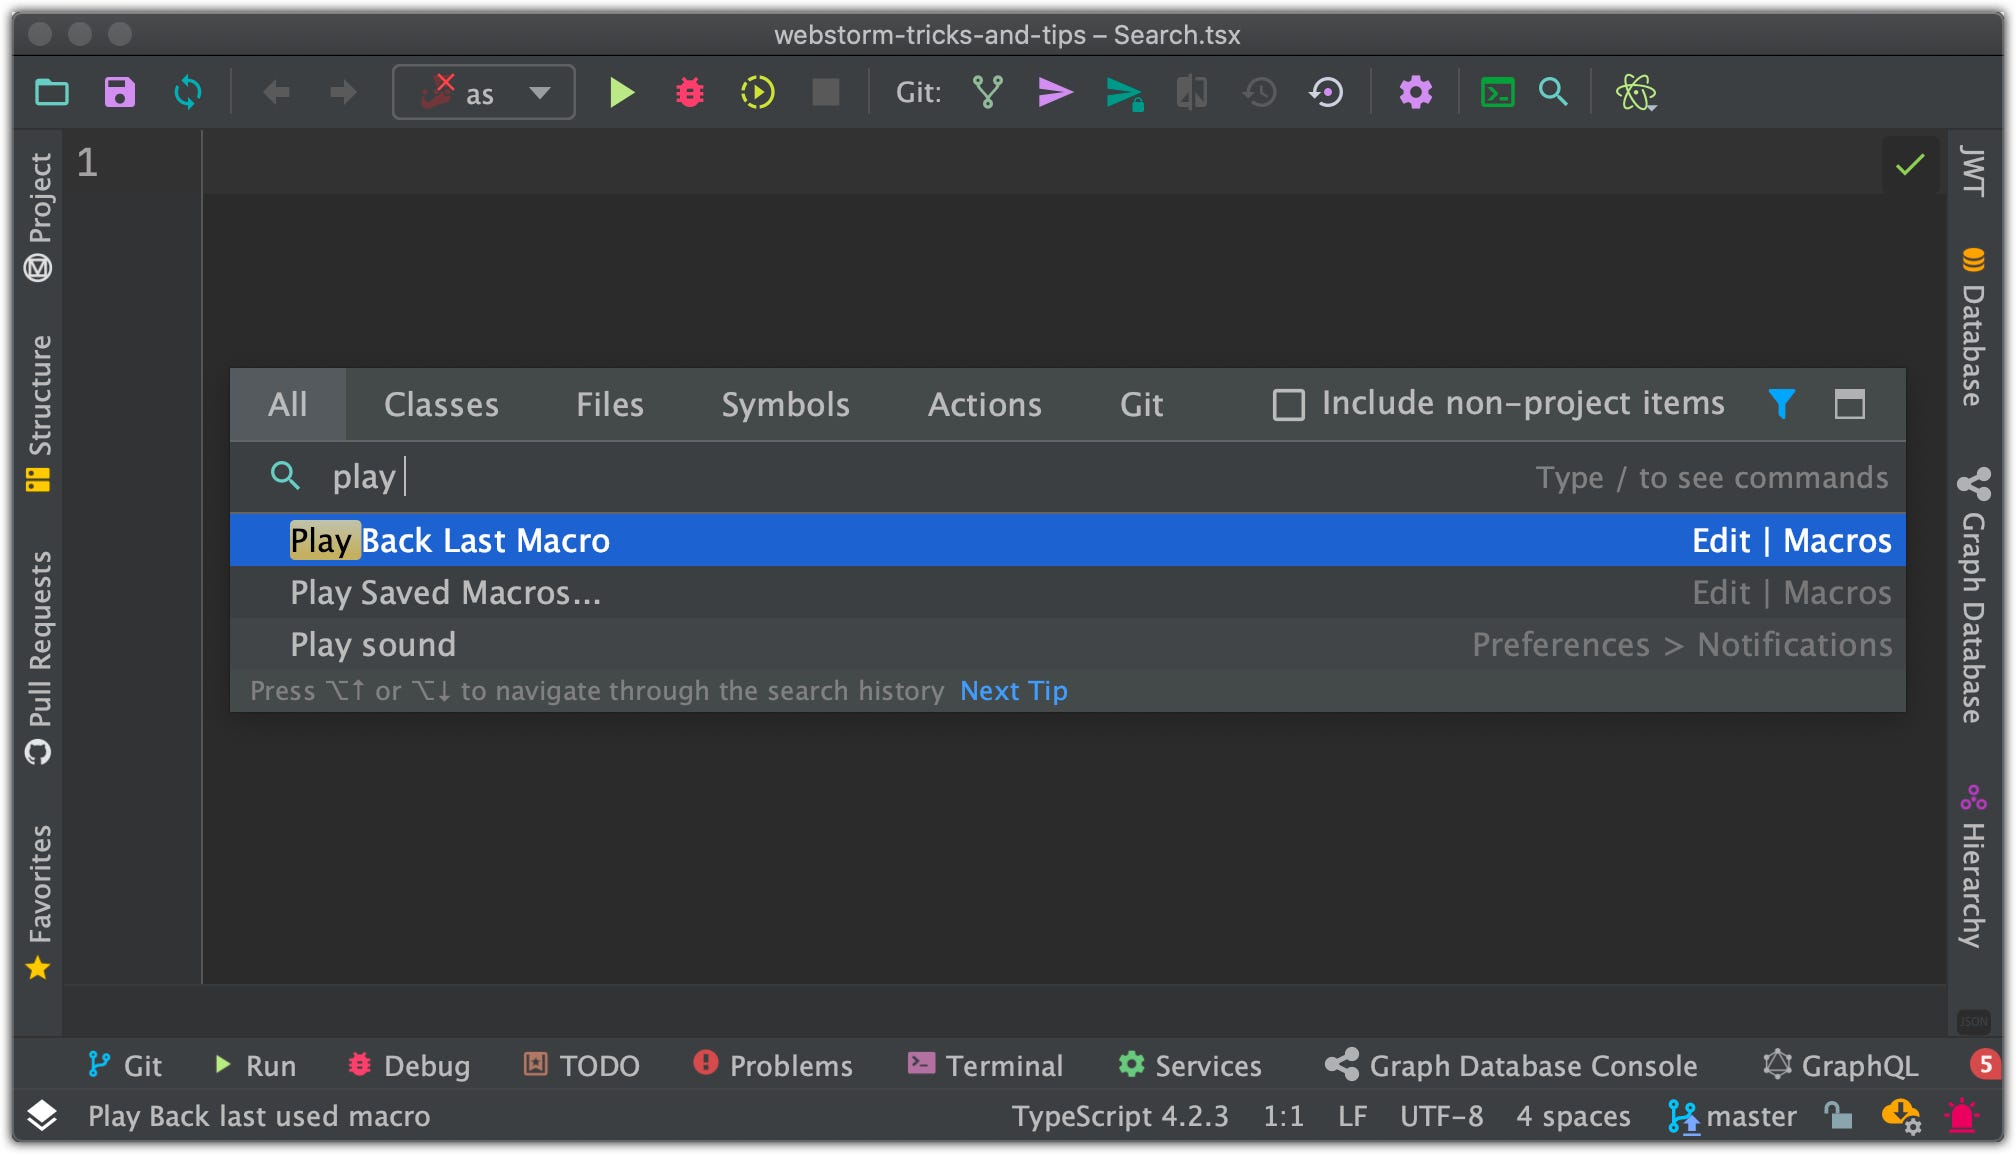
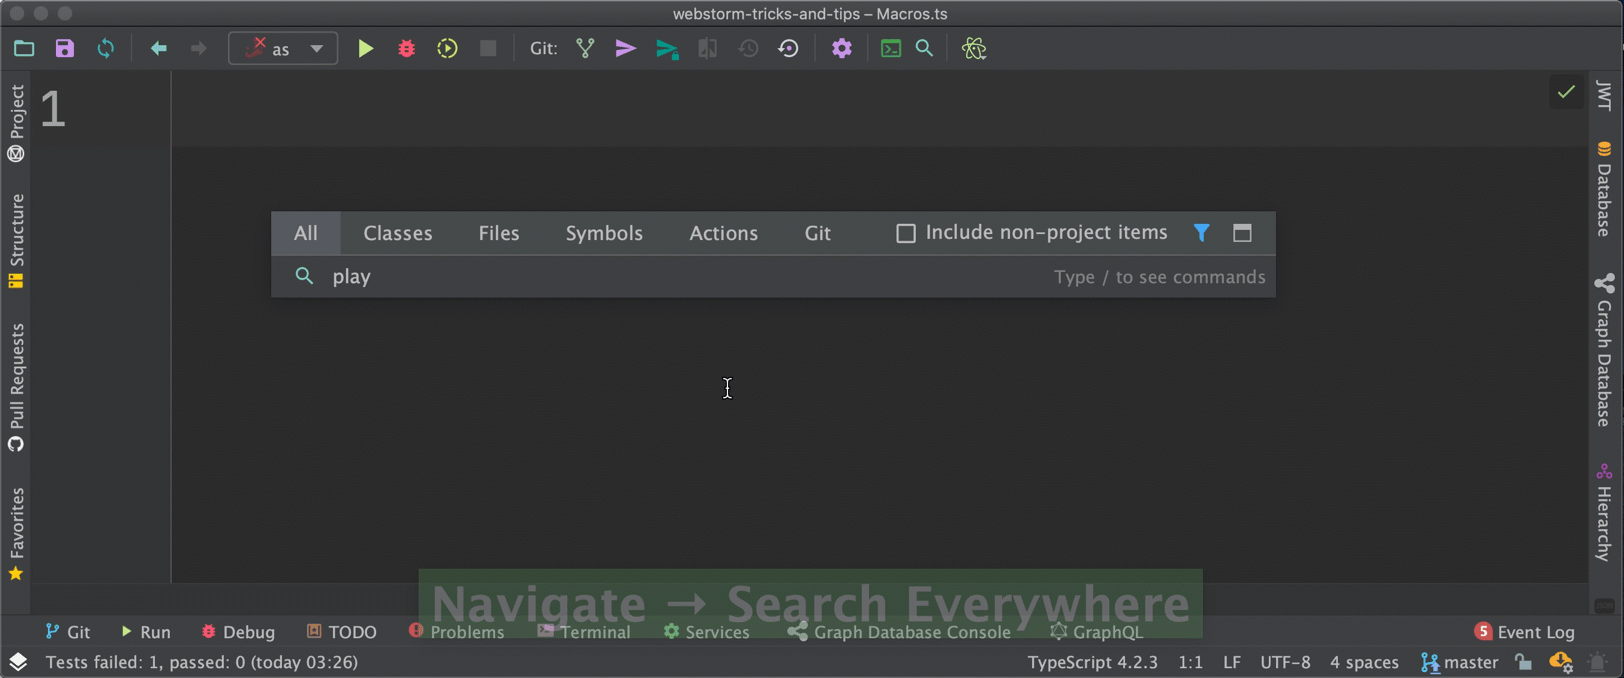
26. Macros
Macros provide a convenient way to automate repetitive procedures you do frequently while writing code. You can record, edit, and playback macros, assign a shortcut to them, and share them.
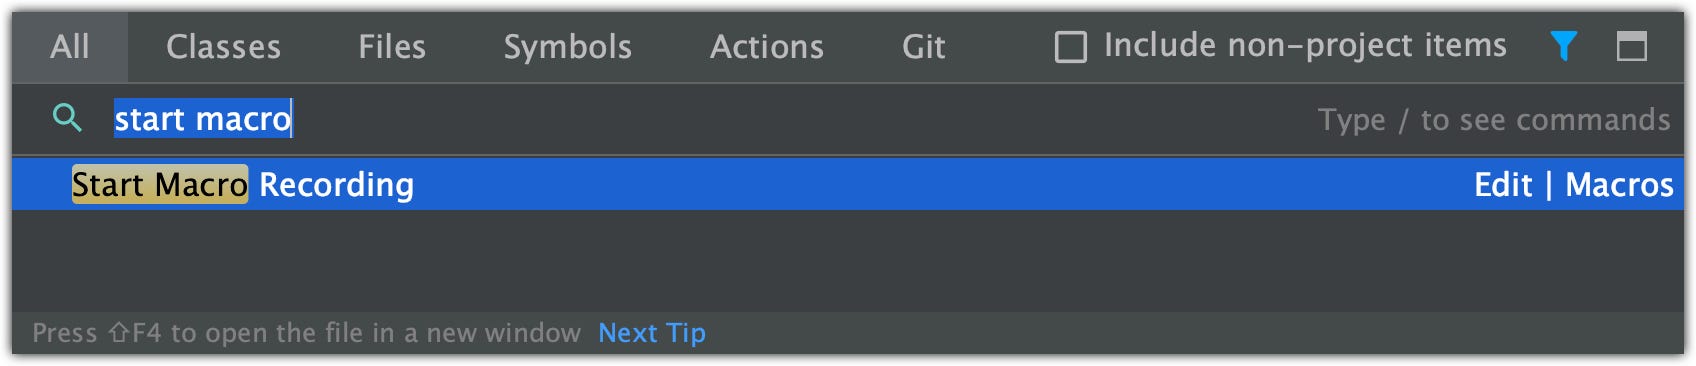
You can start recording by clicking **Edit>Macros>Start Macro Recording**, but I will do it by typing start macro in Search everything
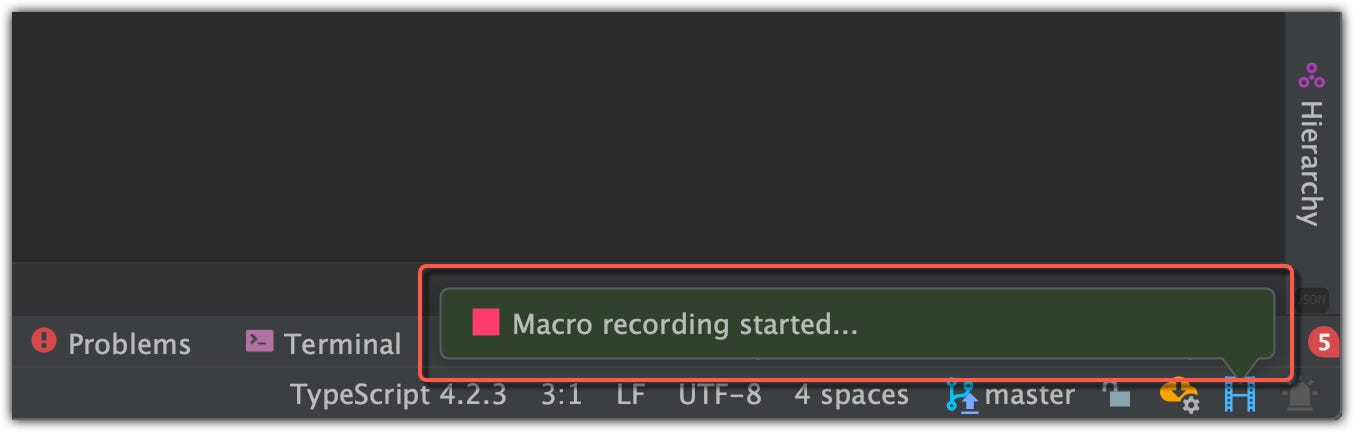
You will see a pop-up with a **STOP** button:

⚠️ NOTE: When you are creating Macros, IDE will record only your actions, but it will not record autocompletion and auto imports. So before you Record a really big code fragment (which I don’t recommend, use templates instead), try it with something simple and by adding features step-by-step.
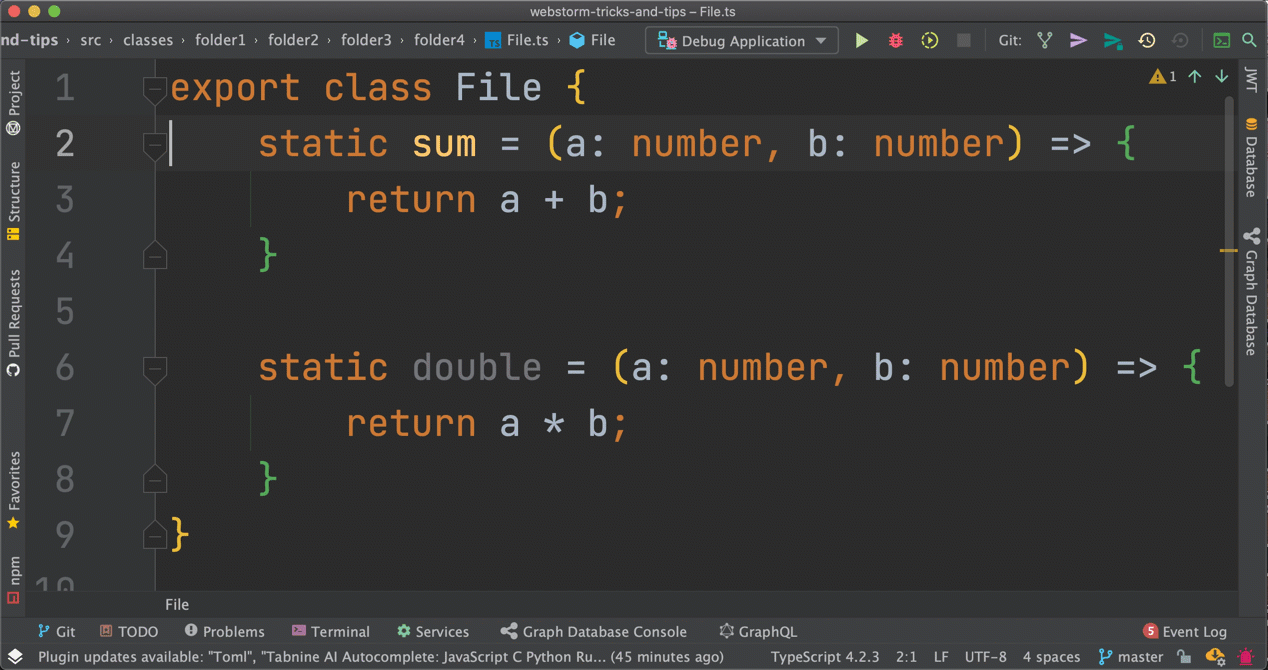
Let’s create something awesome… When you finished, click **STOP** icon and select a name for your Macro.
export const sum = (a: string, b: string) => { return a + b;
}
I will delete all I have created in the file and click on **Play Back Last Macro**:


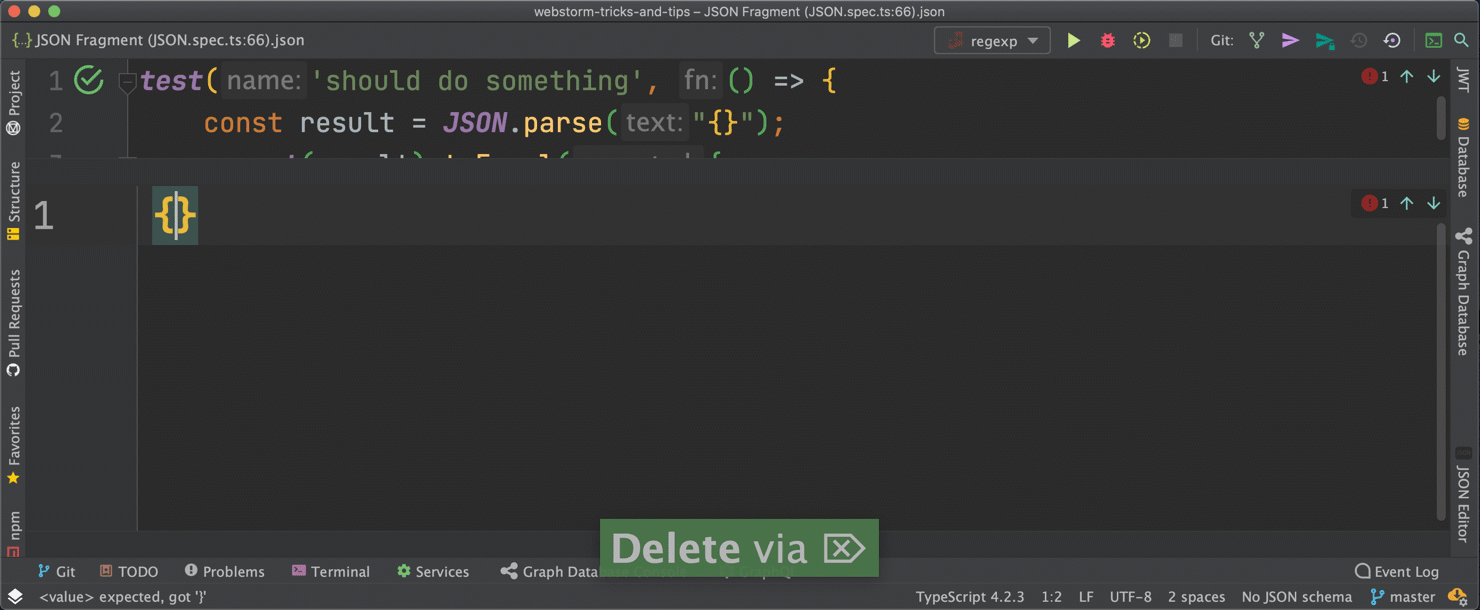
27. Language injection
We all had such cases when we need to type a simple text that should represent JSON, RegEx, HTML, SQL, etc. You don’t need to create those files so that IDE would help you. You can use Language Injection so that IDE would handle those Language fragments in a simple string:
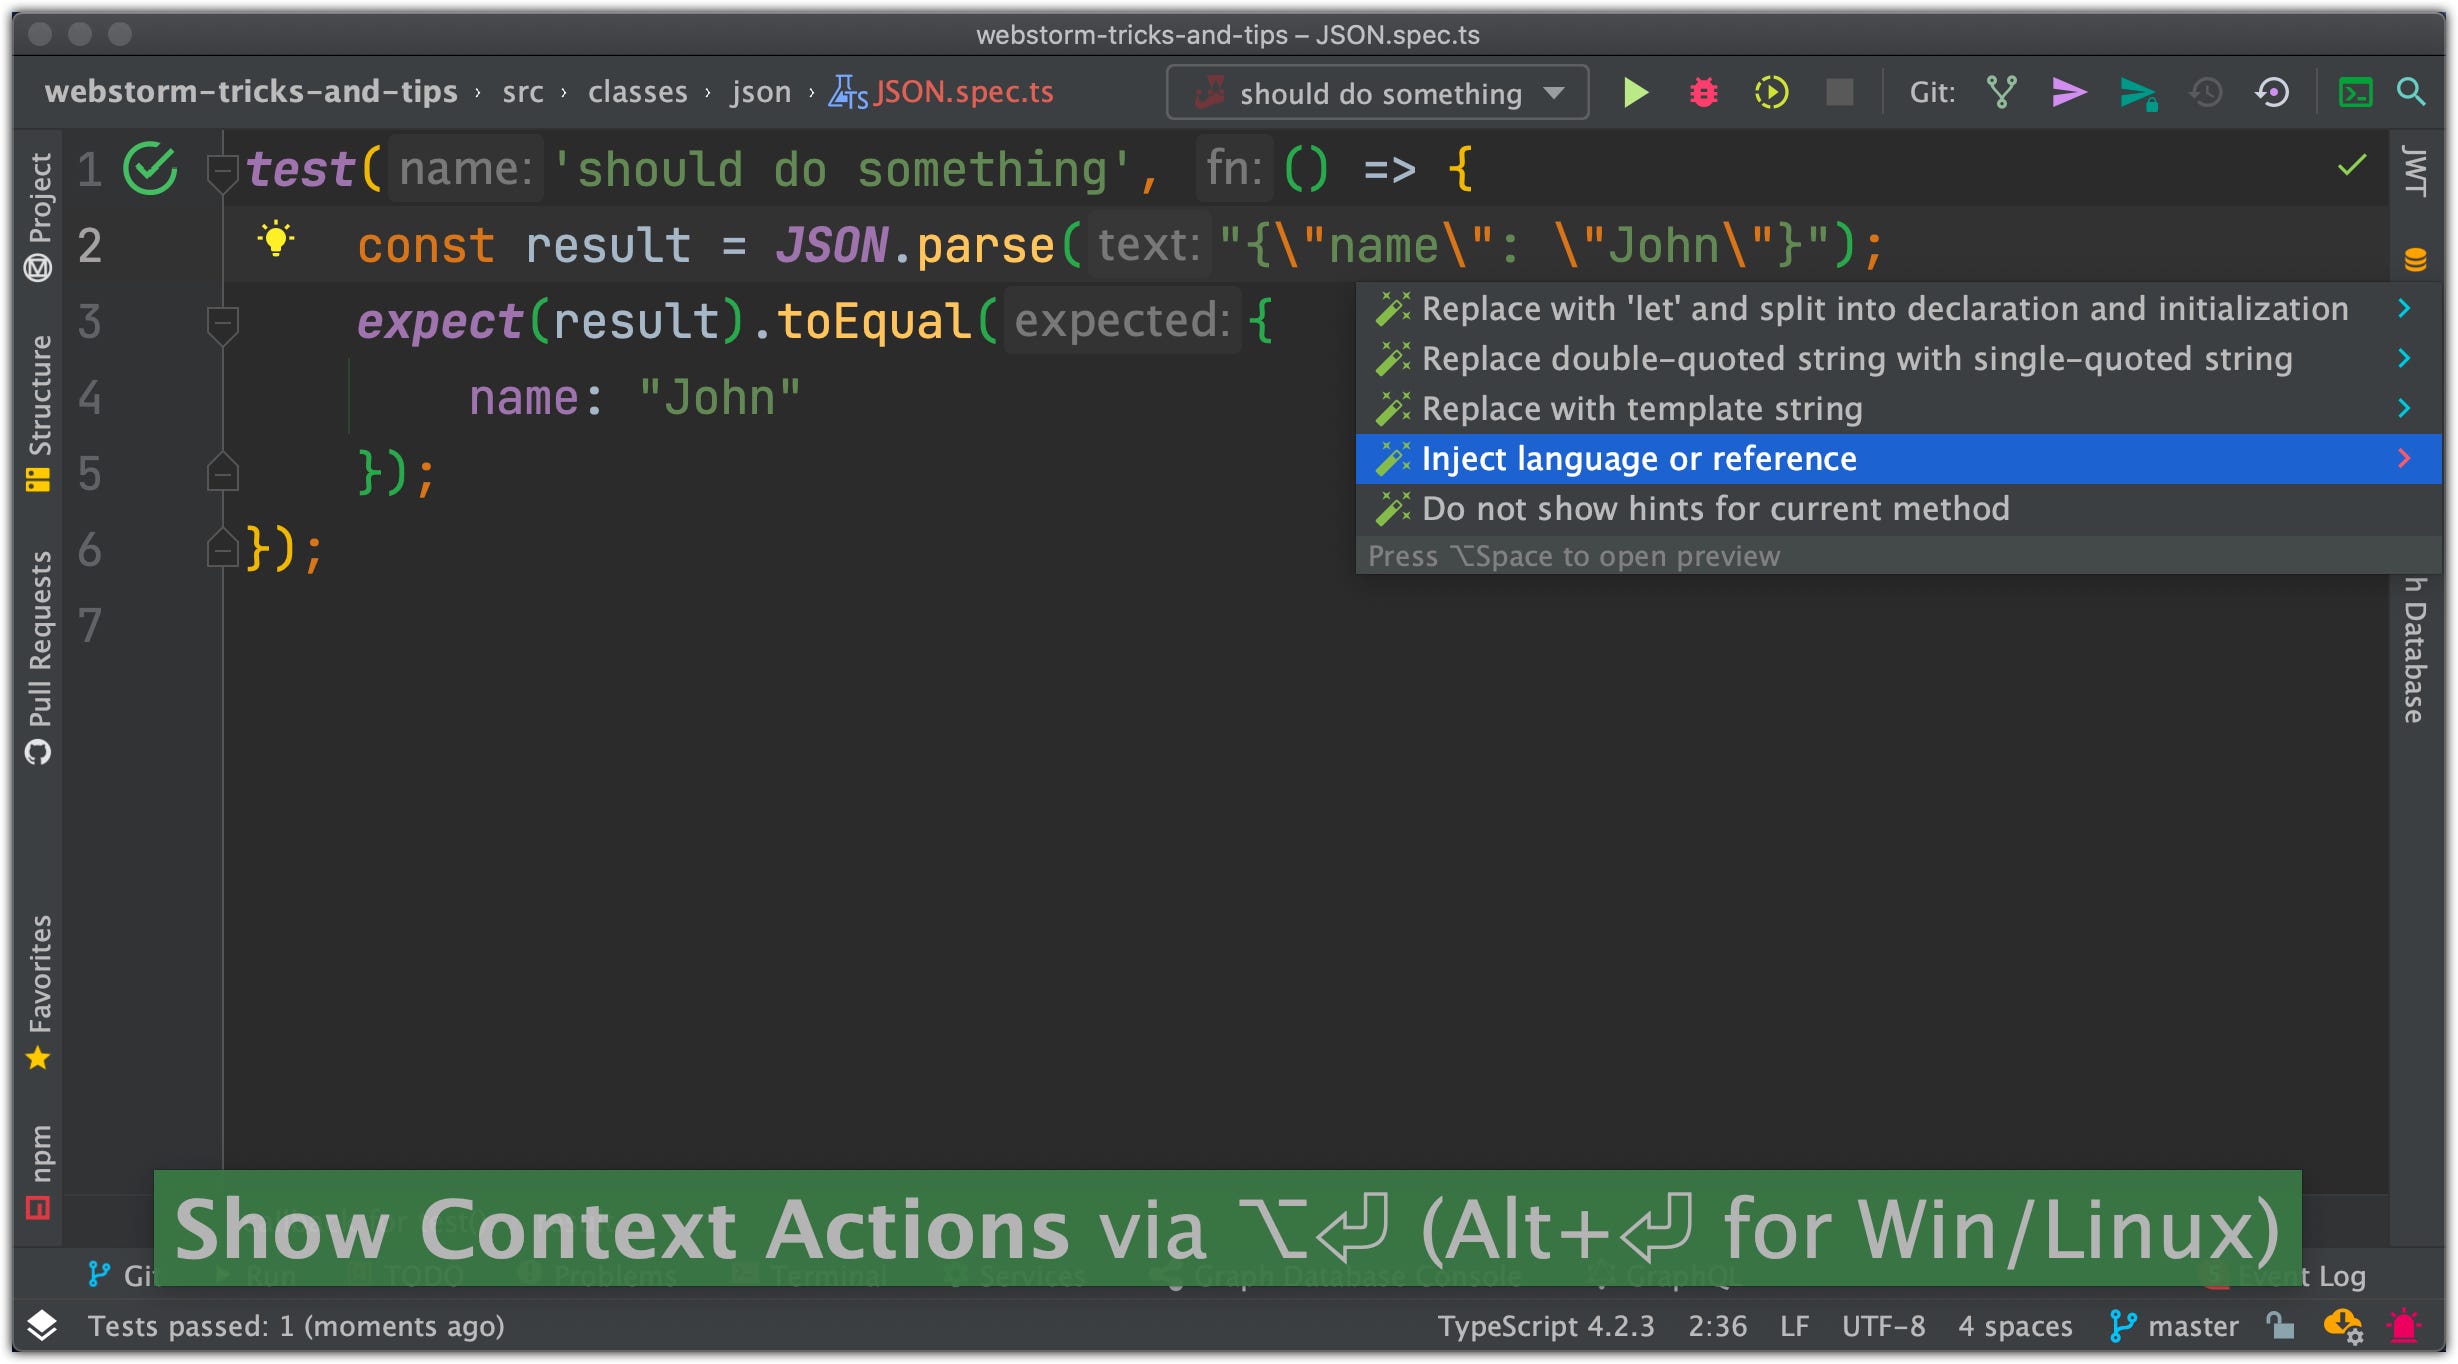
In ES6 JavaScript you can use template literals `{“name”: “John”}`, but in this example, we will pretend that we are still using ES5 🙂

Now IDE will highlight our JSON props and will notify us if we made a mistake:


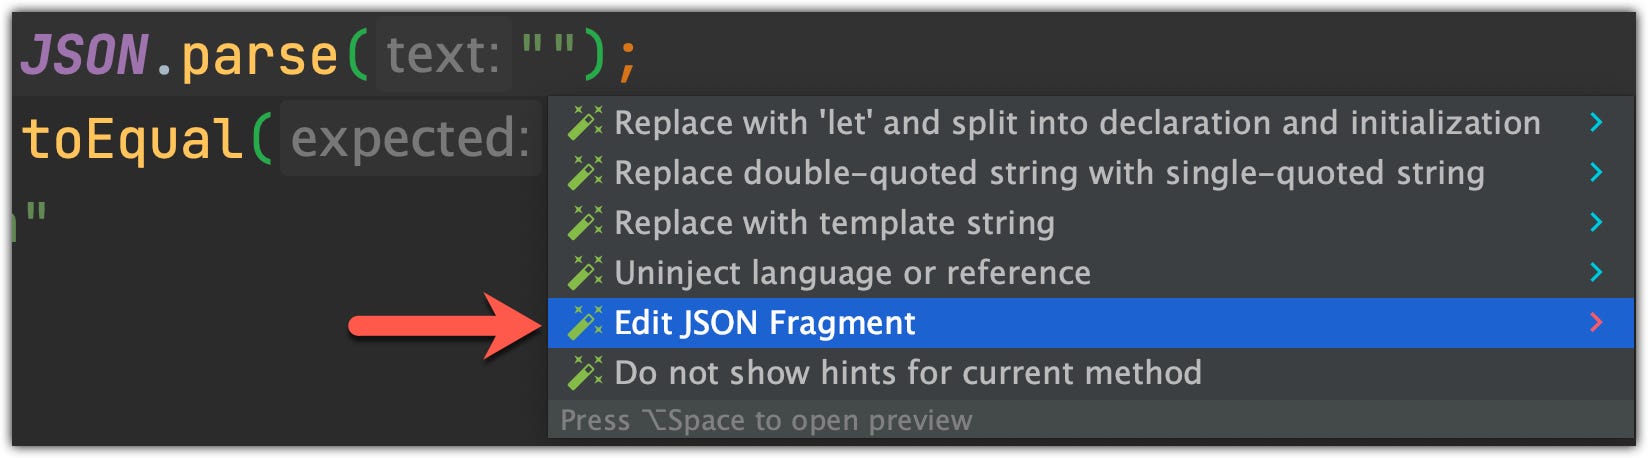
‘Edit JSON fragment’ action will open a JSON editor:

Now let’s take a look at how it works in IDE:
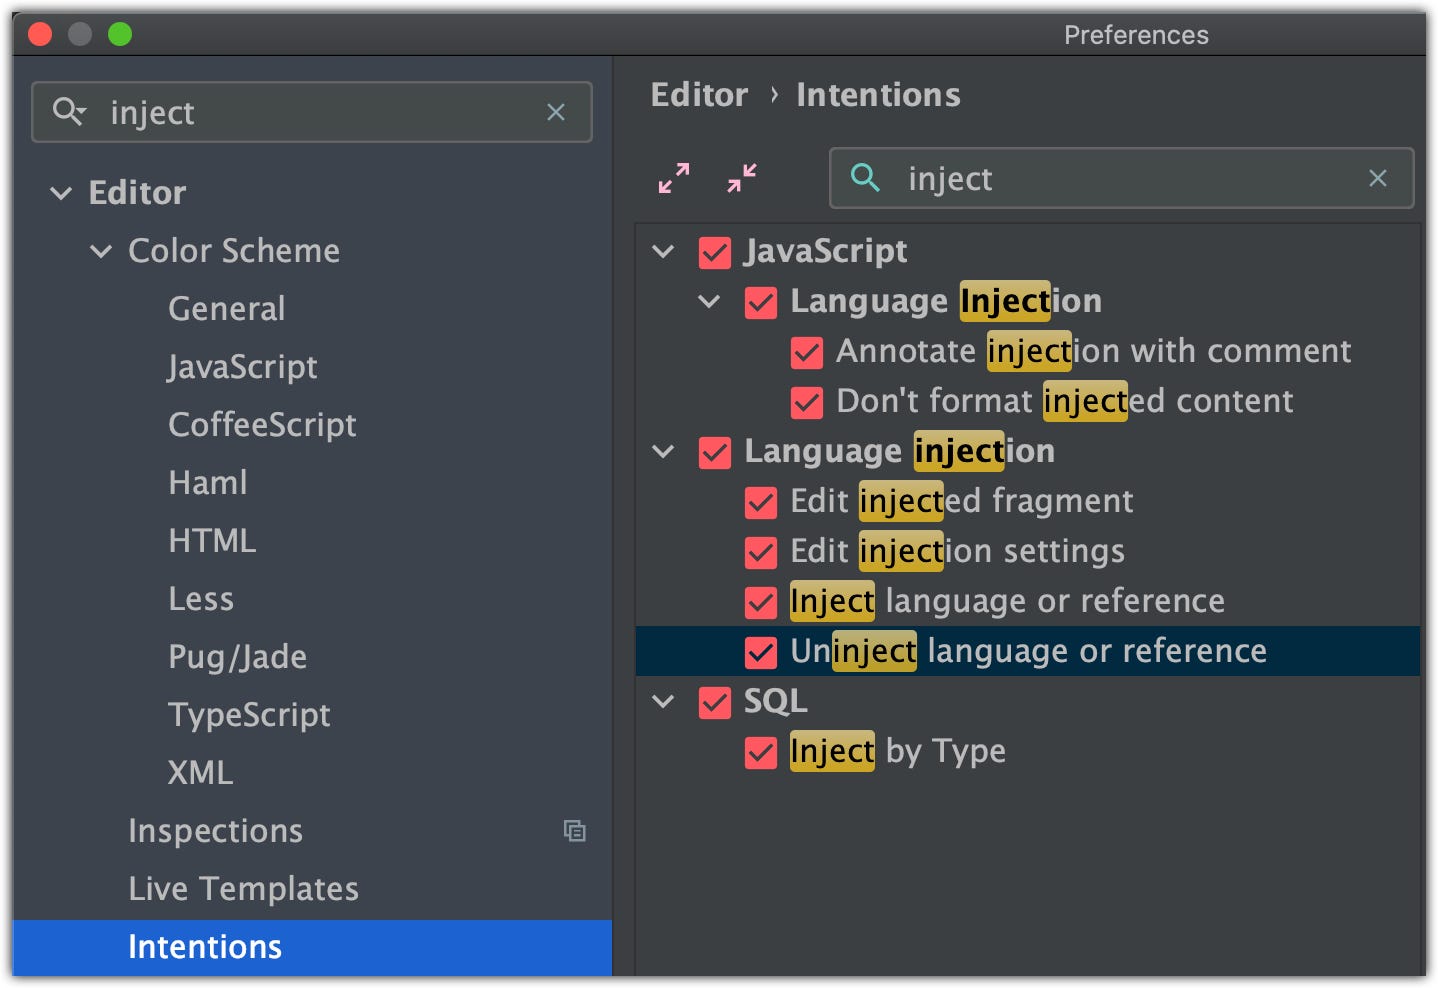
⚠️ NOTE: If you don’t see **Edit JSON Fragment** in Context Actions — make sure that you have Editor > Intensions >Edit injected fragment enabled:
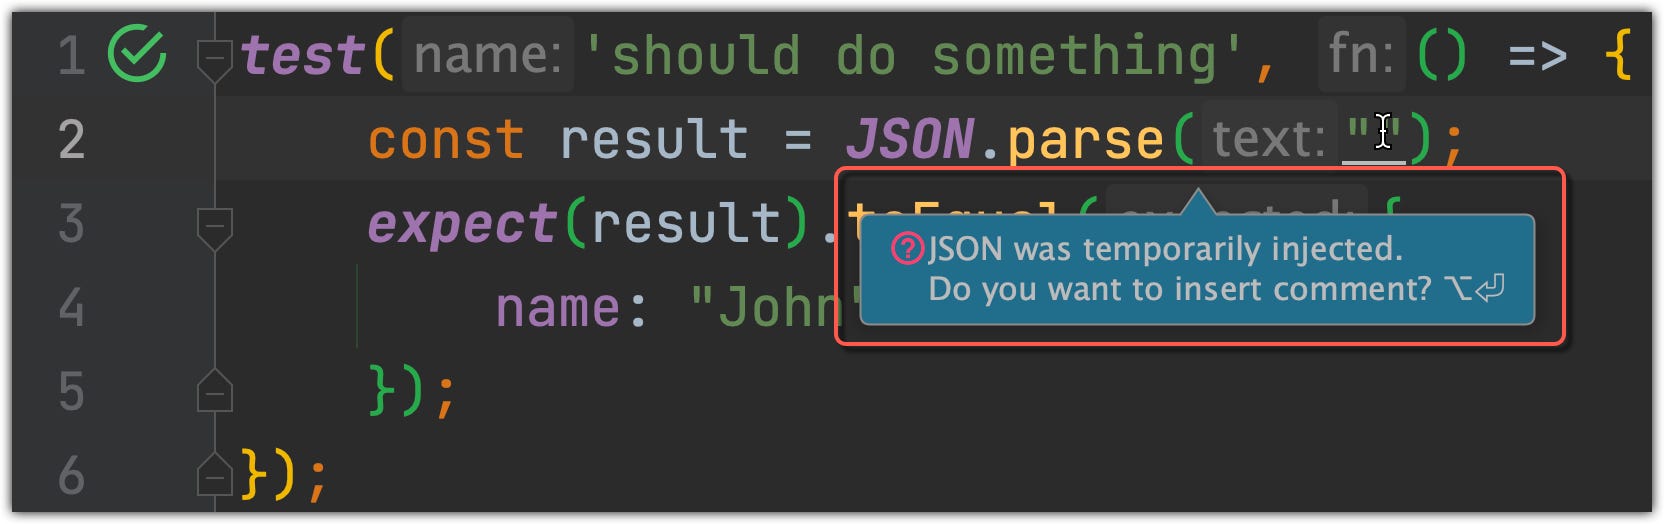
⚠️ NOTE: All previous examples were temporary injections, they will reset if you restart the IDE, if you want to set this injection permanently you will need to add a comment above the string:
// language=JSON
… or you can just answer “Yes” when IDE will ask you 🙂

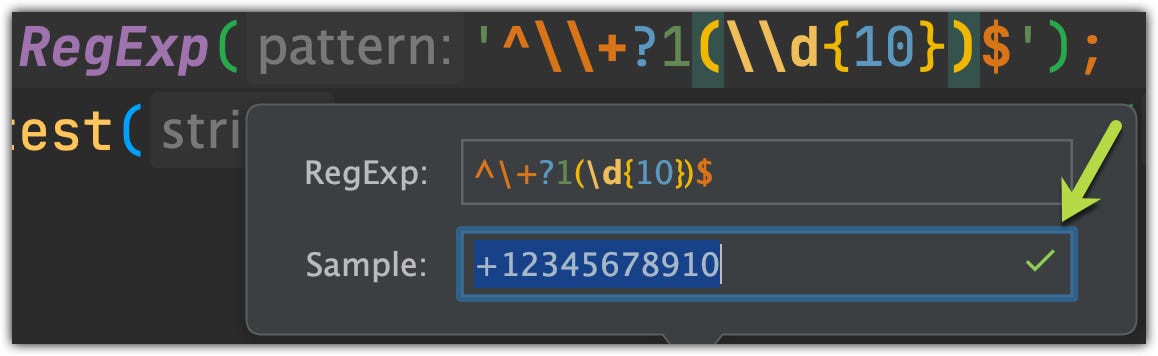
Same with RegExp:

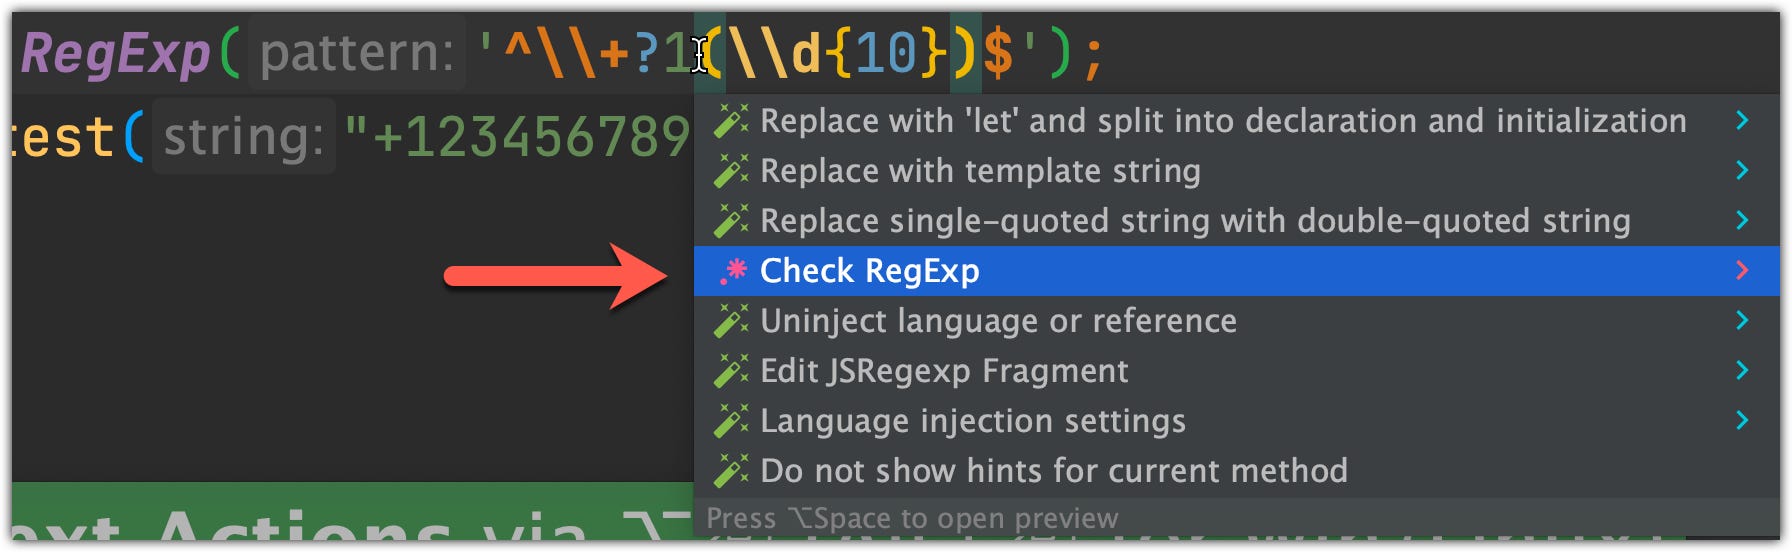
Now you will be able to test your regex in the popup window:

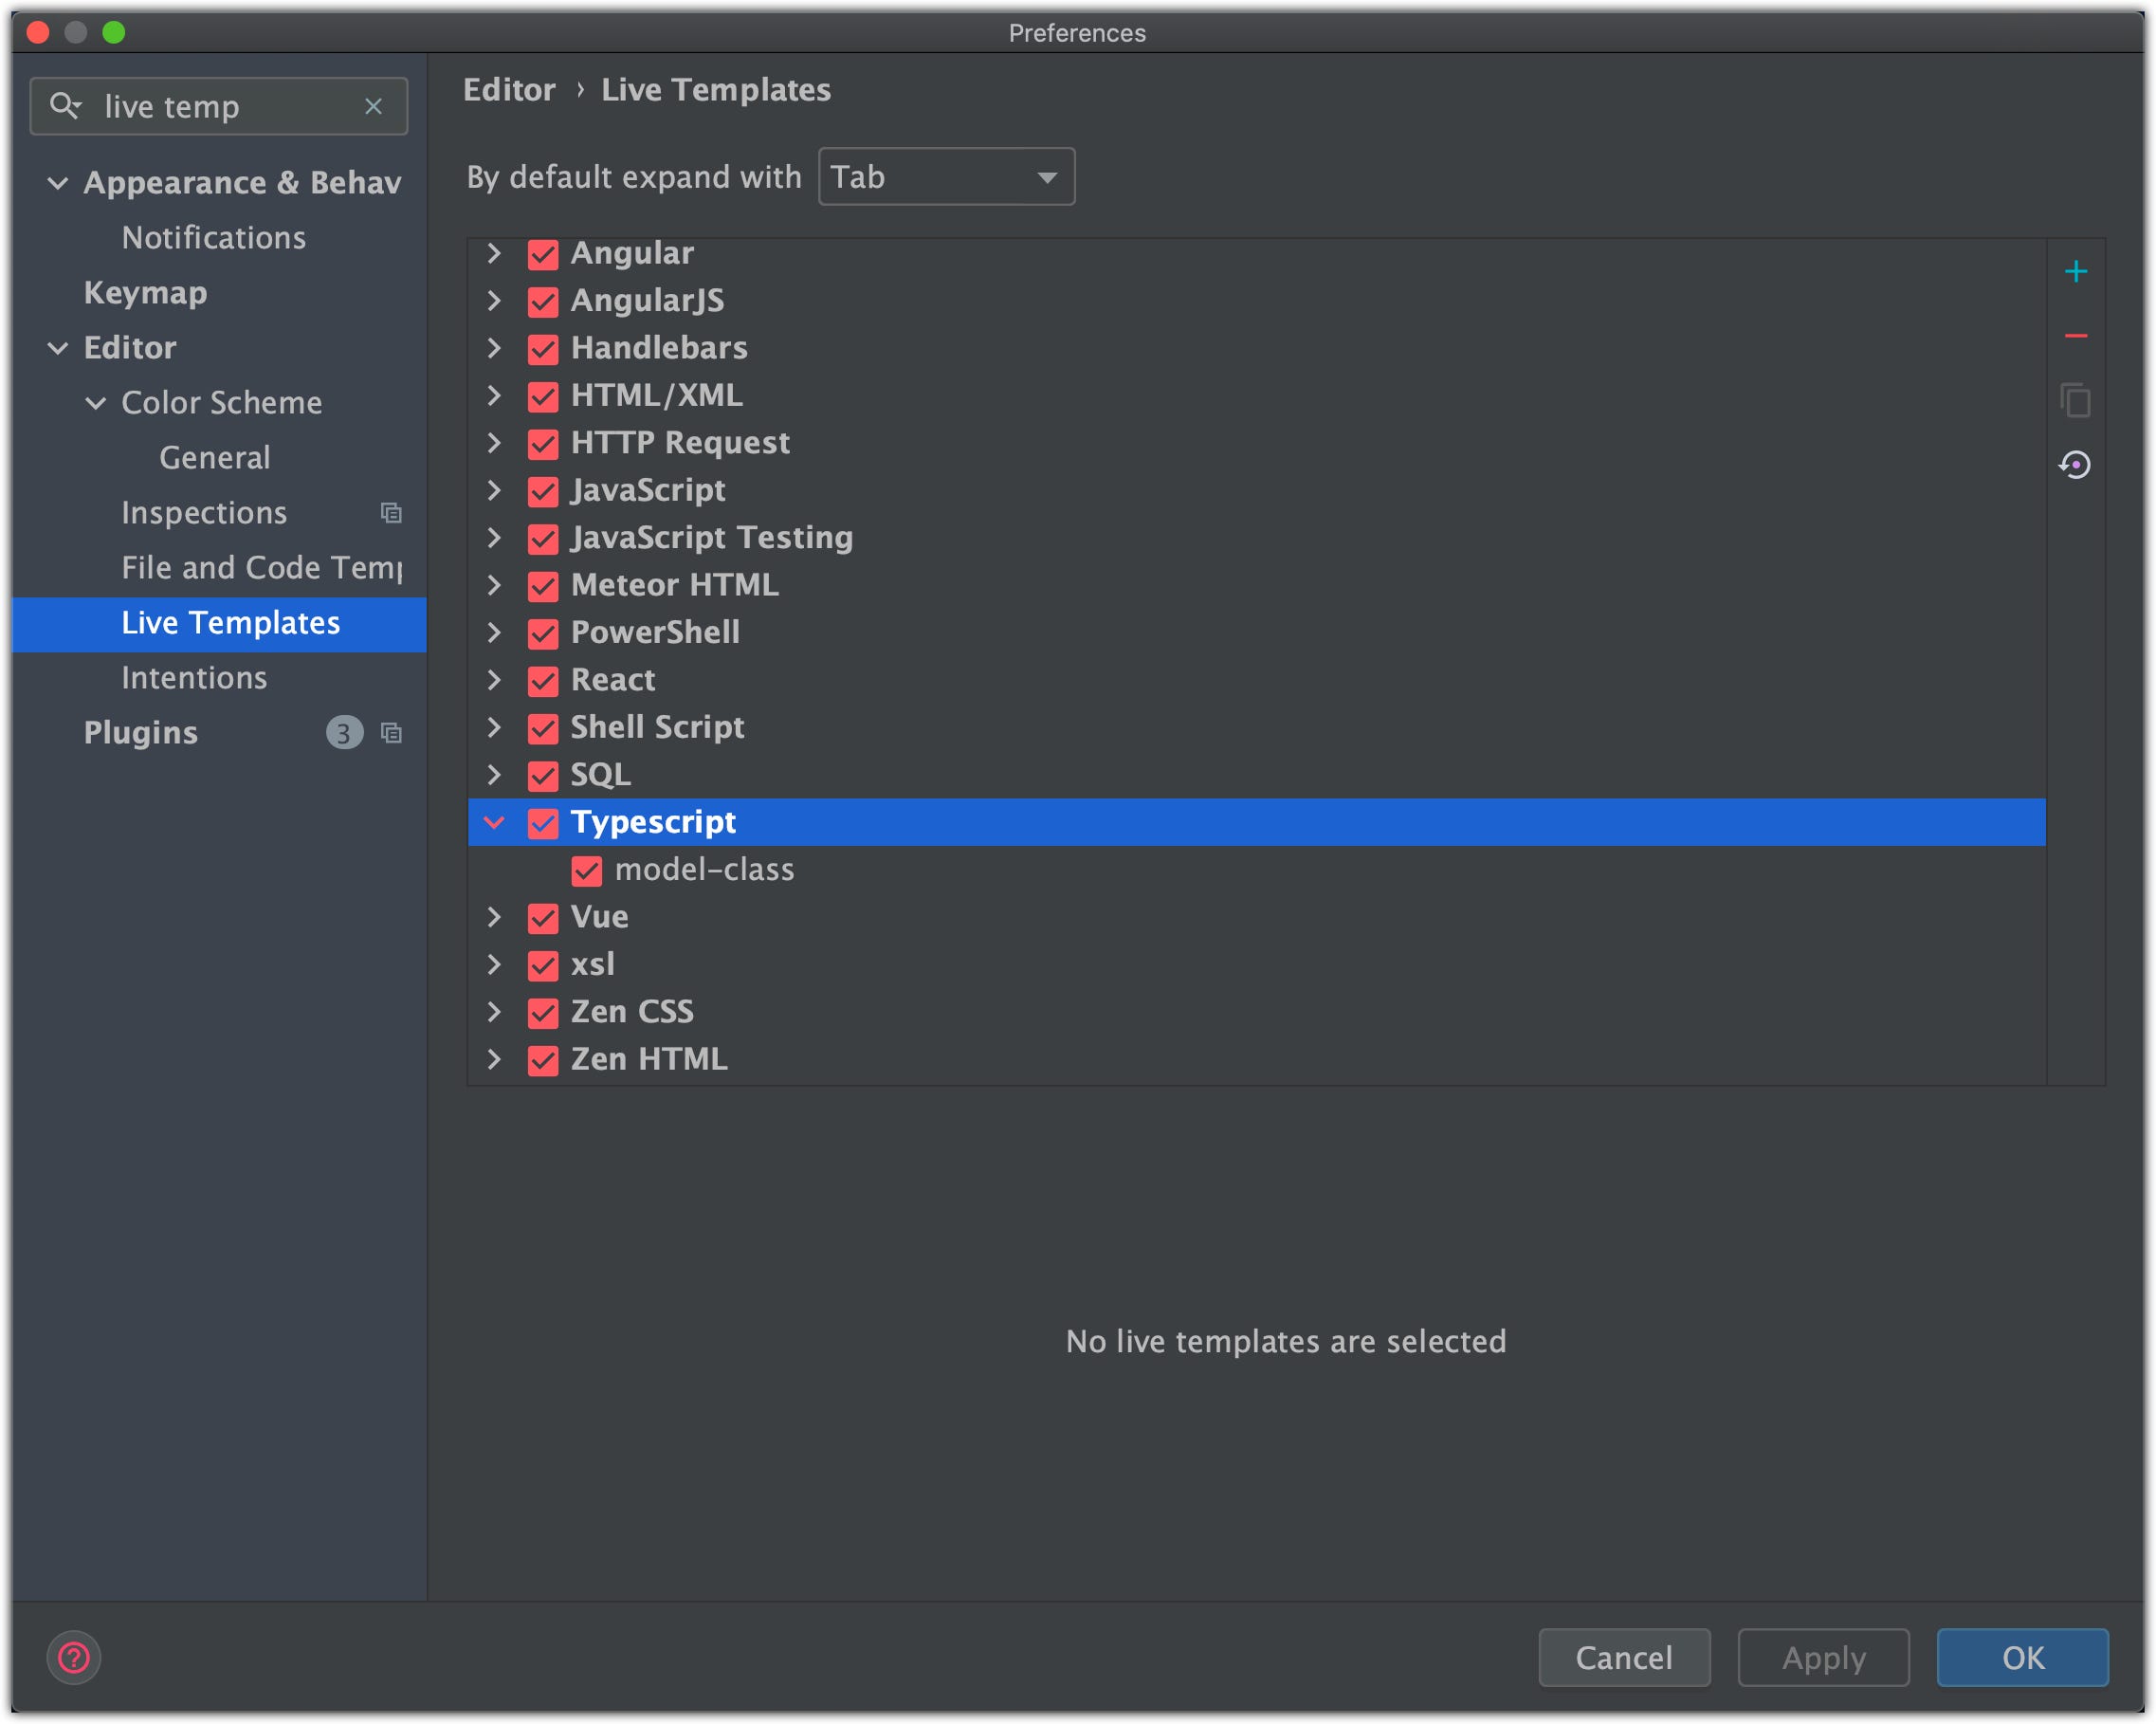
28. Live Templates
Just like with Macros Live Templates provide a powerful feature of creating your own templates of any code you like, variable/ function/ class/ component/ package declarations.
You can see available predefined templates by using [ Command+J / ⌘J] hotkey:

You can create your own templates, just search ‘Live Templates’ in IDE preferences:

Let’s take o look at some simple example:

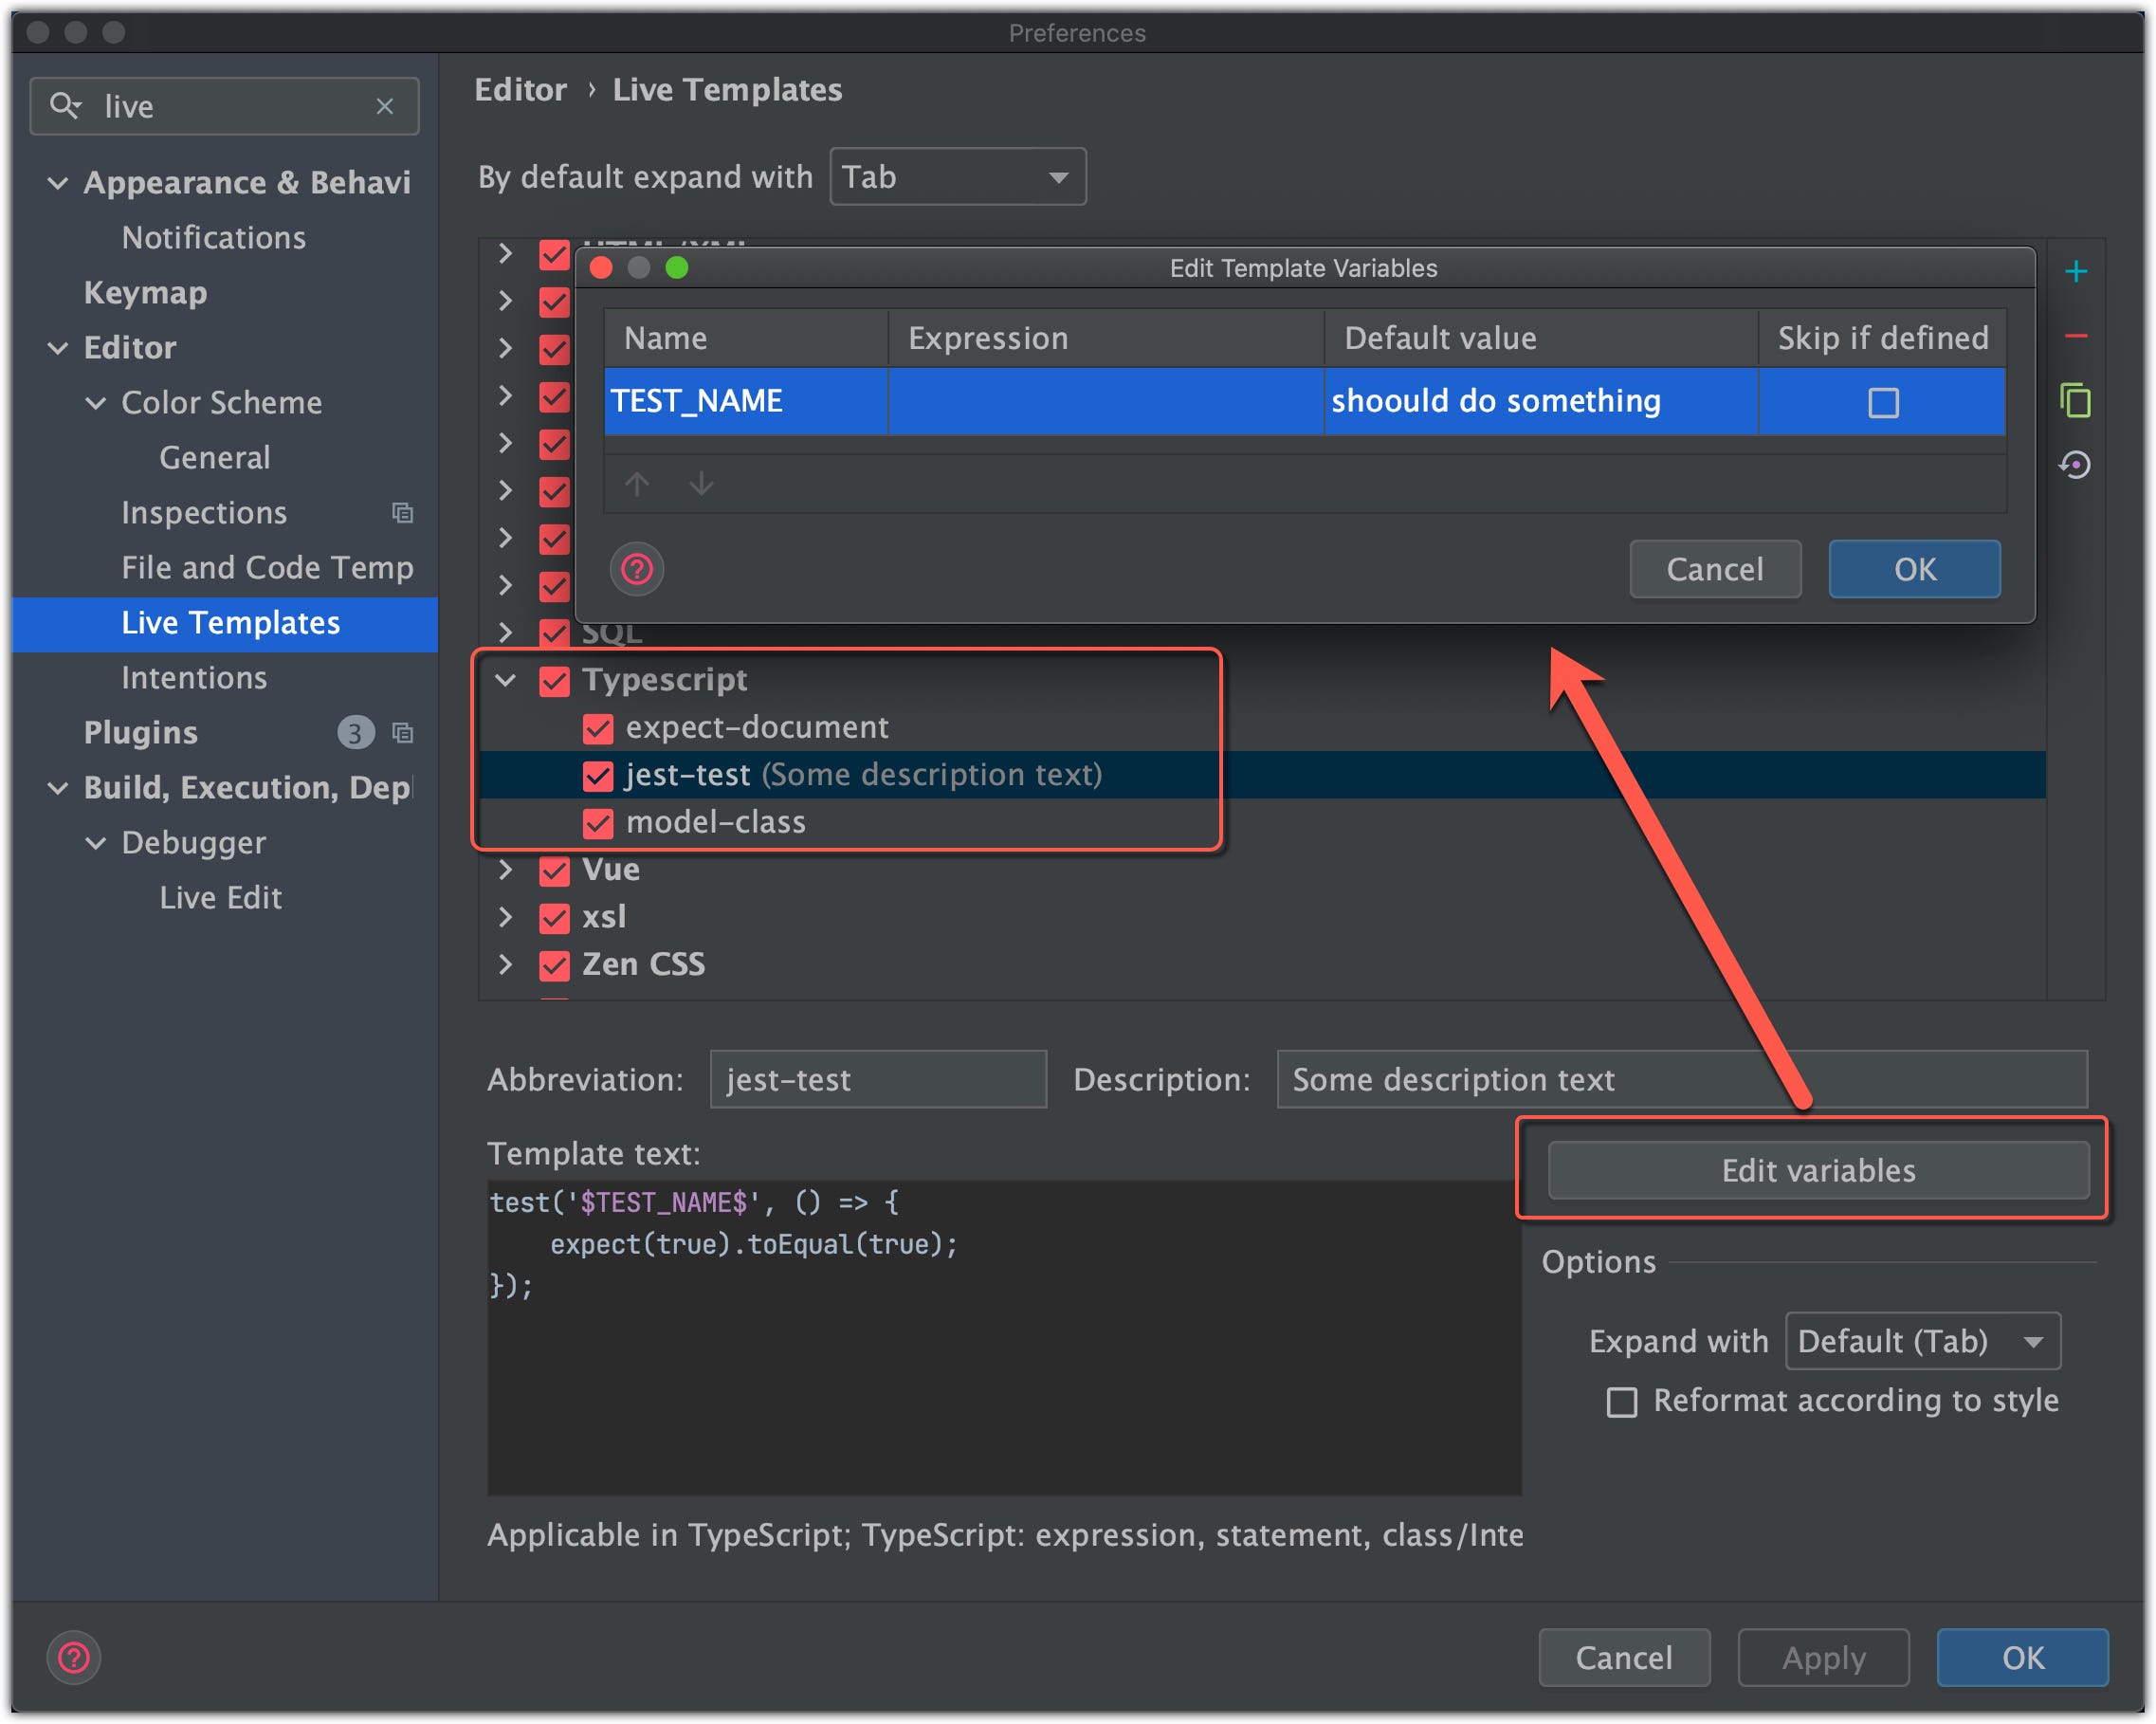
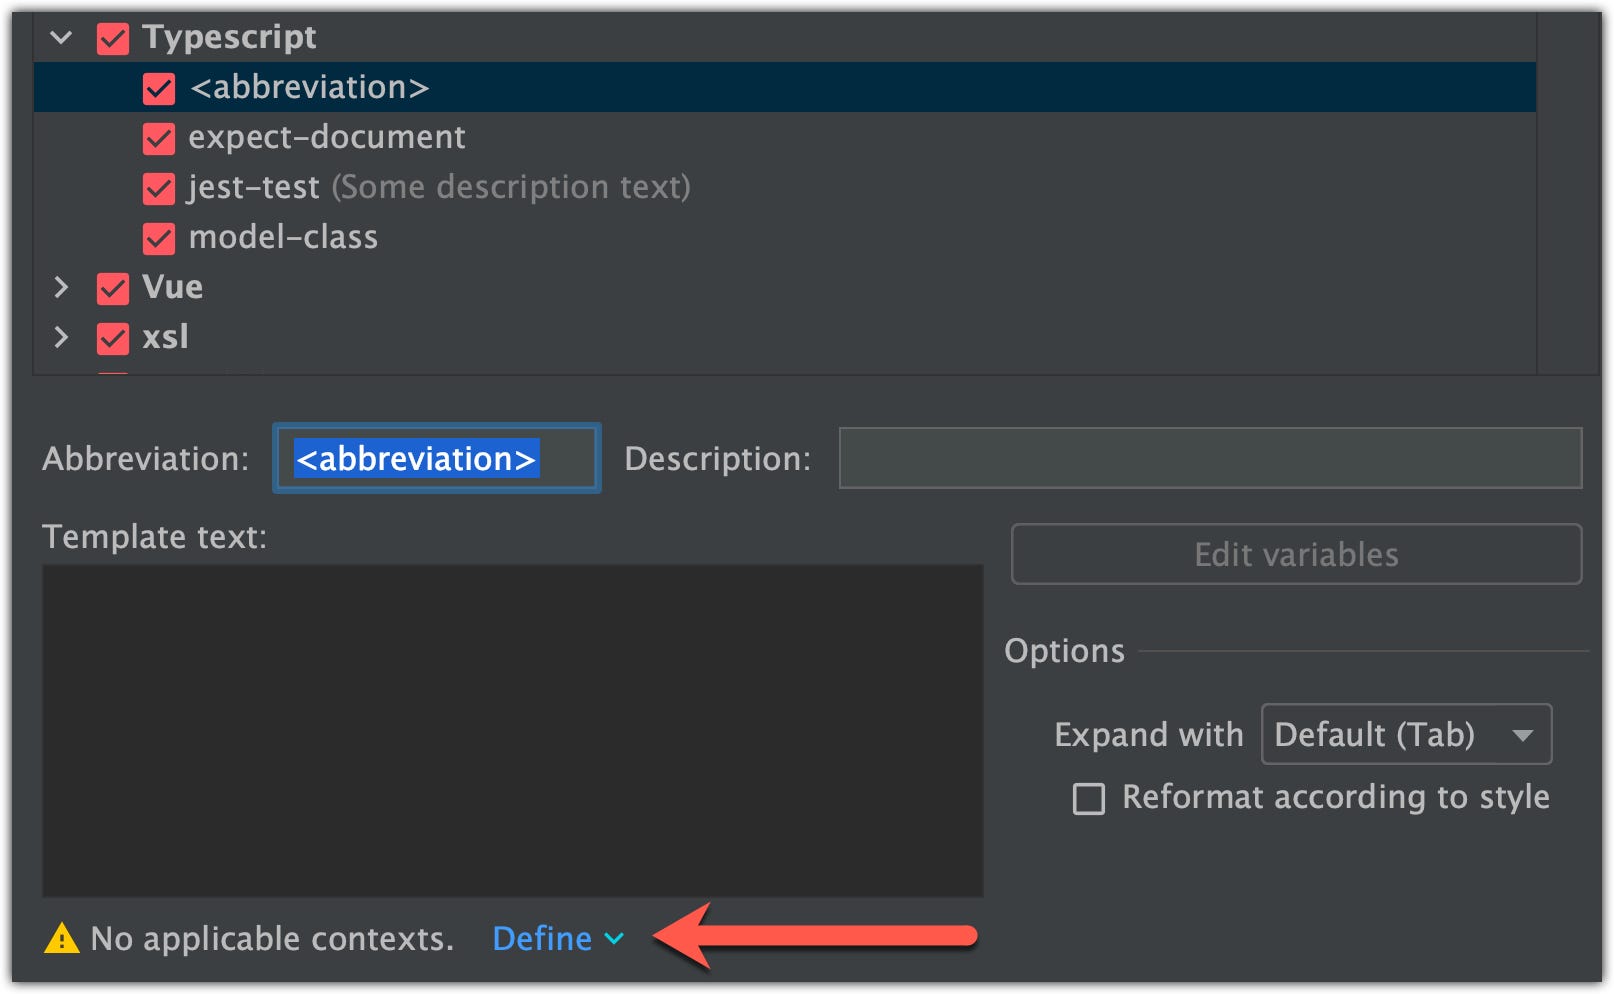
⚠️ NOTE: Don’t forget to set the Applicable context so that your templates were shown by IDE only in files that can use those templates (I don’t think that the Jest test fragment should be shown in SQL 🙂):

After applying new templates you can use them by typing your custom abbreviation:

⚠️ NOTE: You can edit IDE’s predefined templates as well.
29. Enable preview tab
The preview tab allows you to view files in a single tab one by one without opening each file in a new tab. Any other file that you select will replace the previous one in this tab.
You can enable this feature in the IDE Preferences:
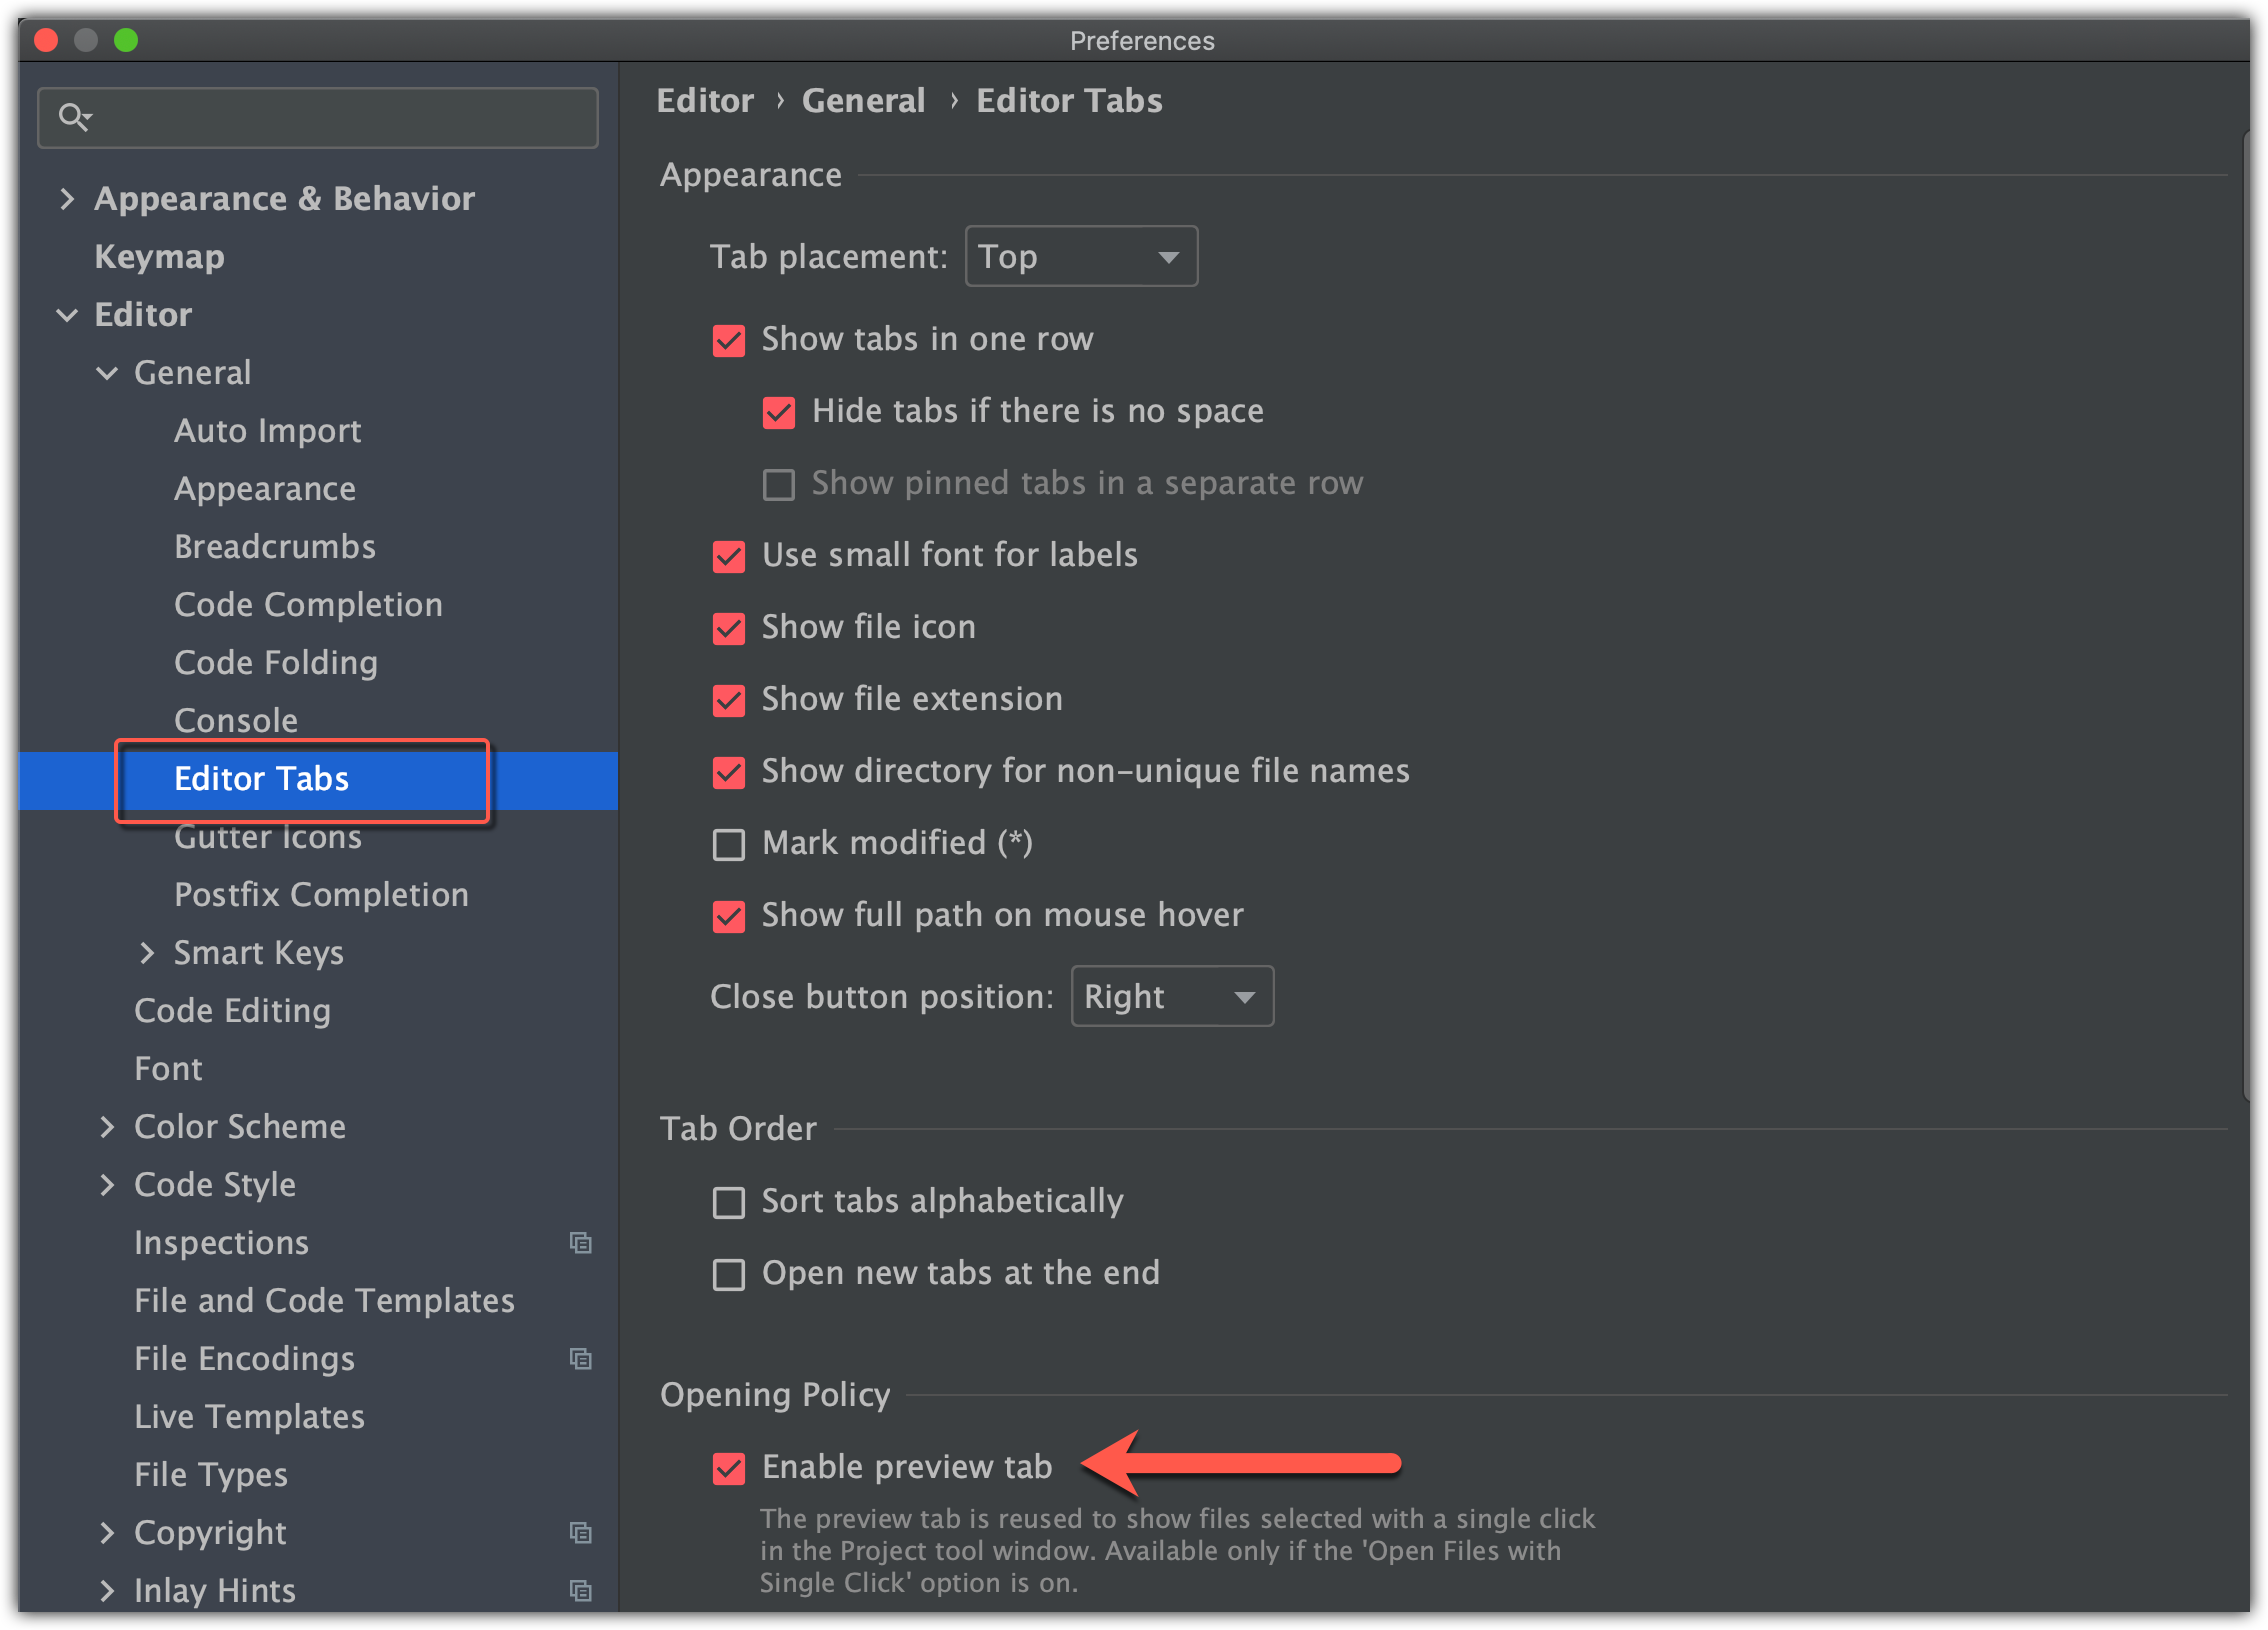
Or here in the Project window settings:

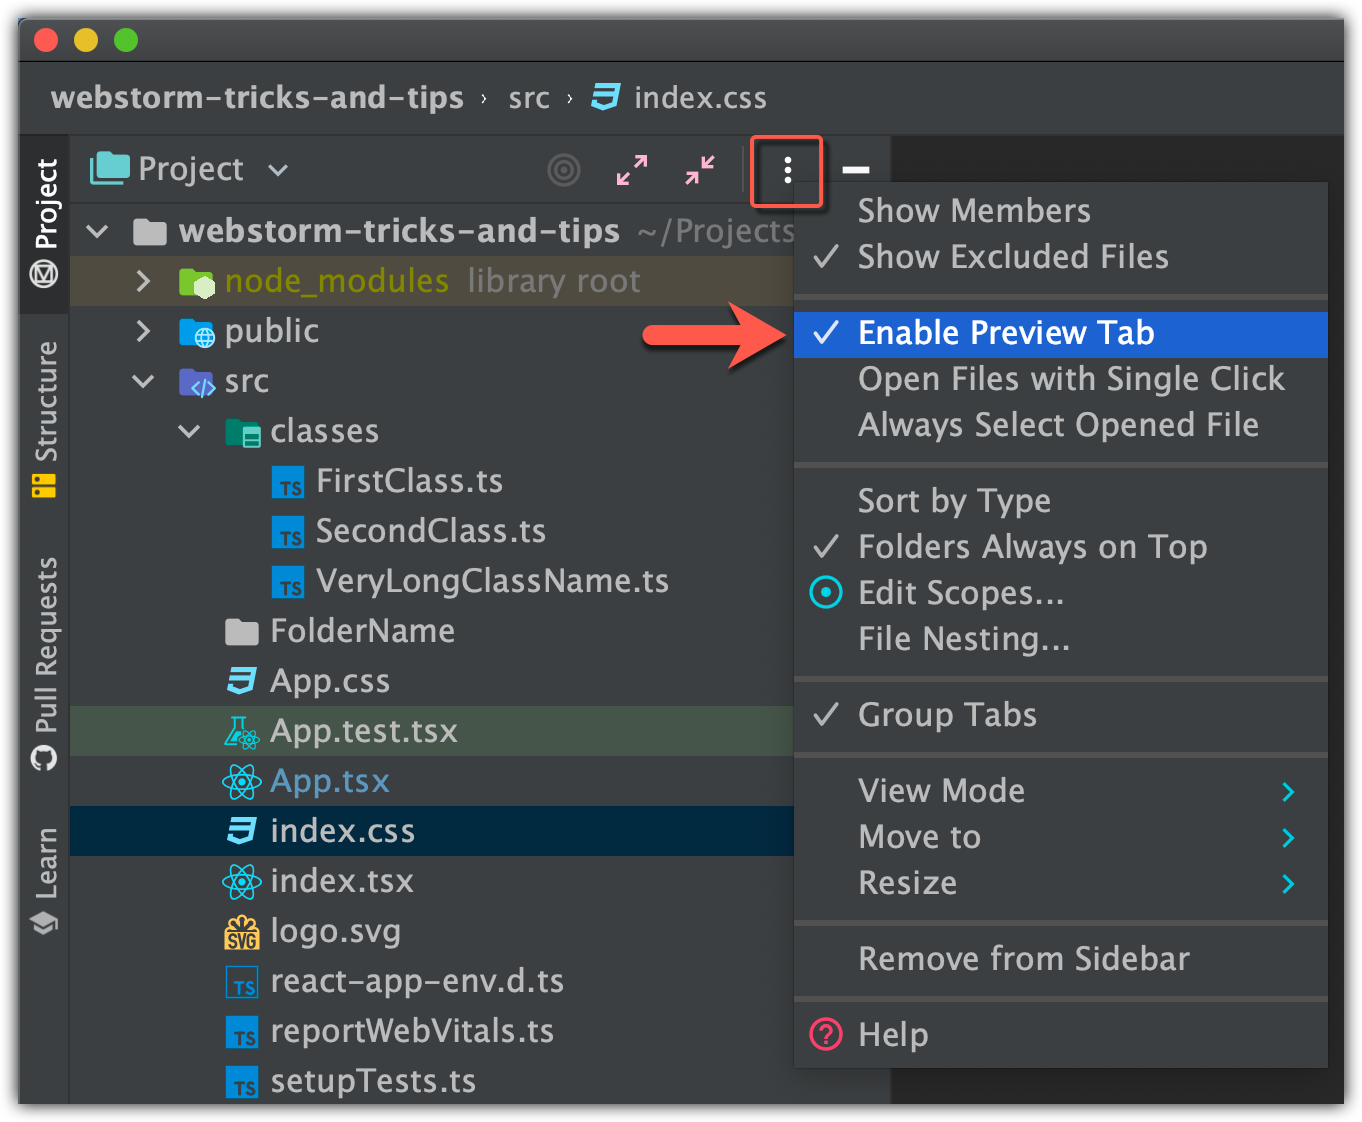
Now you can preview files without opening them in a new tab by just clicking one time on a file, if you click twice — file will be opened in an old-fashioned way.
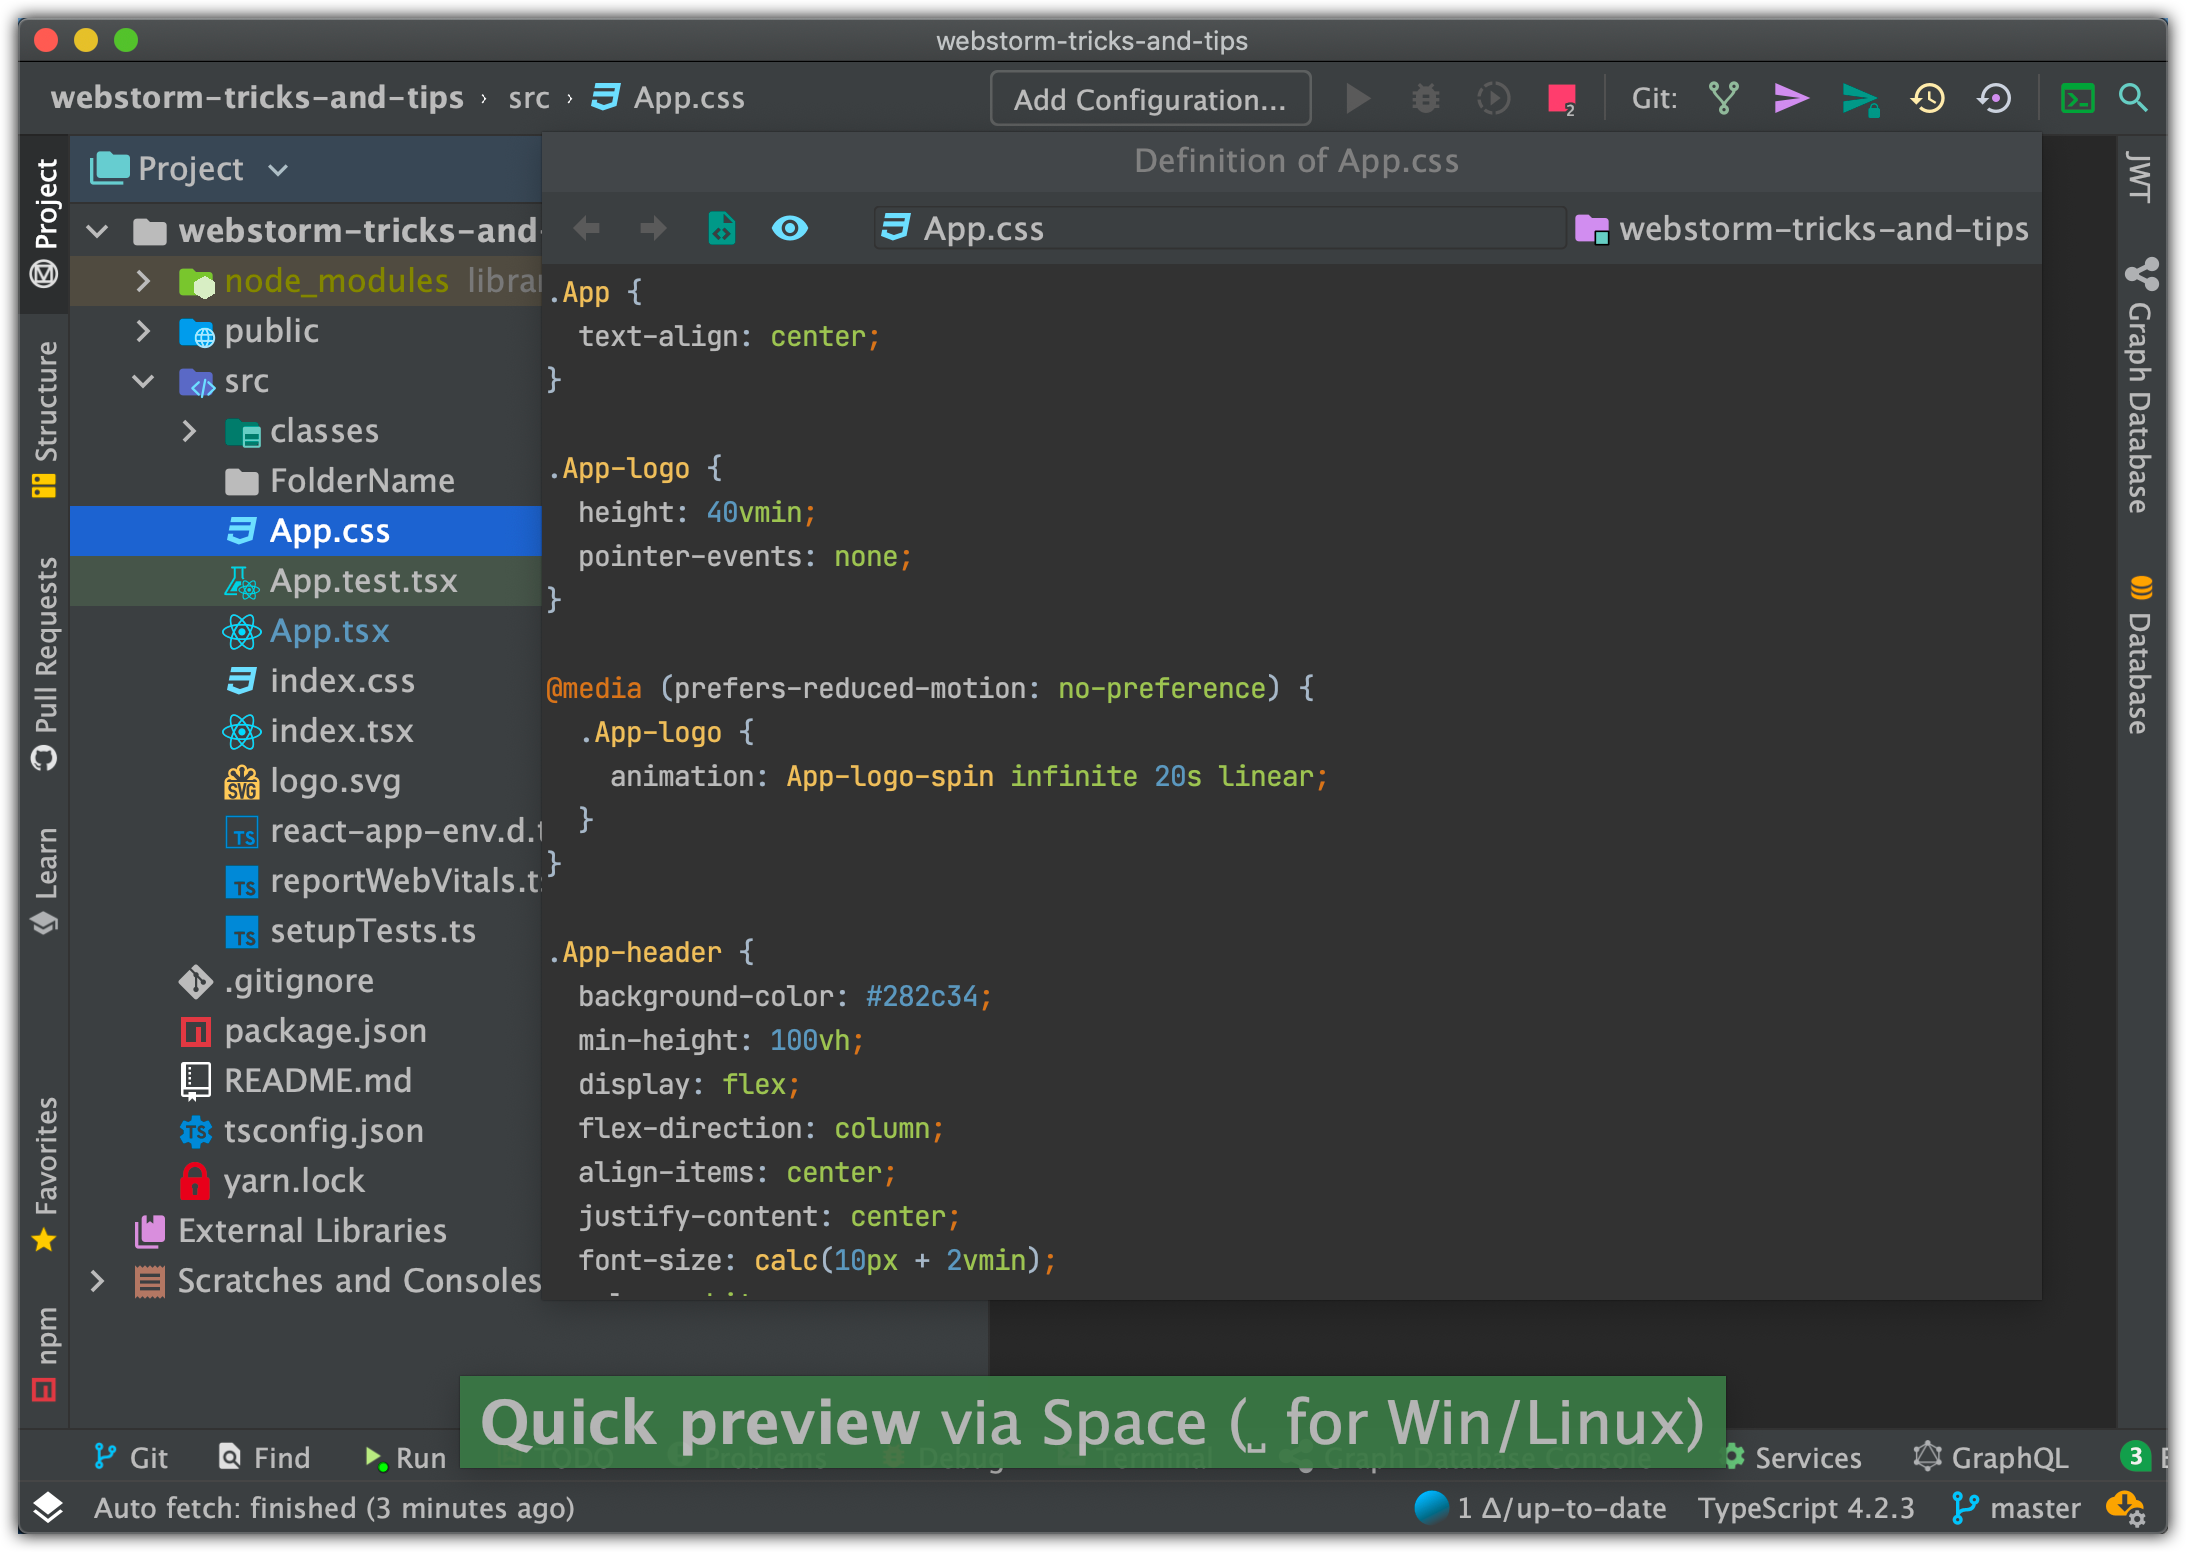
30. Quick preview
If you don’t want to enable the ‘Preview Tab’ feature you can just press Space key and IDE will show you the content of the file in a pop-up window without opening any tabs:
31. Always select opened file
If this option is on, WebStorm automatically locates documents that you open in the editor in the current view of this window.

32. Jump to Navigation bar
This feature is useful when you don’t use the NavBar at the top of the IDE:

You can disable it in View > Appearance > ✔︎ Navigation Bar, but note that the toolbar will disappear too:

You just need to enable it after disabling the Navigation Bar:

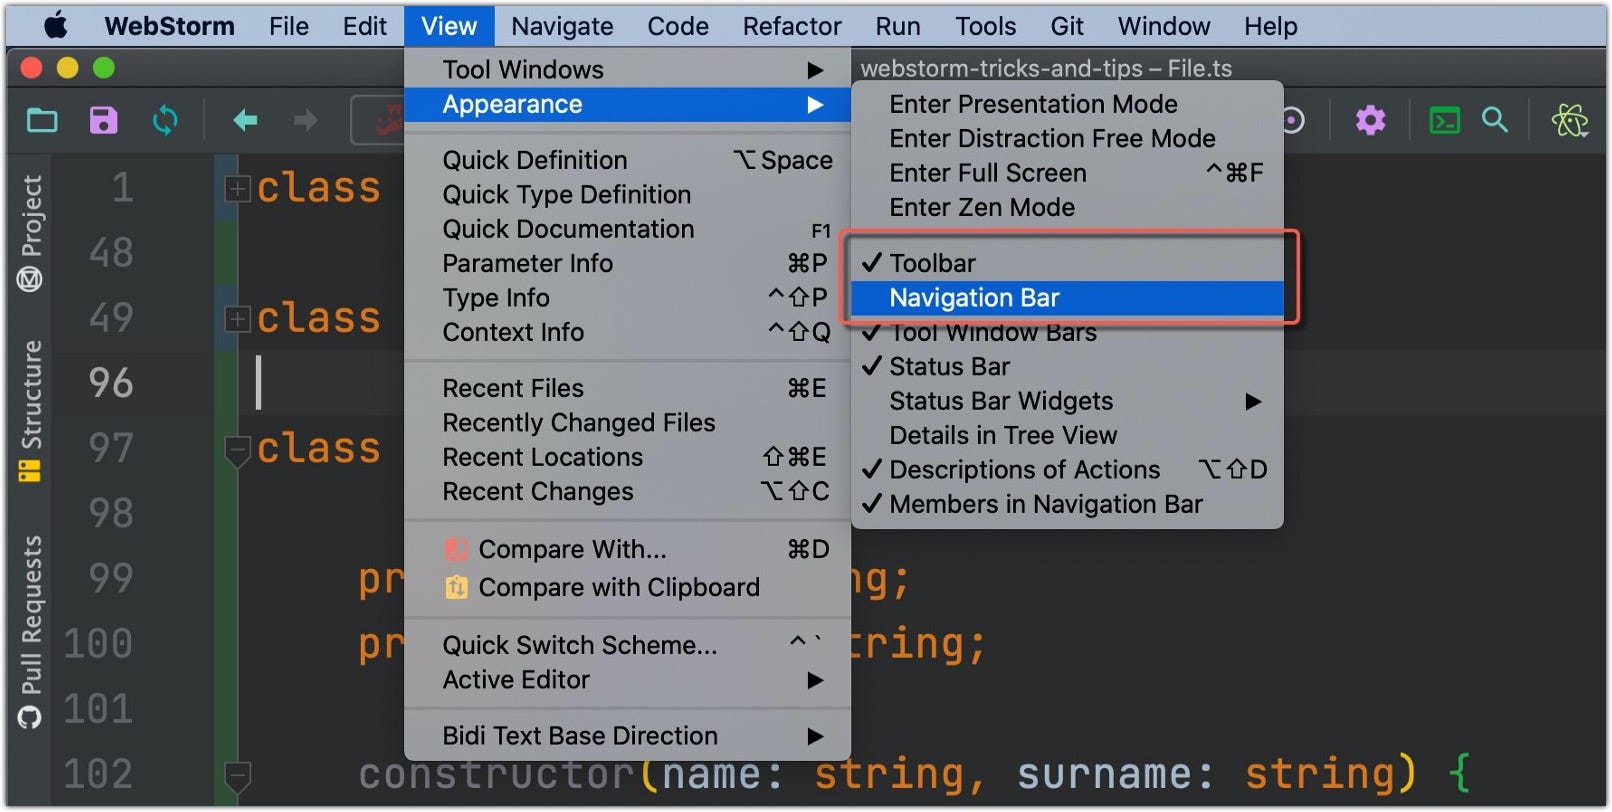
The point is that your workplace will become cleaner and you could just invoke it only when you needed by using [ Command+Up / ⌘↑] hotkeys “Jump to Navigation Bar” action:


⚠️ NOTE: You can use the ‘Show Source’ action by pressing [ Command+Enter ] hotkey that will show you selected folder in the Project window or create a new File/Folder inside of selected folder by pressing [Command+N] hotkey


33. Editor tabs
If you like working with Tabs enabled, you can place your tab in the Top/ Left/ Bottom/ Right or None. Let’s set the placement to the Left:
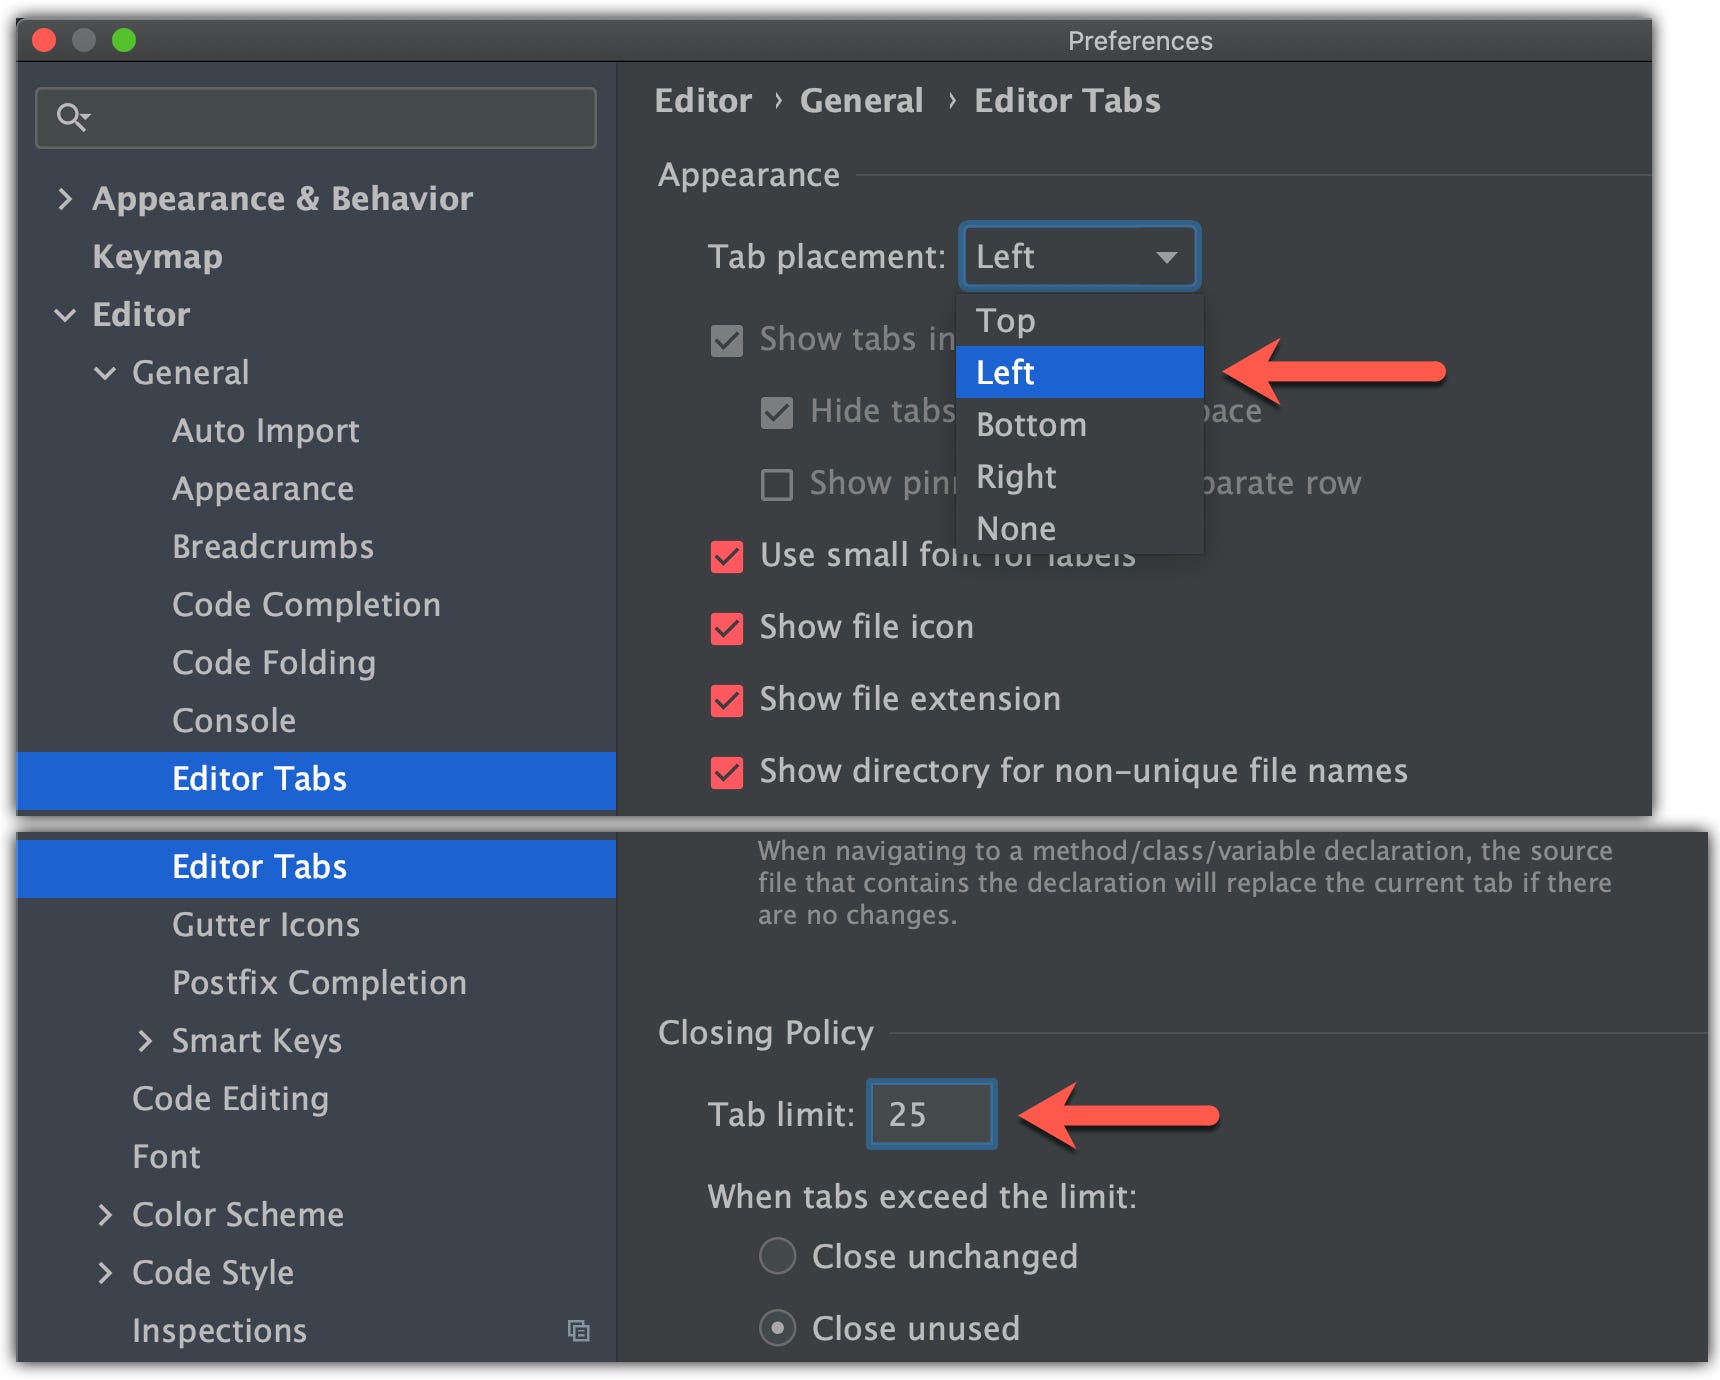
It will have some benefits, now your tabs will not mess up with names and you will see the whole list with the full names:

Or you can just disable them and use “Recent files” -> [ Command+E ] hotkey…
… and navigating through the Project window only. You can hide/show it by using [Command+1 / ⌘1] hotkey:

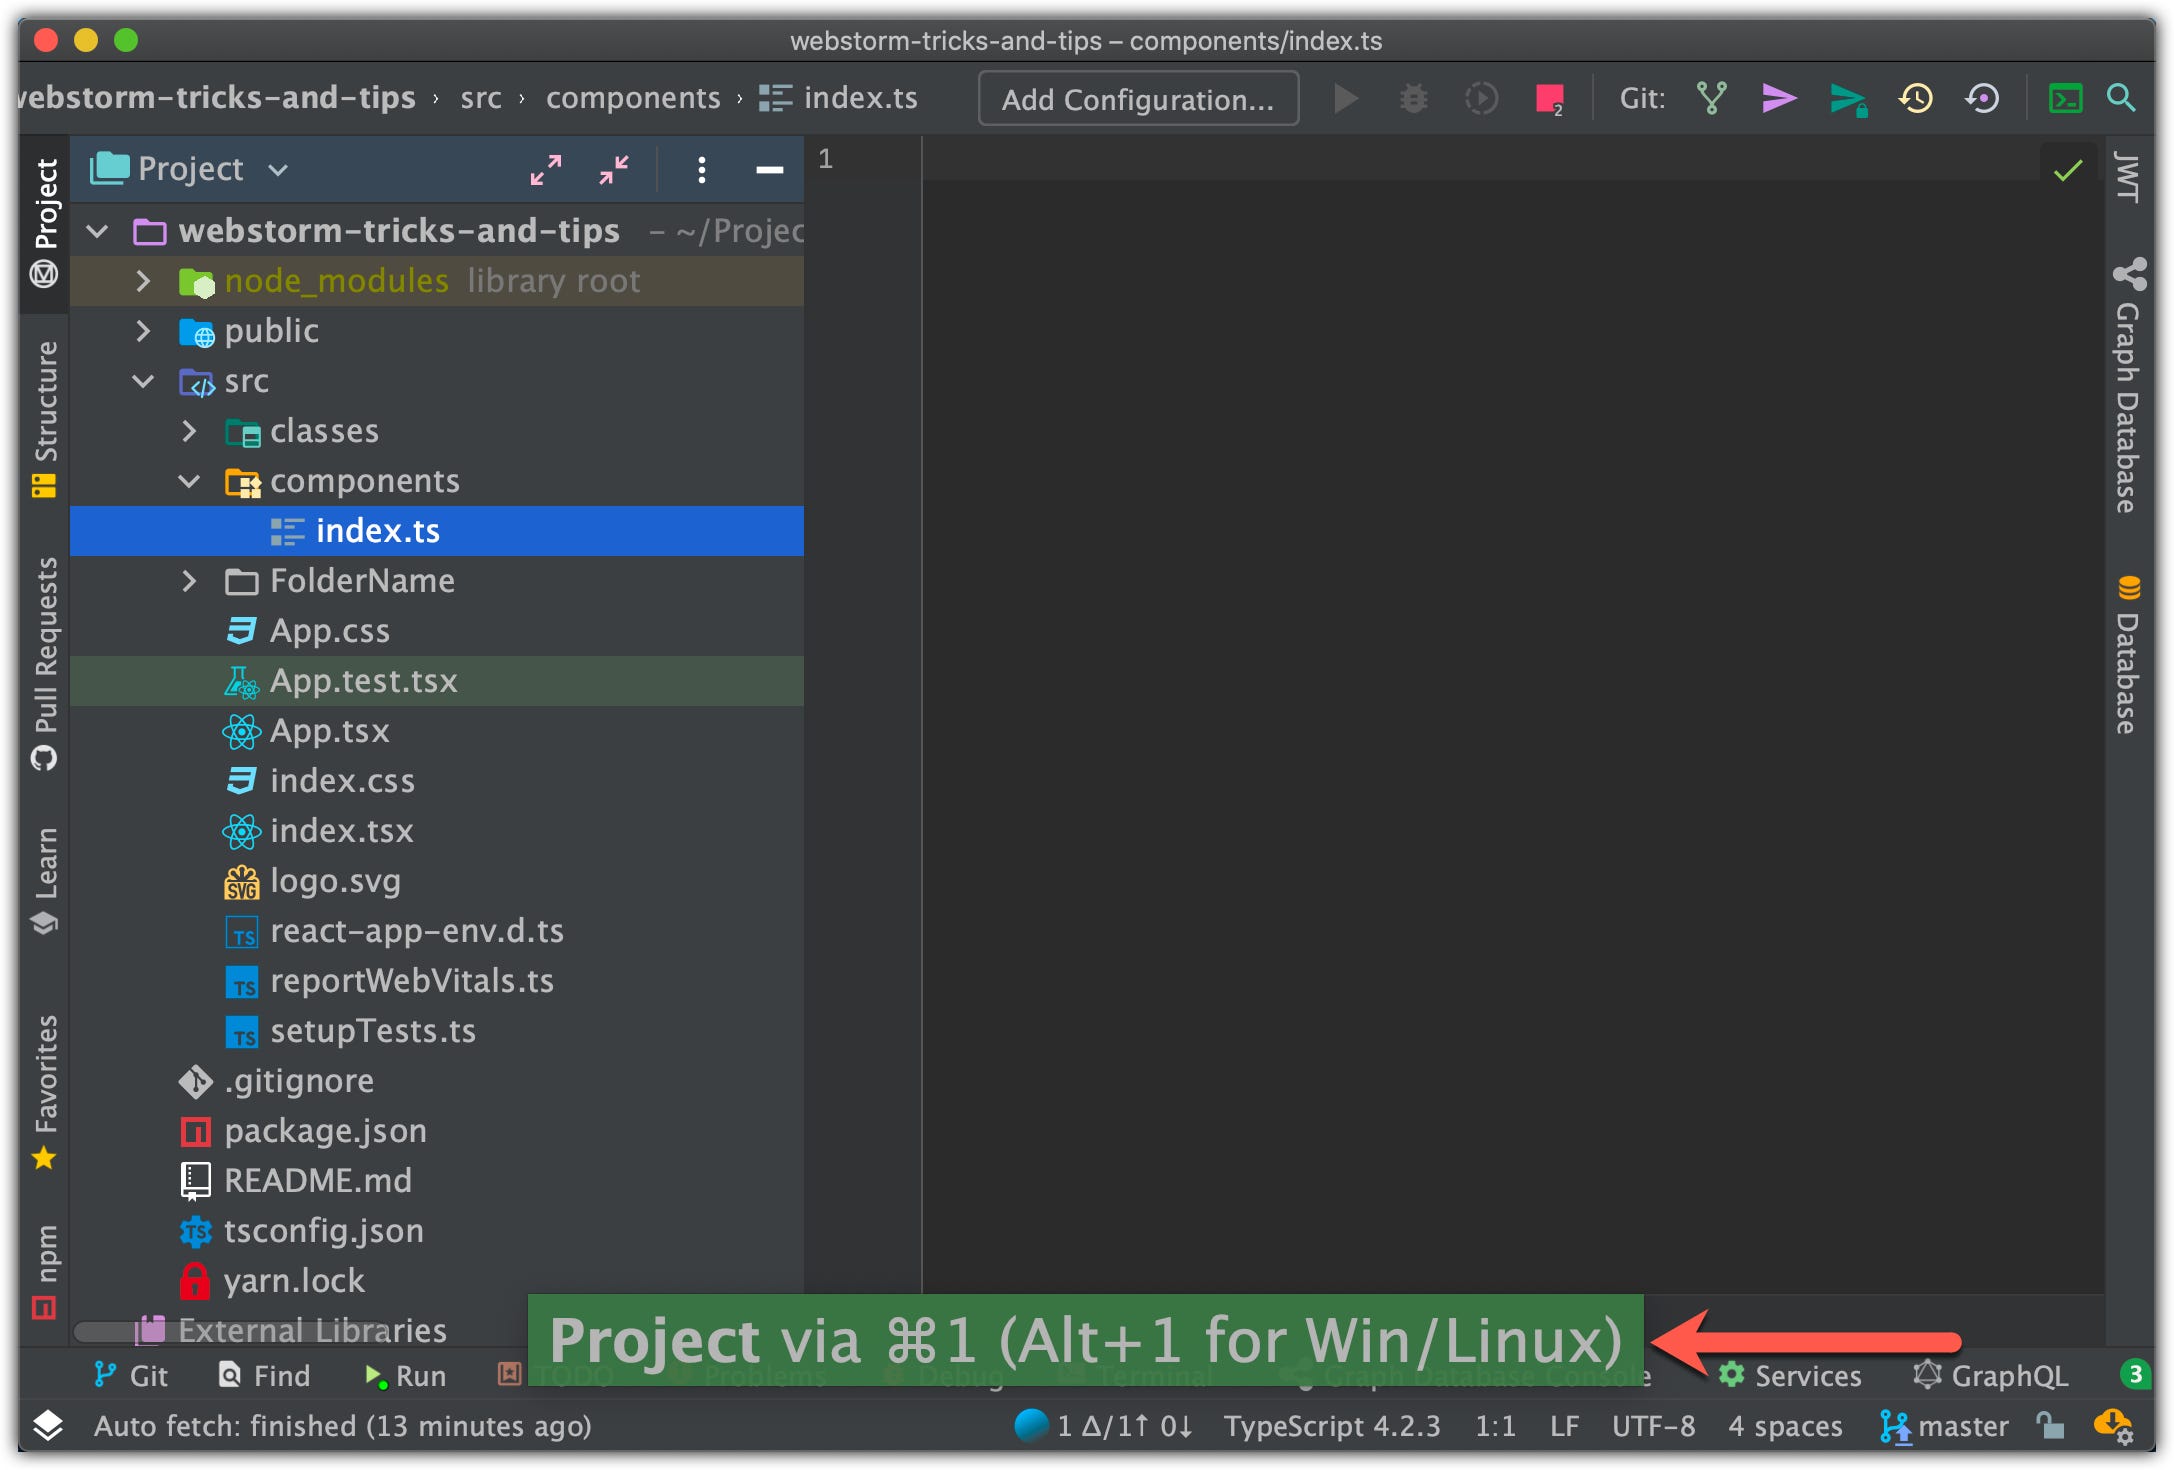
You can switch between the Project and Editor tab only with ⌘1 and ESC, let’s take a look how it works:
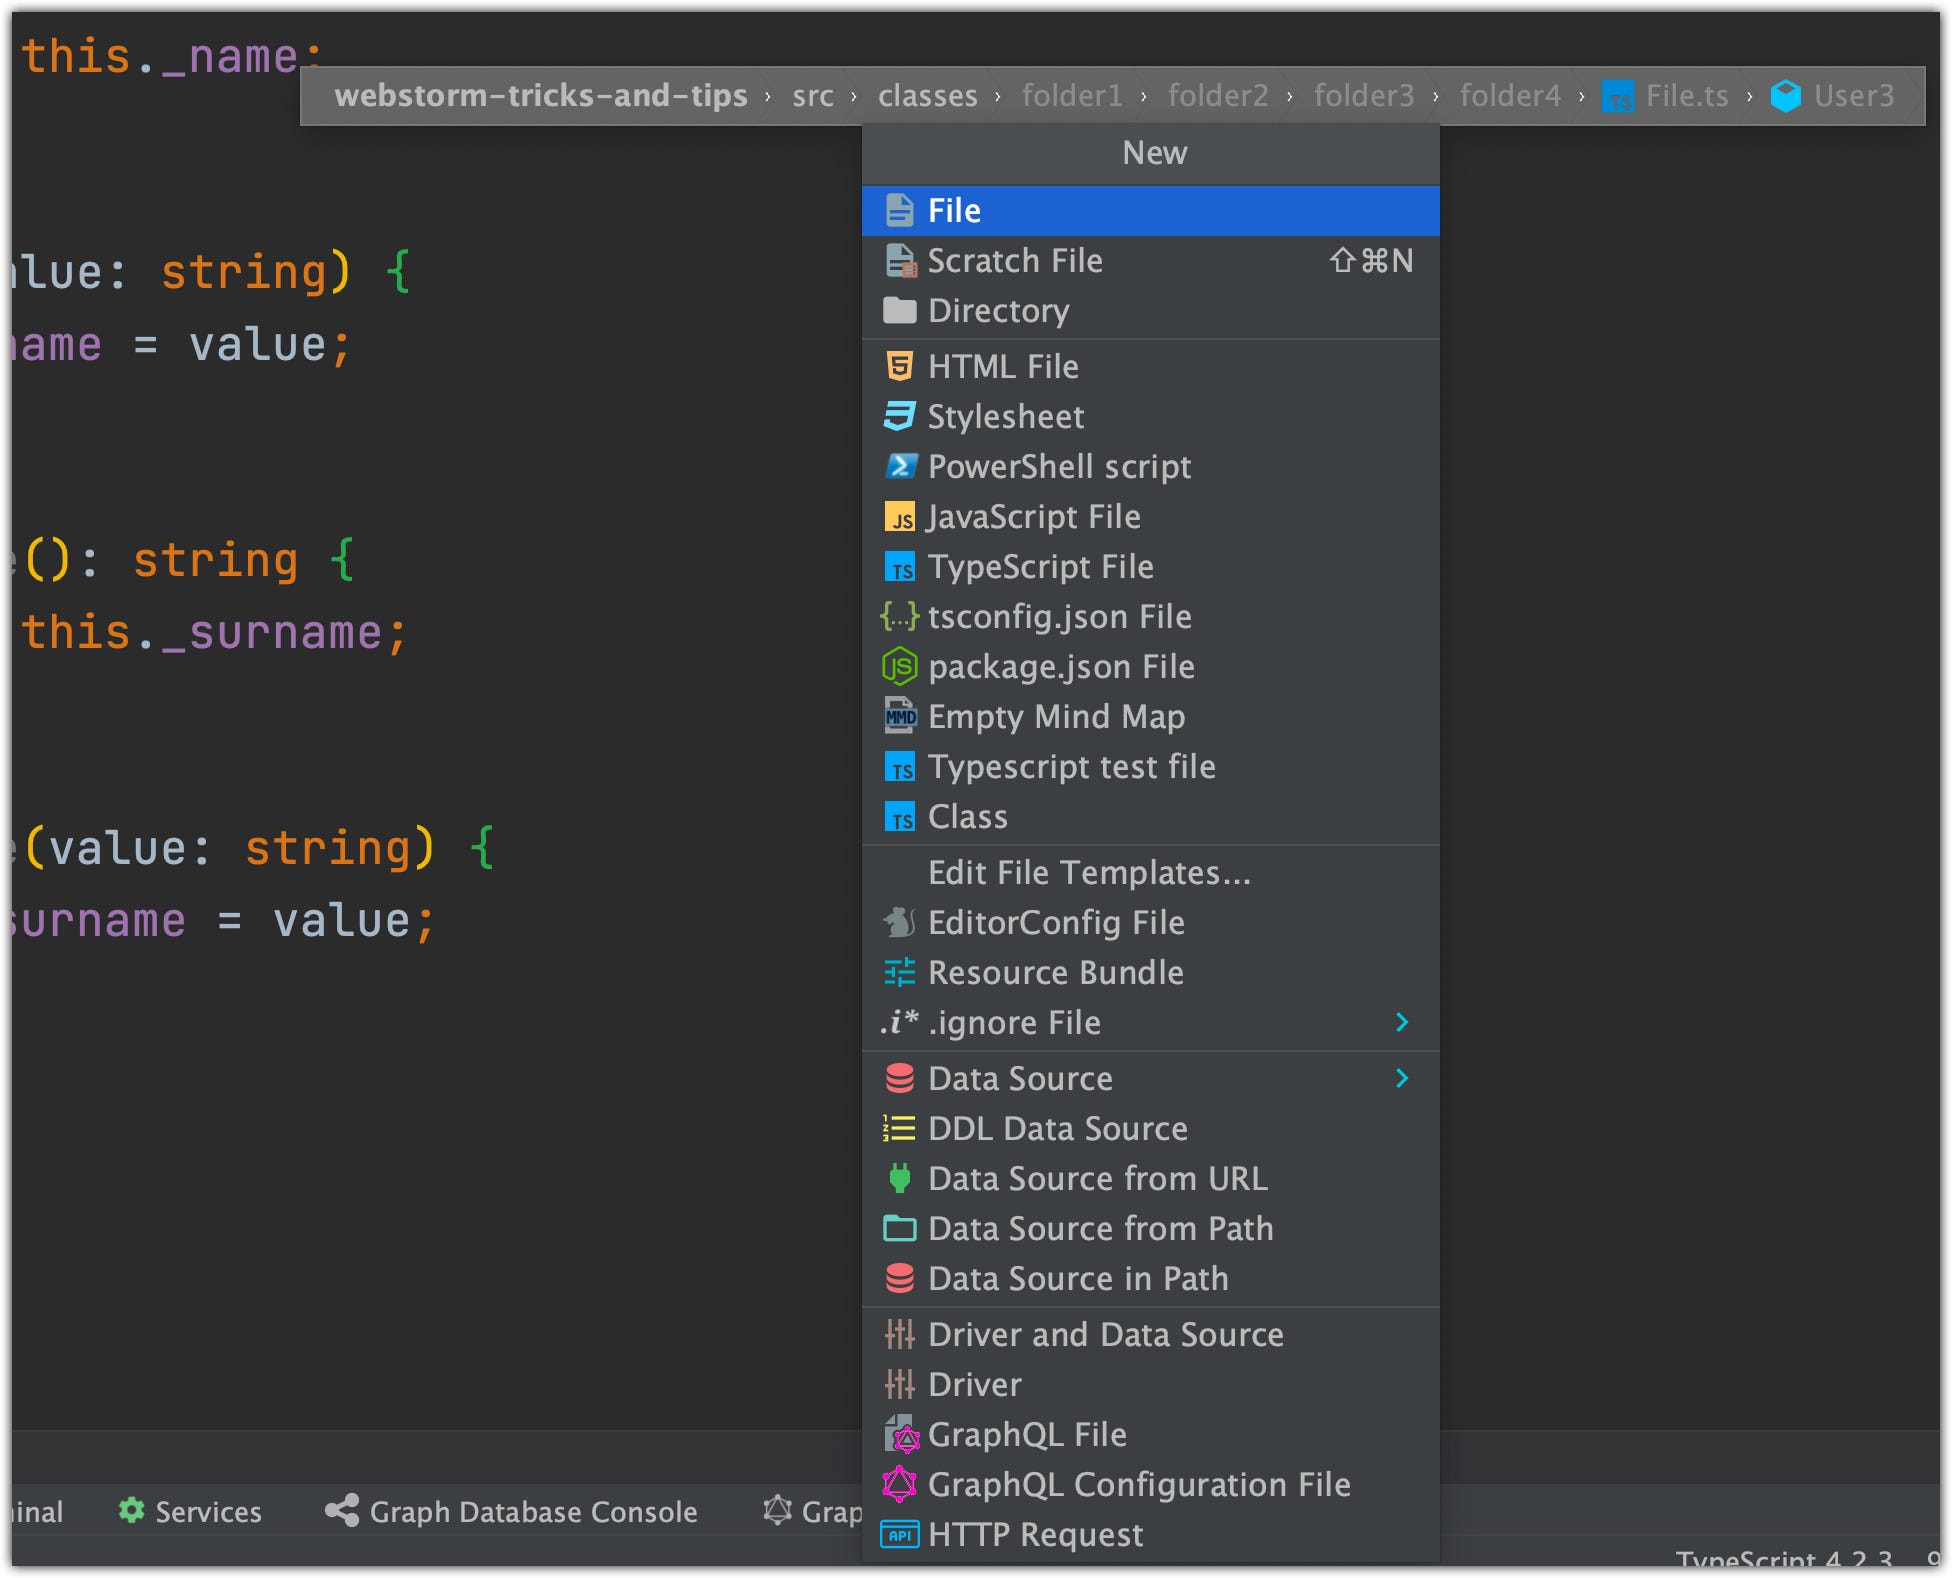
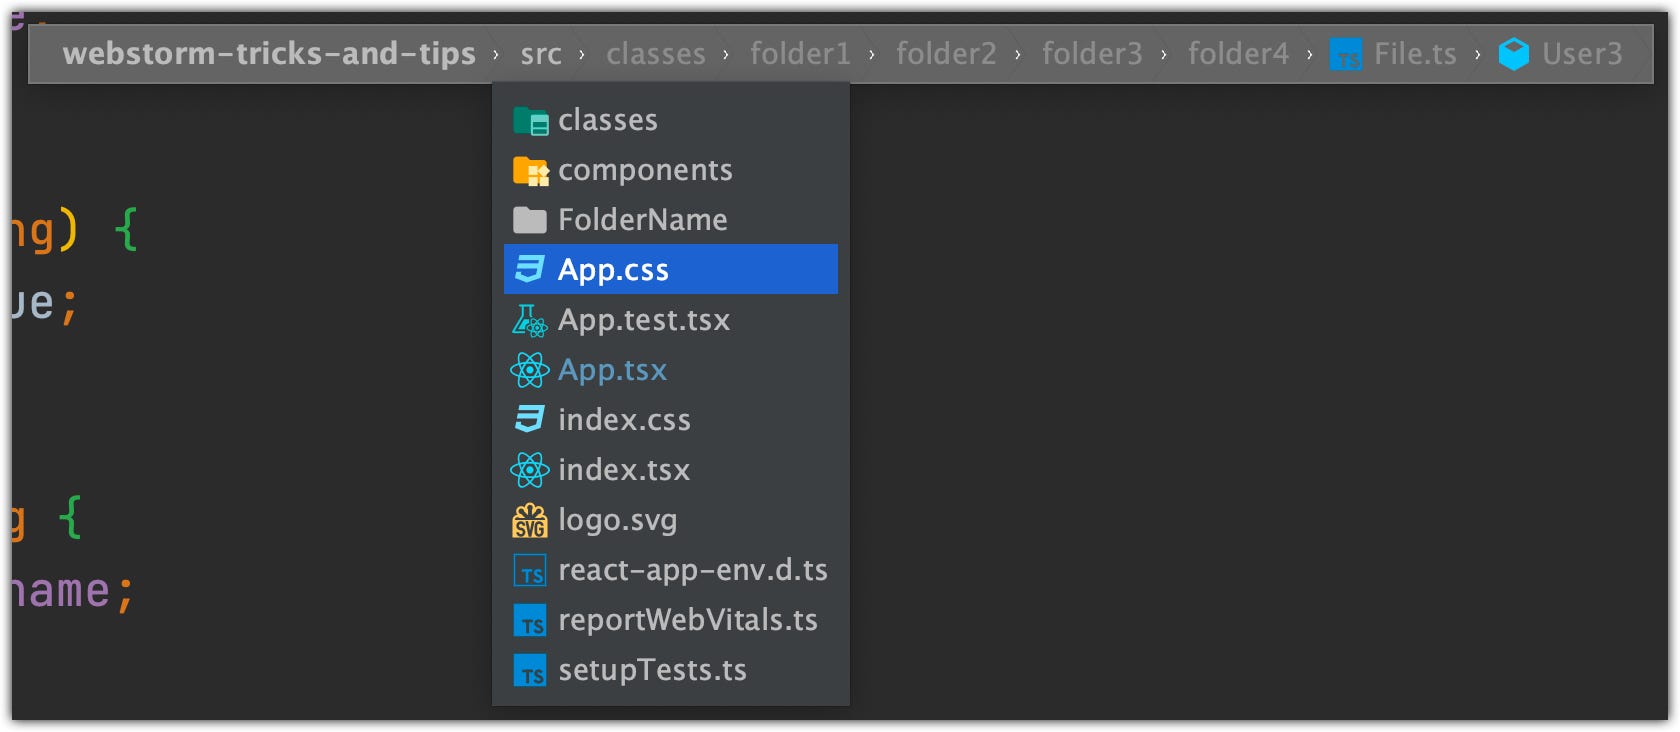
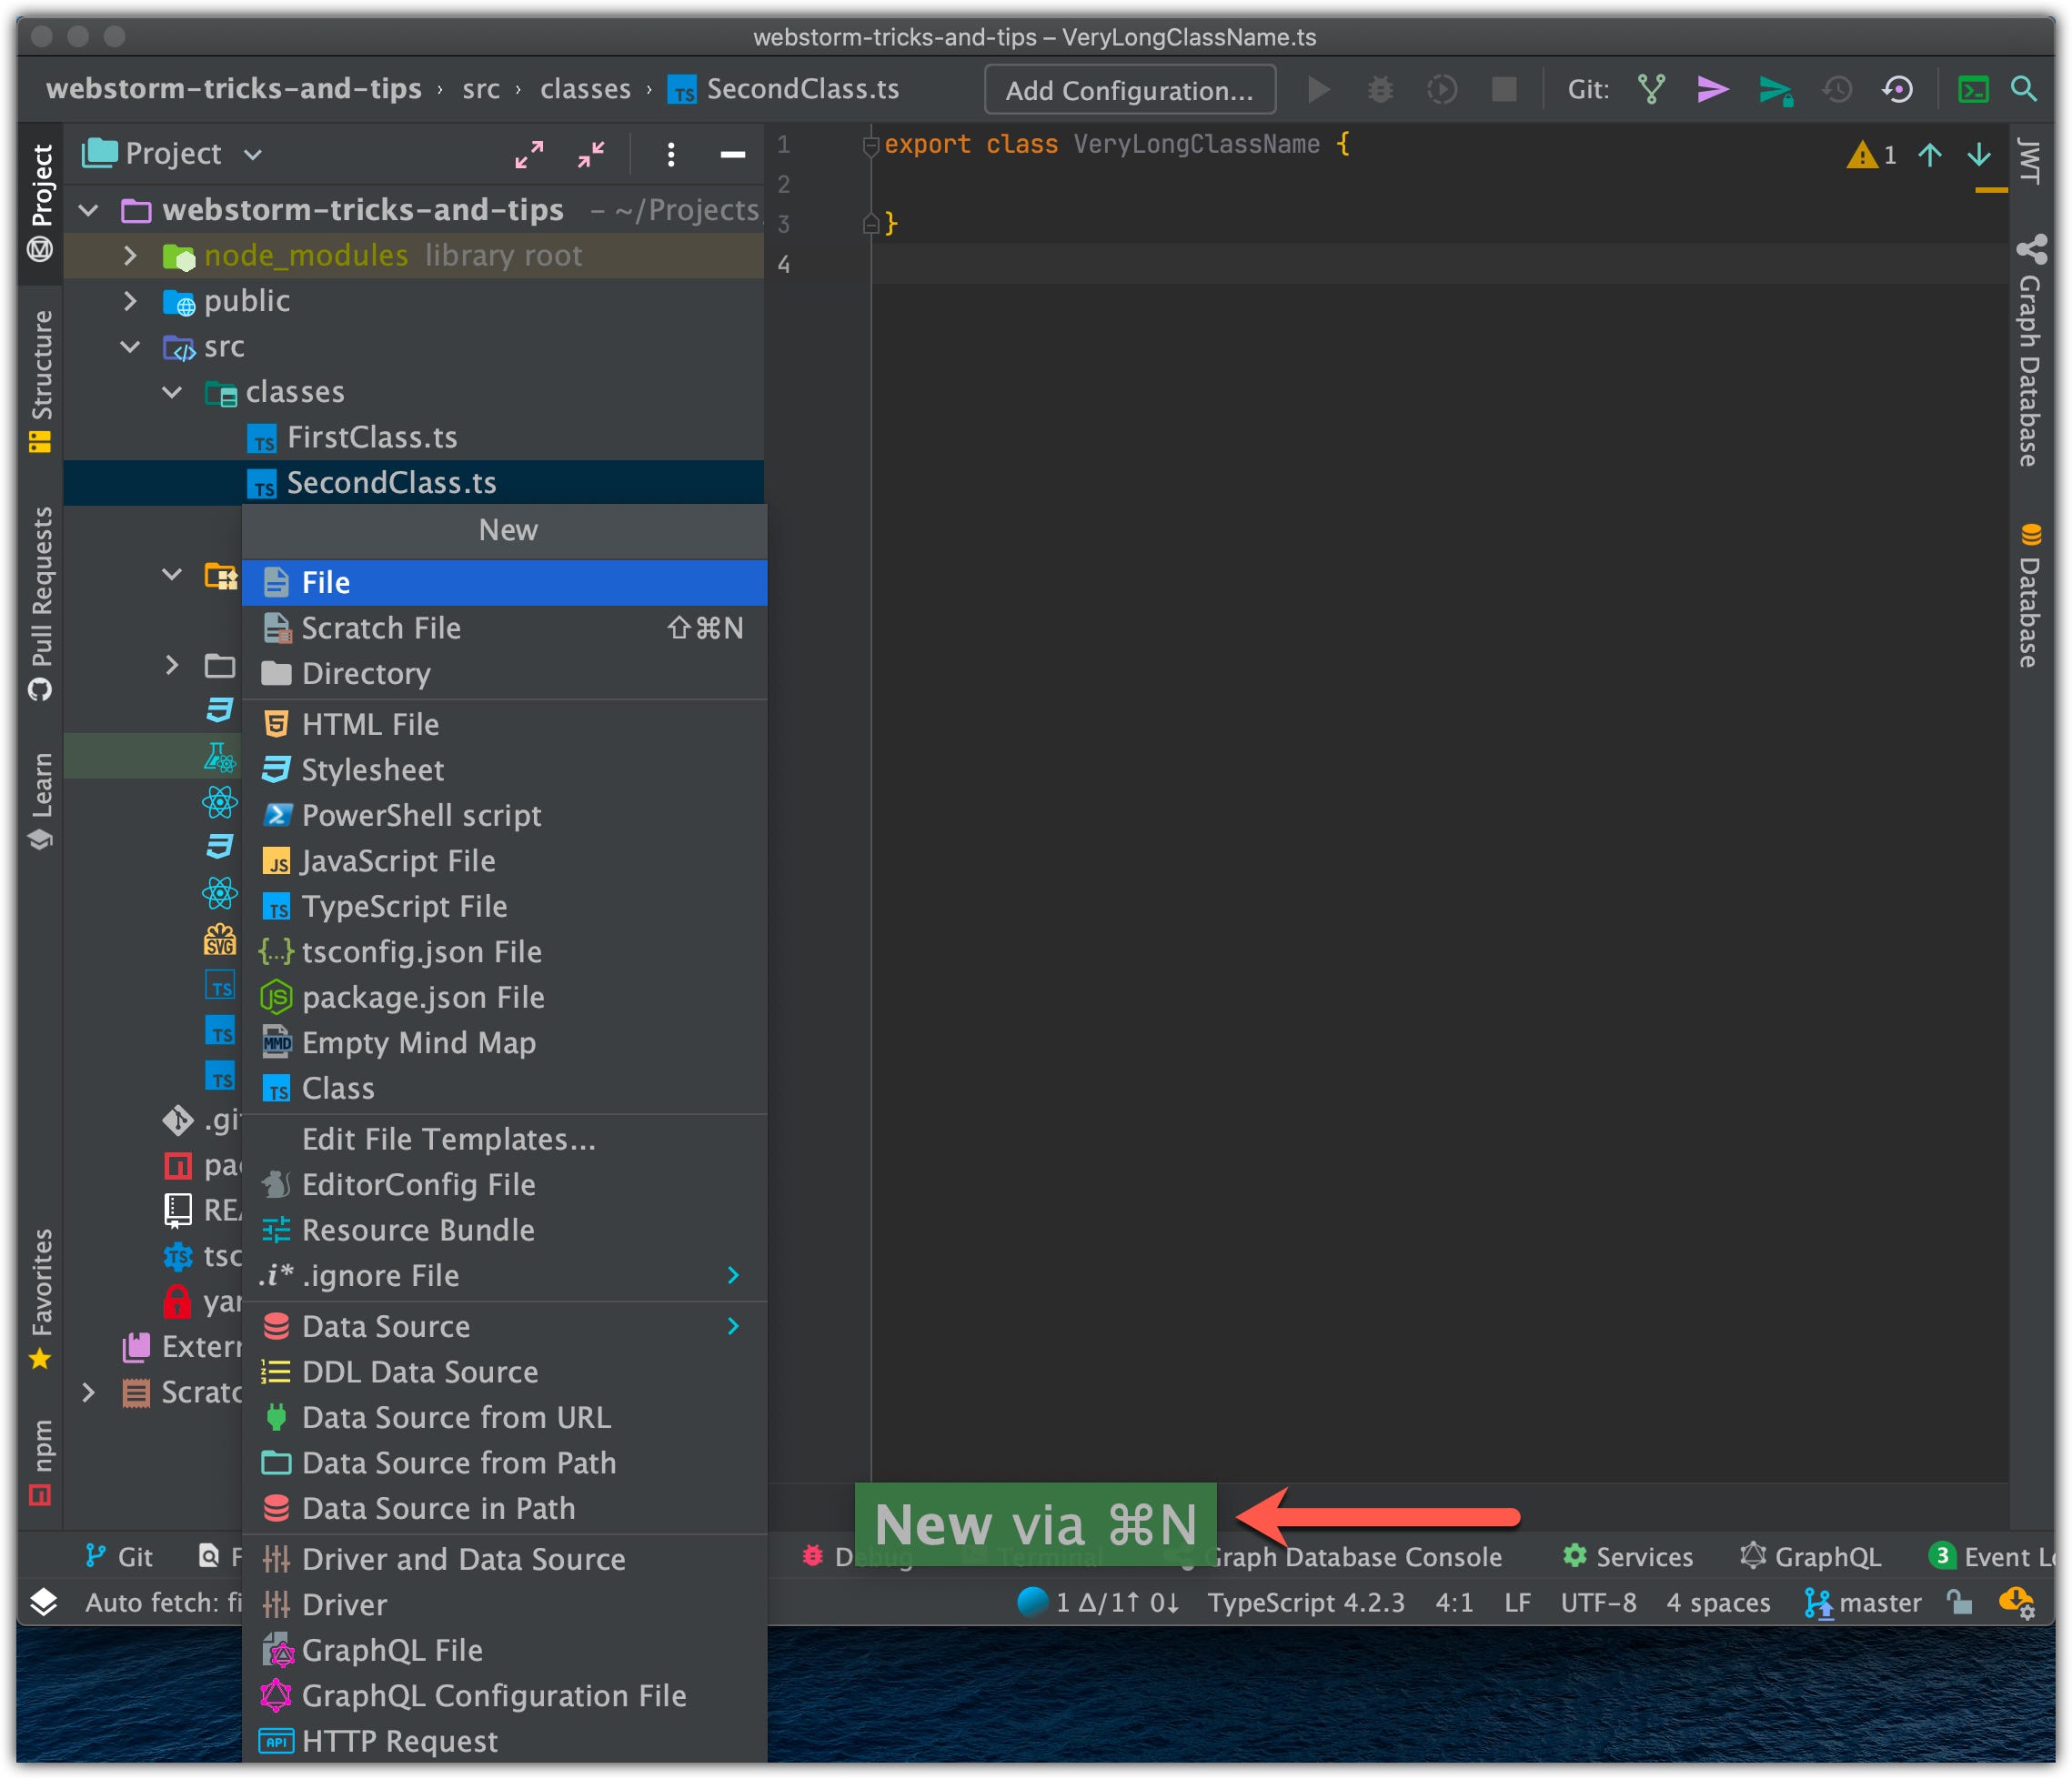
34. Create a new file
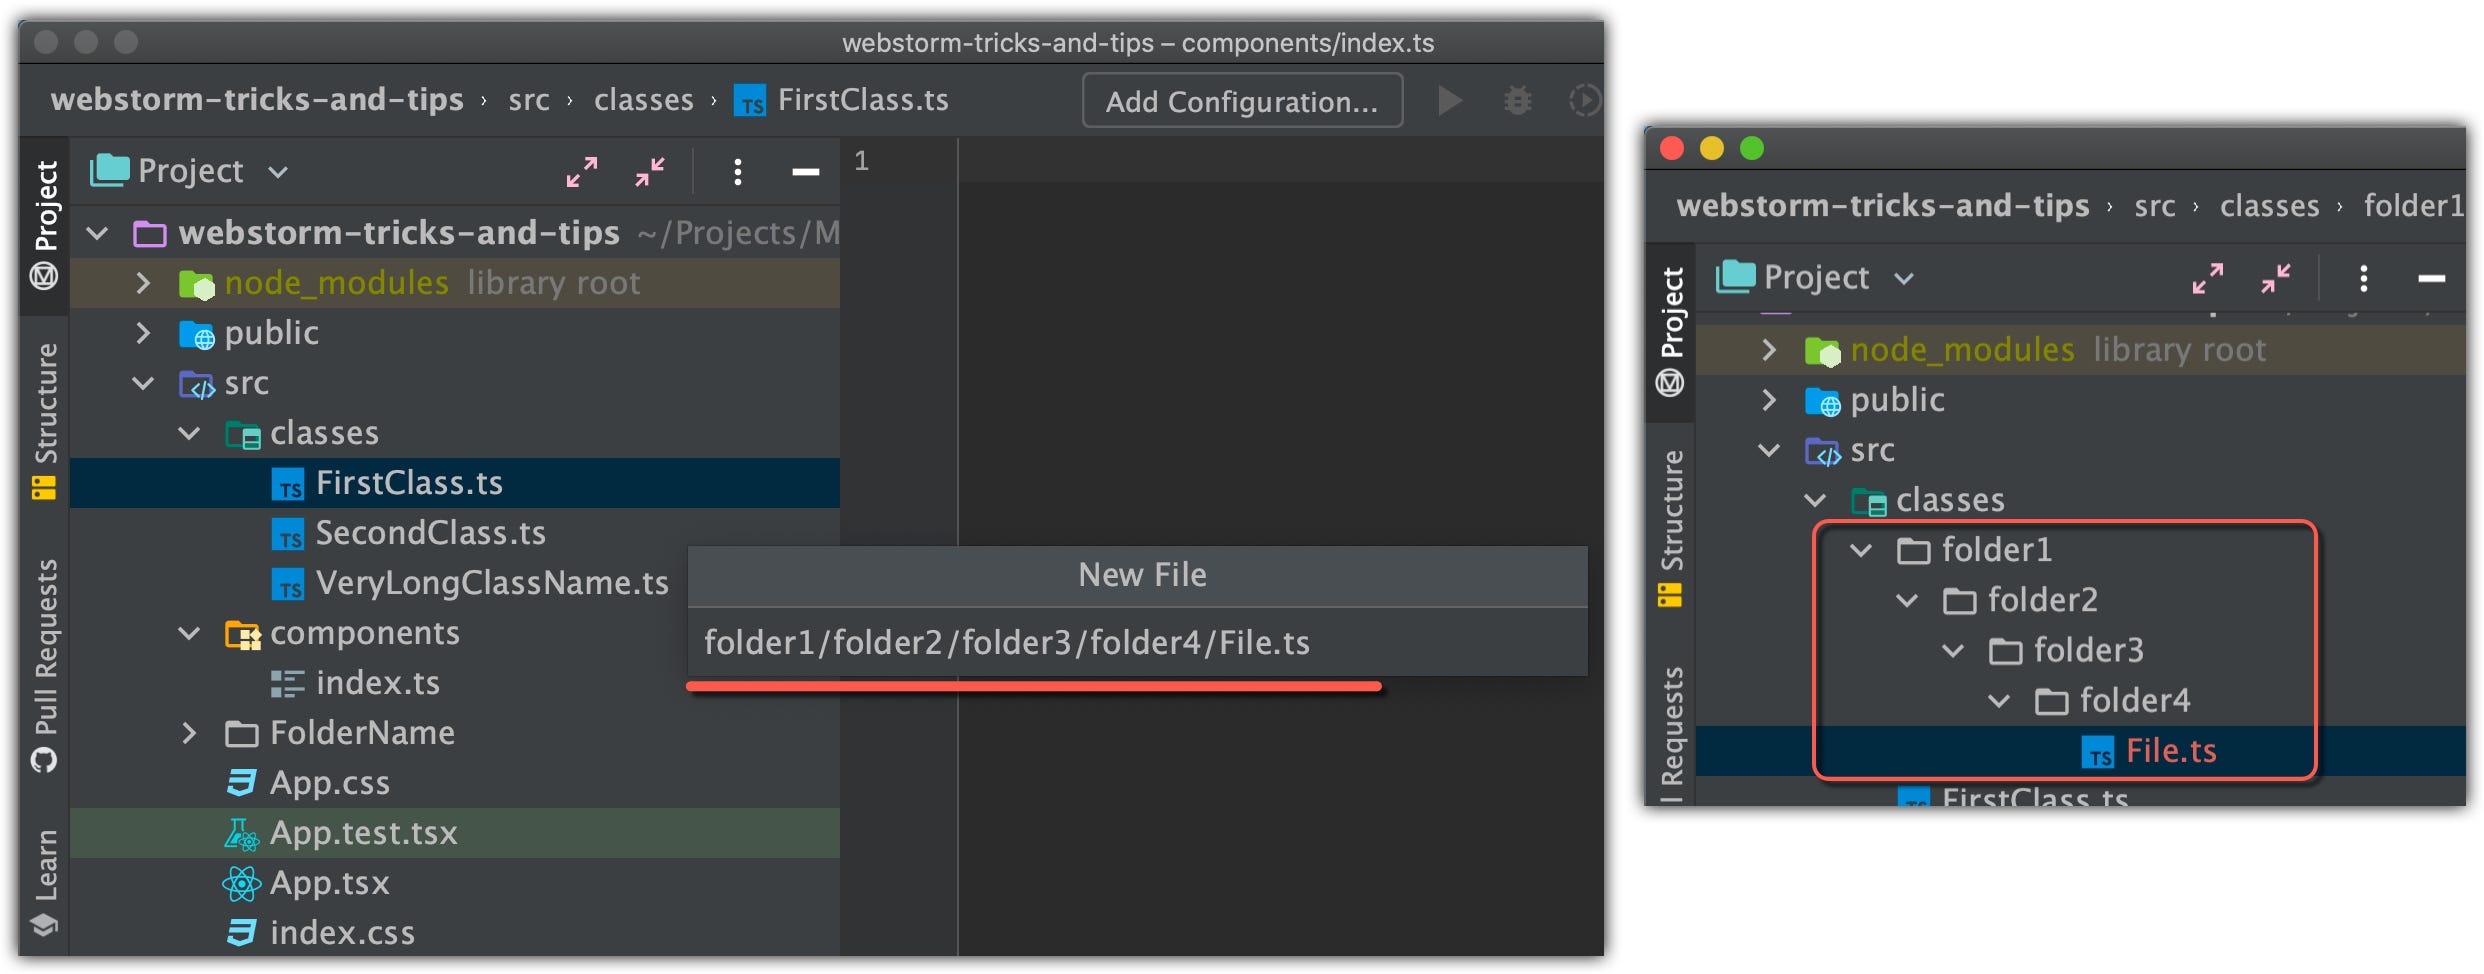
If you want to create a new file inside a folder you can just select a folder in which you want to create a file or select a file in that folder and press [Command+N / ⌘N] hotkey:
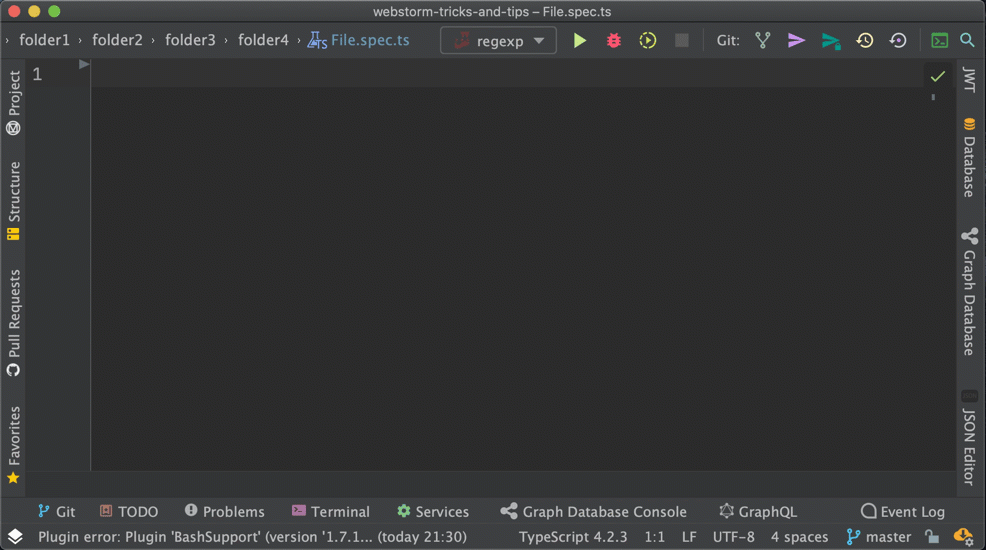
⚠️ NOTE: If you want to create a file inside folders you can create it by separate folders with use of a a slash: folder1/folder2/folder3/**File.ts**:
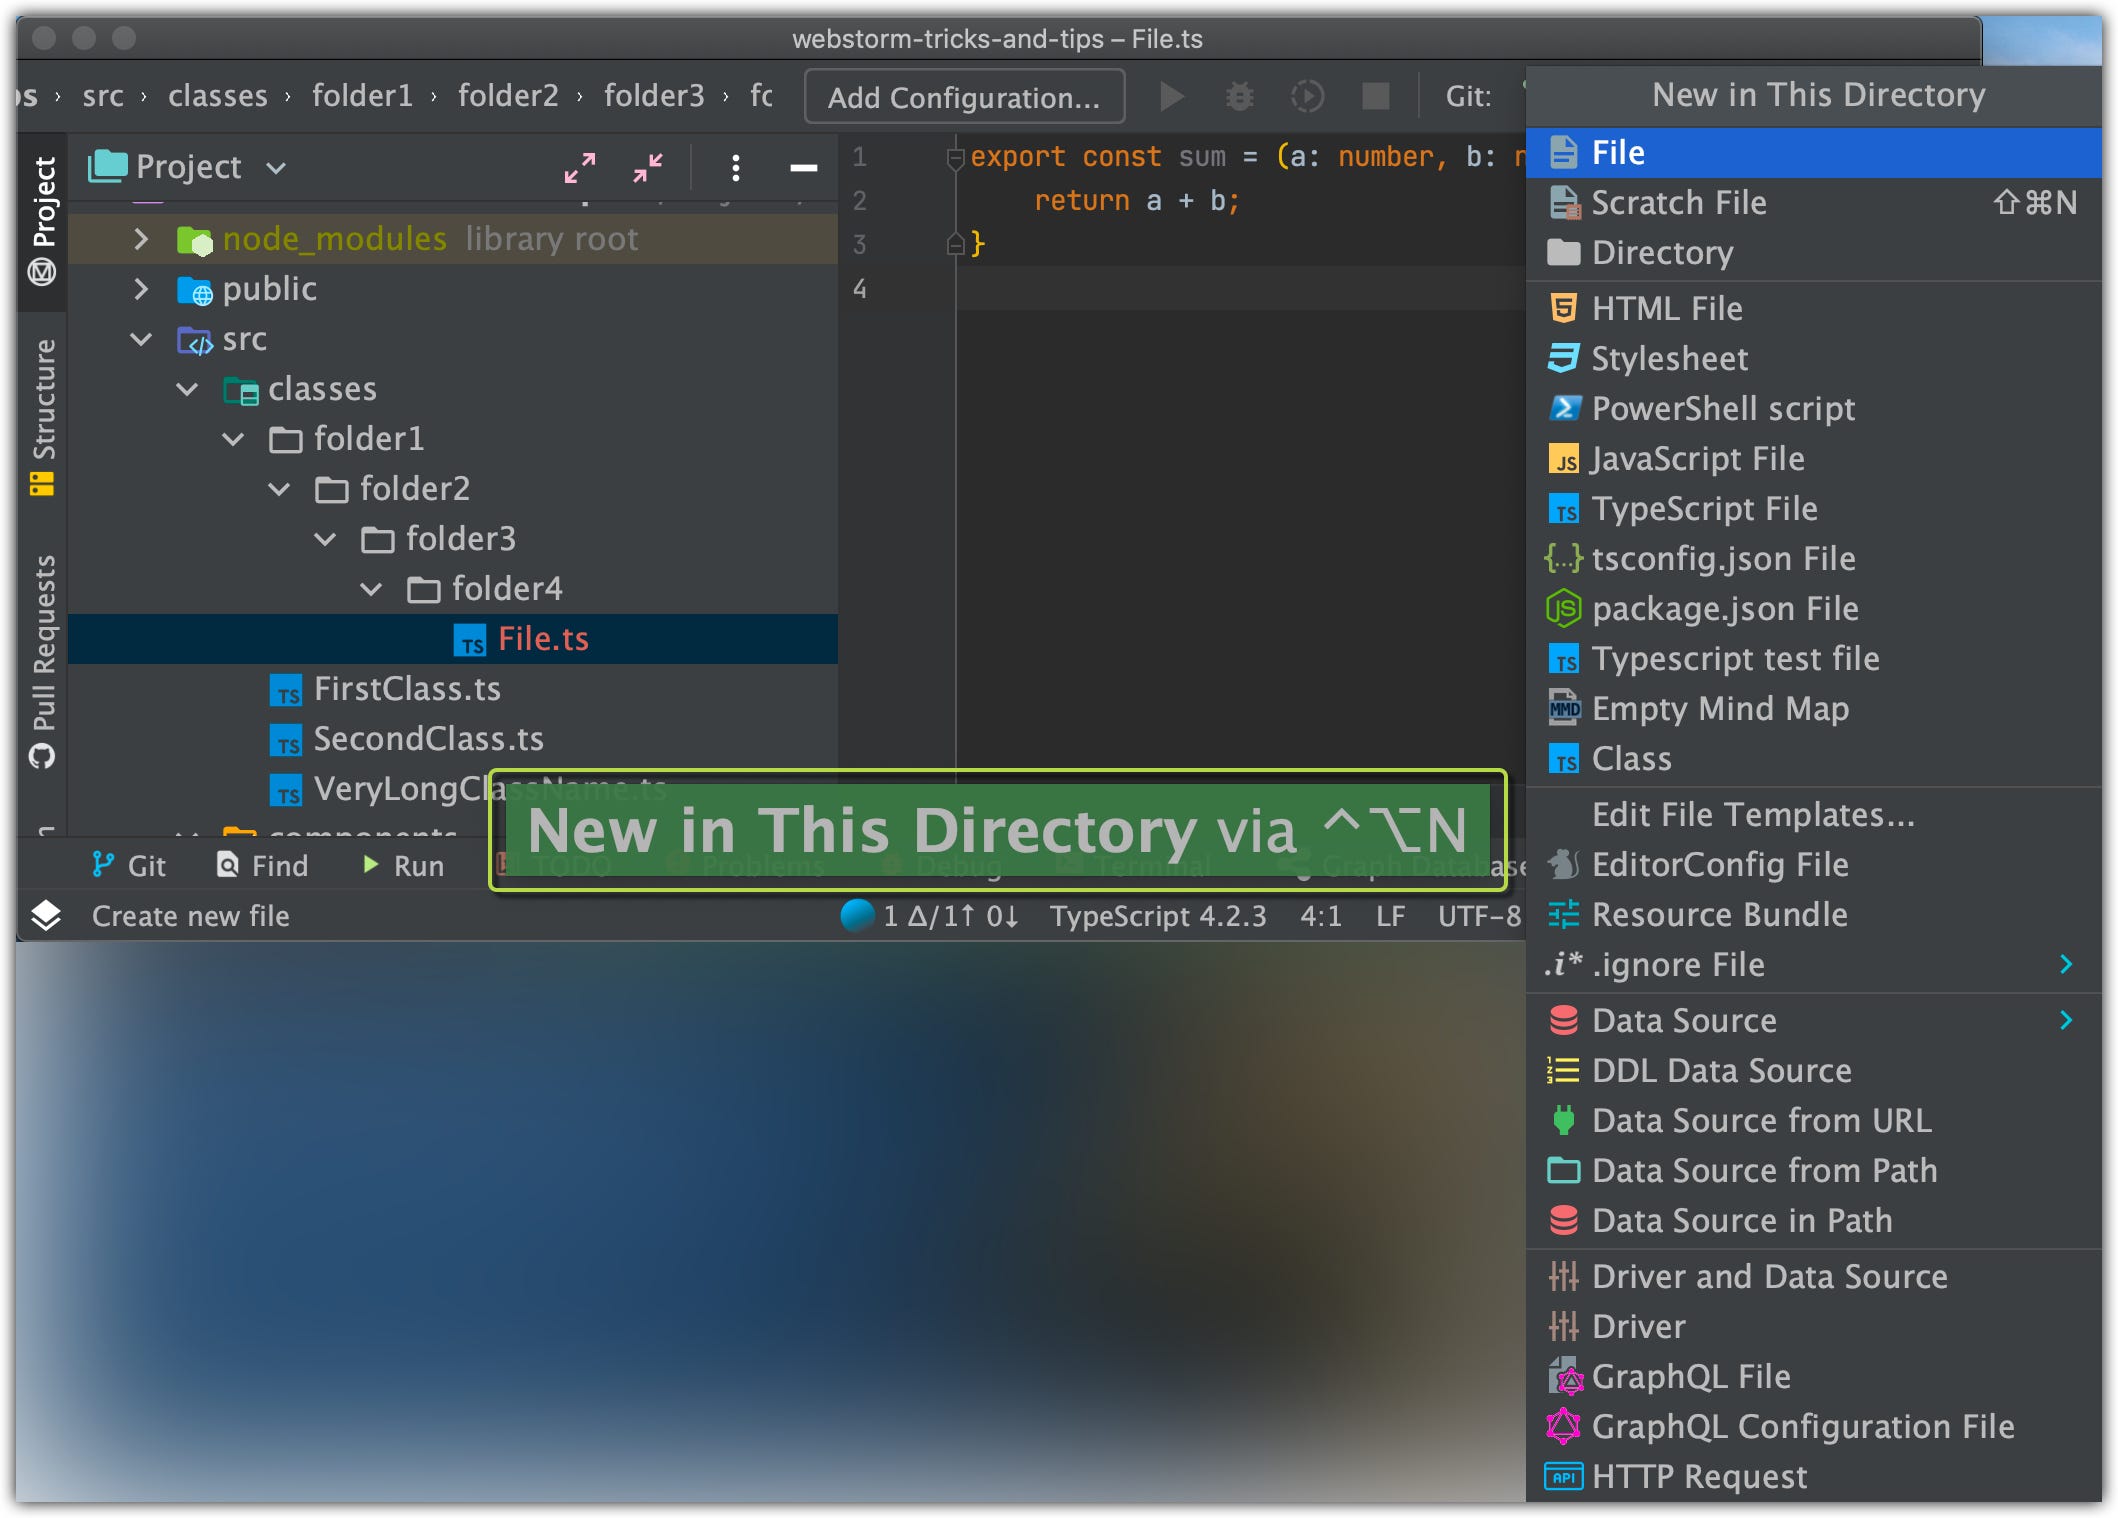
⚠️ NOTE: If you open a file for editing, and you want to create a new file inside of a current folder you can use the ‘New in This Directory’ action [Control+Option+N / ⌃⌥N] hotkey:
35. Create file template
You can create your own File Templates so that when you ‘Create new file’ your own template will be in that list.
Search for the file and code templates in ‘Search everywhere’ window:
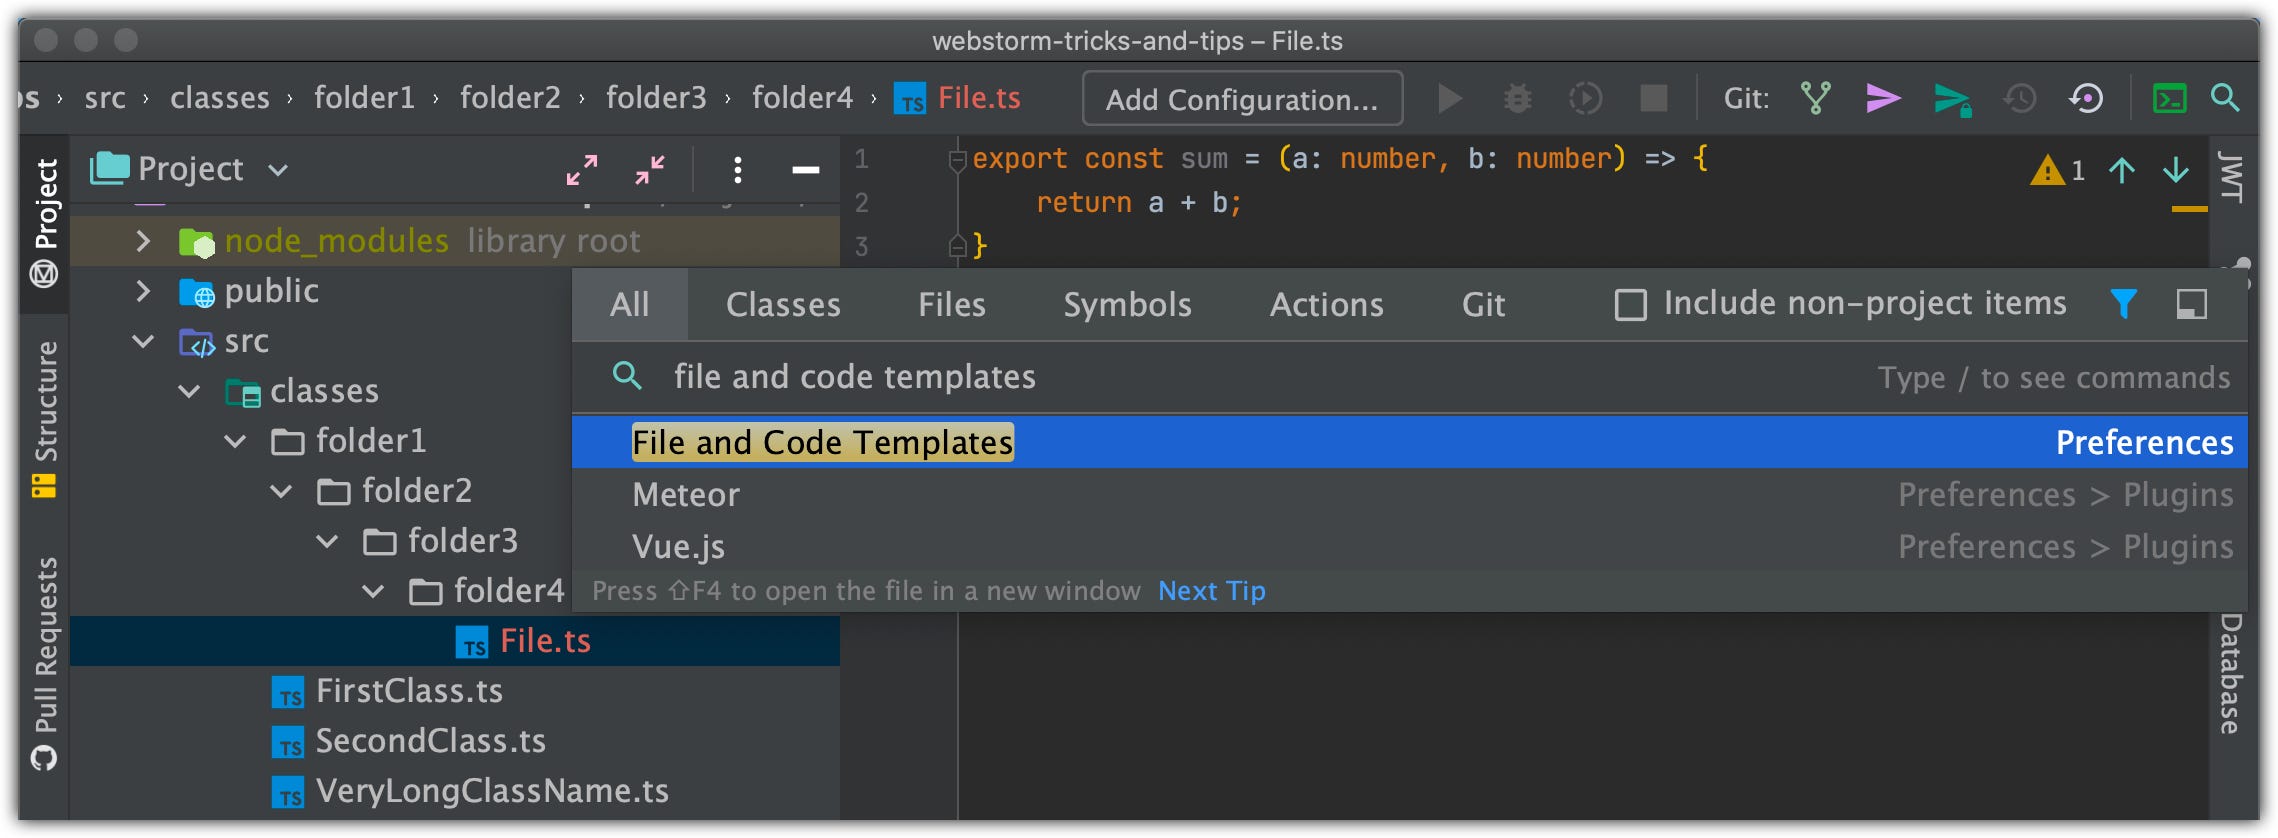
Or find it in IDE’s Preferences window:
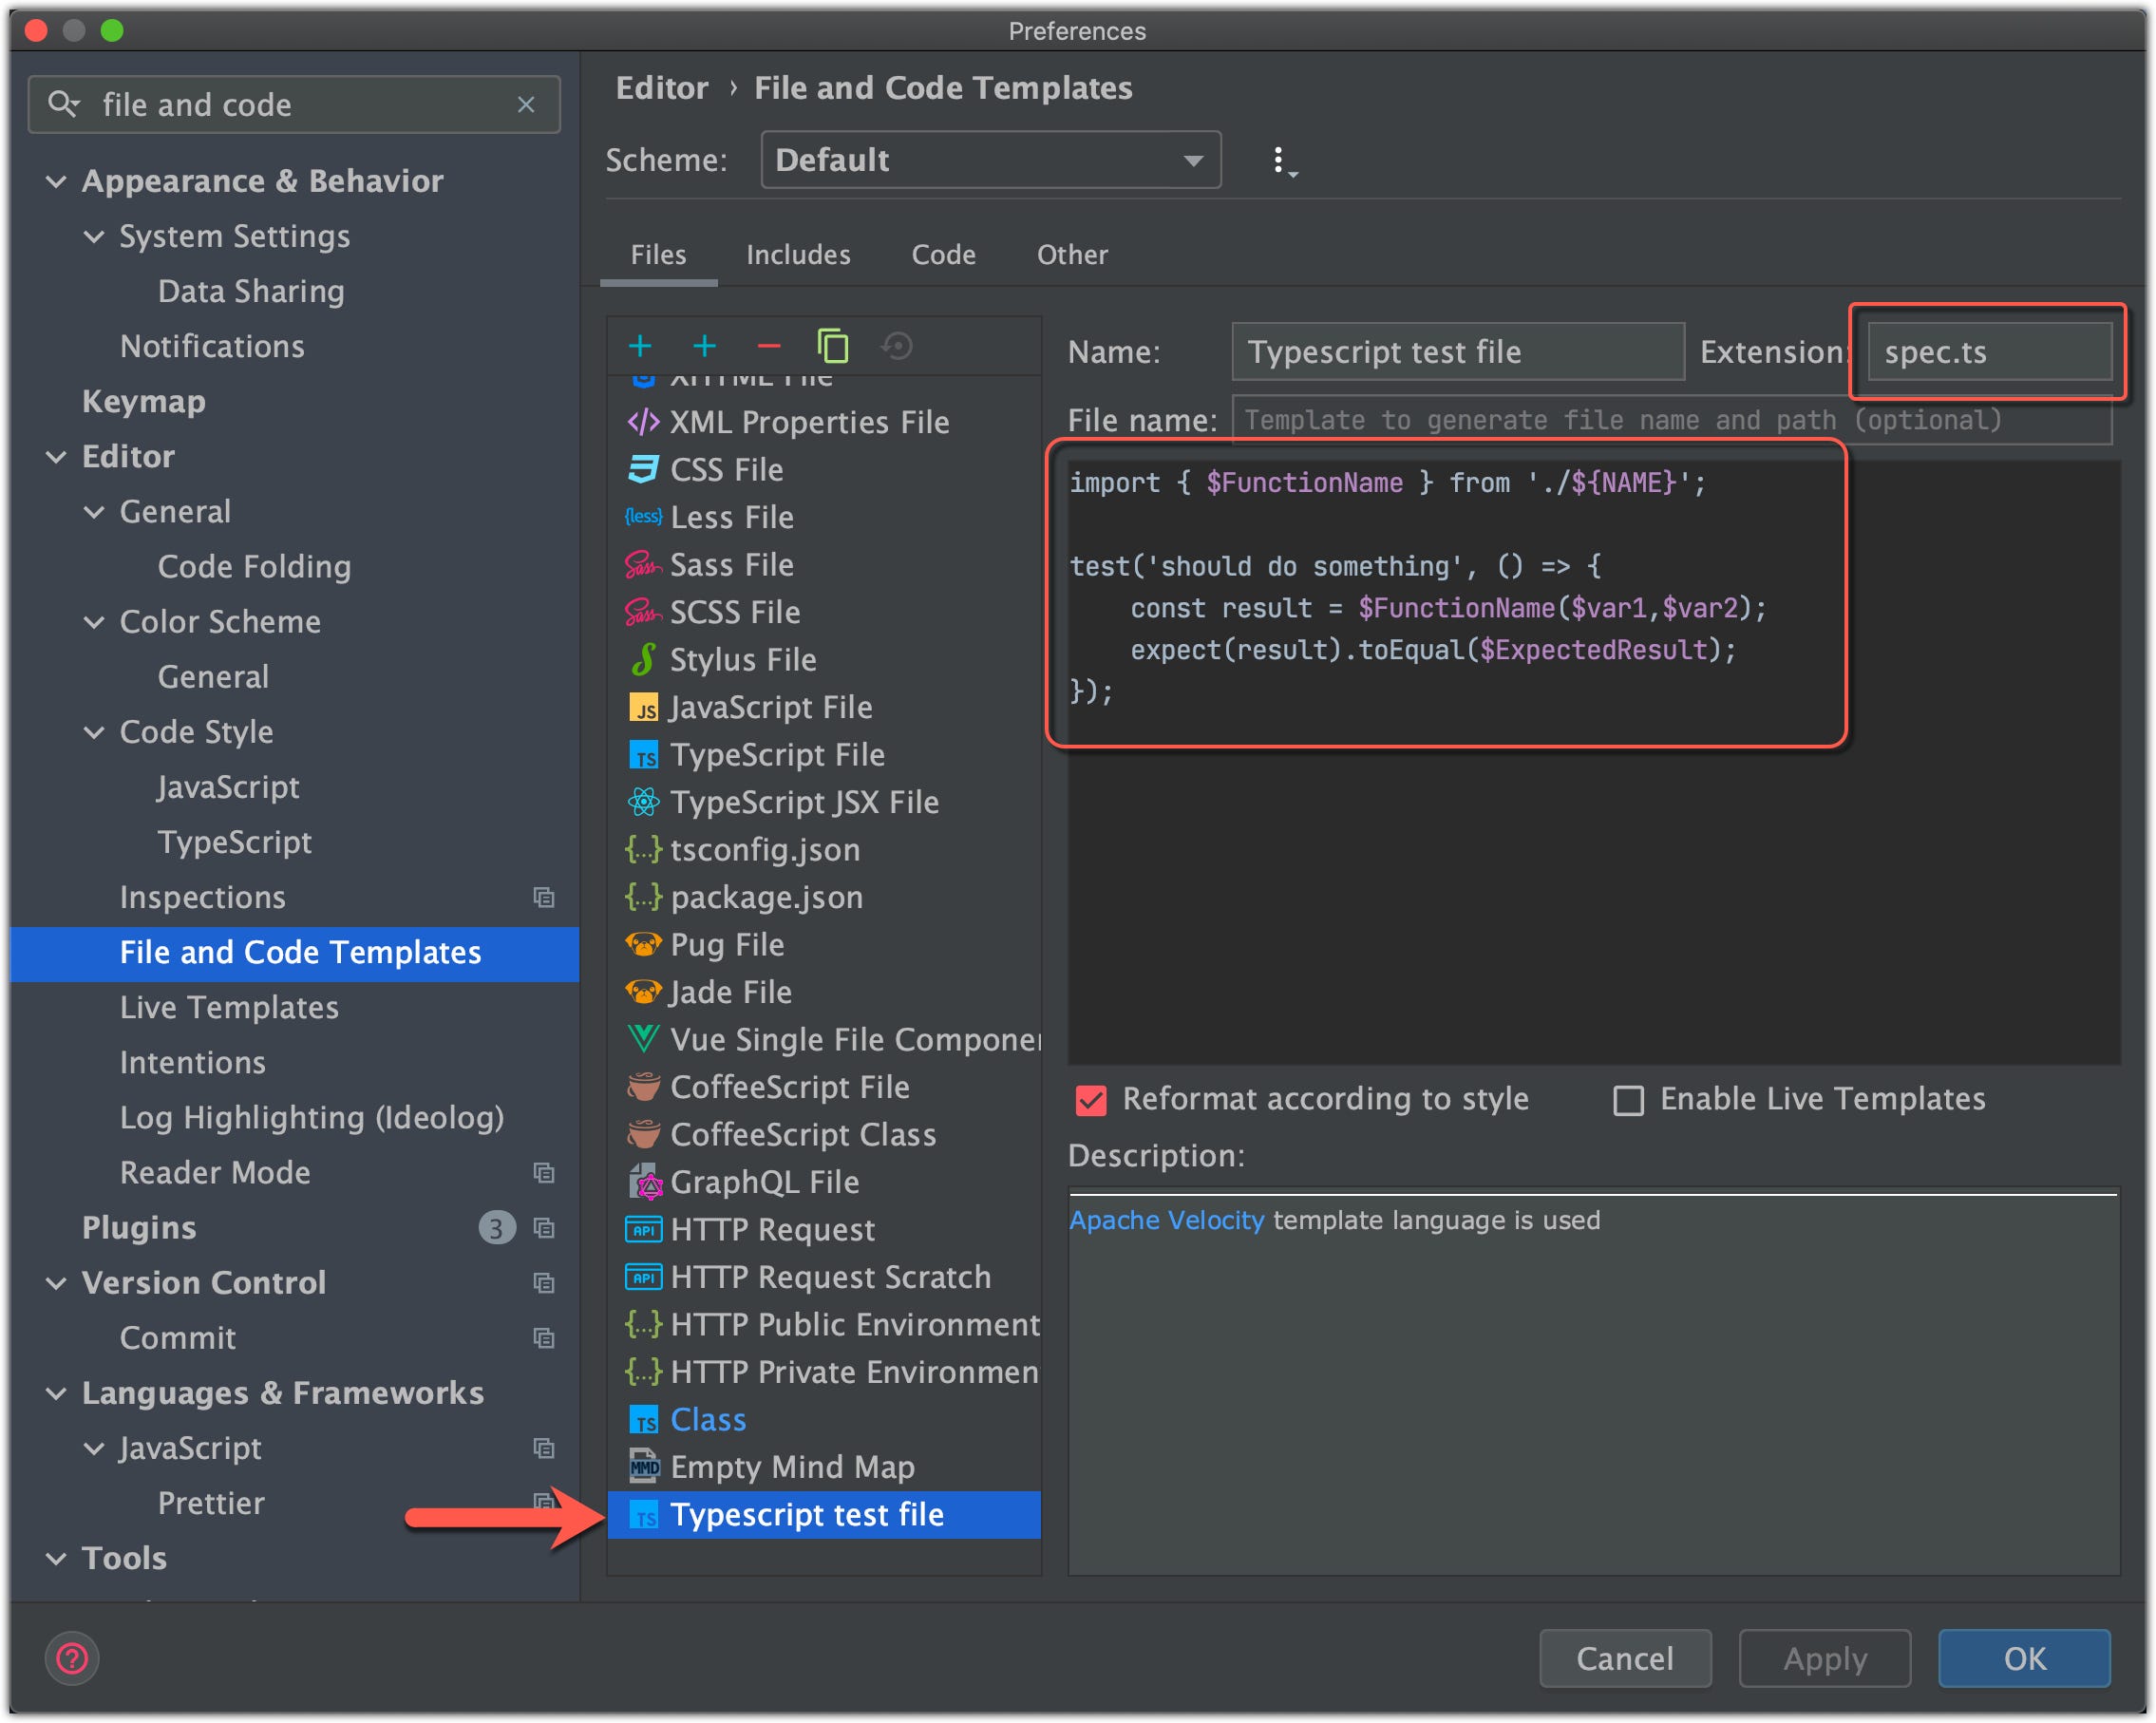
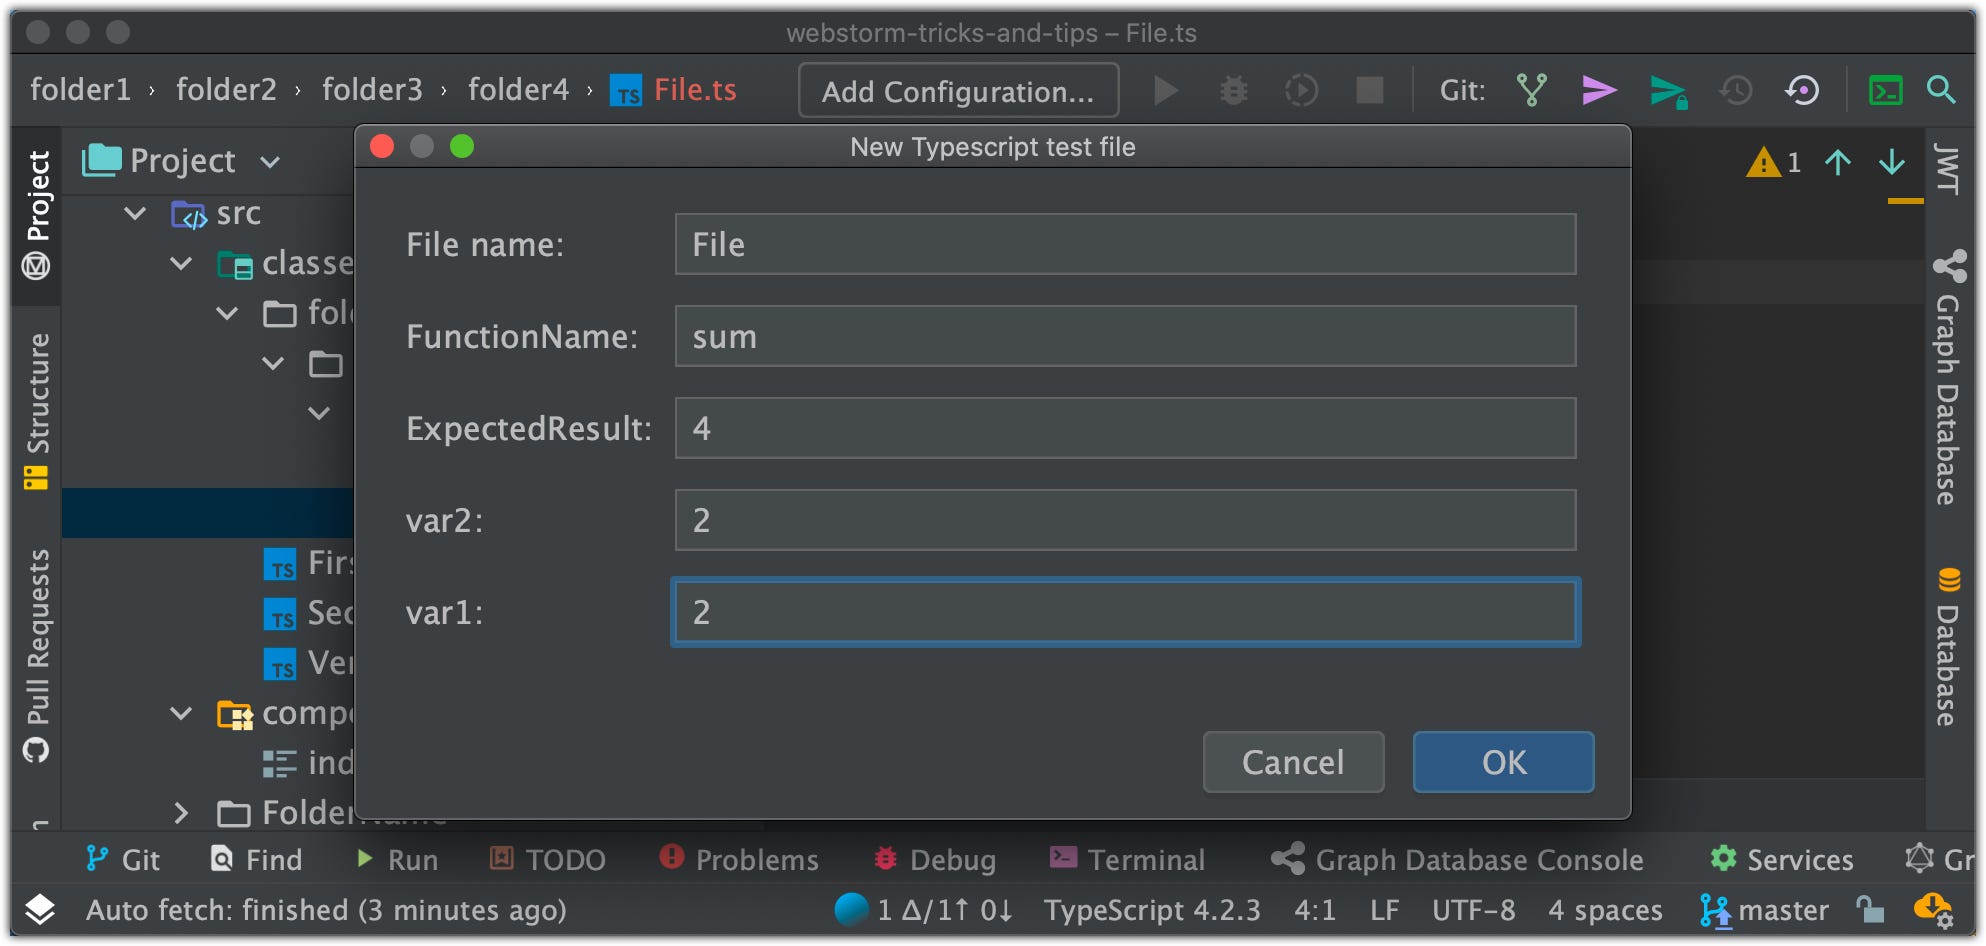
After creating your template, when you use “New in this directory” you will see your own template, and you can specify additional props values:
🎉 Awesome.
36. Hide all windows
If you use [ Shift+Command+F12 / ⇧⌘F12] hotkey → it will hide all opened windows except the editor window, if you press the hotkey again → it will restore all hidden windows:
37. Resize active window
You can resize the active window without using a mouse: Stretch to Right/Letf by using [Shift+Command+Left/Right] hotkey:

38. Select and move lines
Most of the time we need to move lines from one place in code to another. Stop using copy-paste actions. You can select lines by pressing [Shift+Up/Down] hotkey:
… and after that press Option, so your combination would become [Shift+Option+Up/Down] and move lines in the current file:


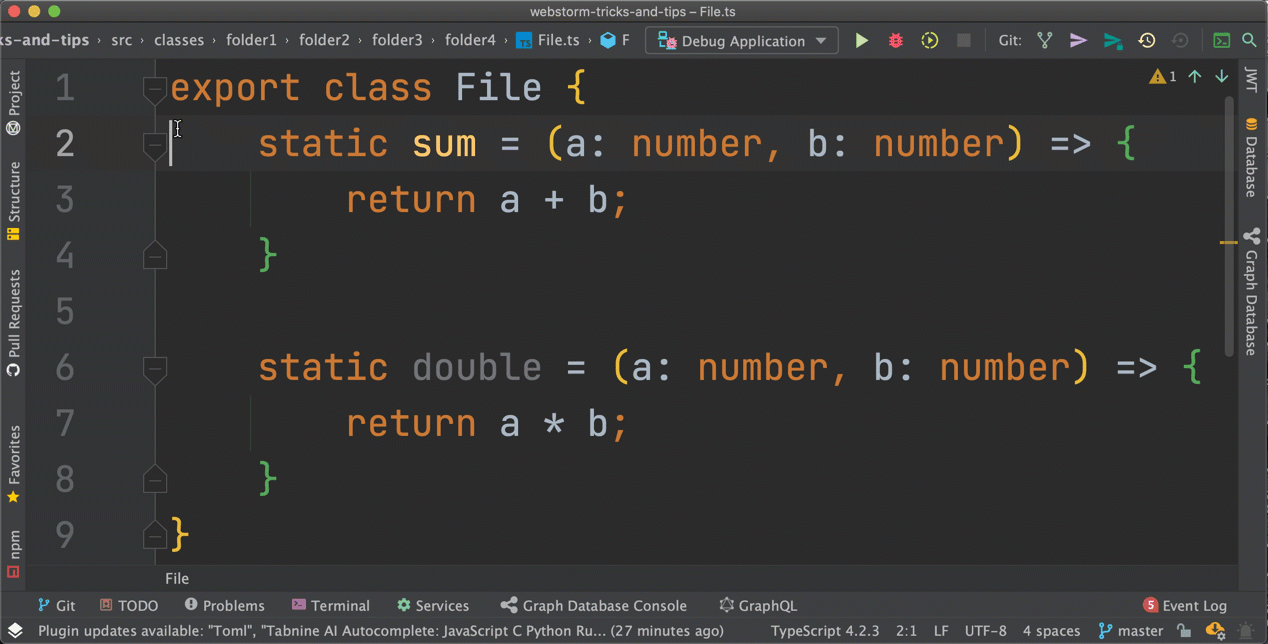
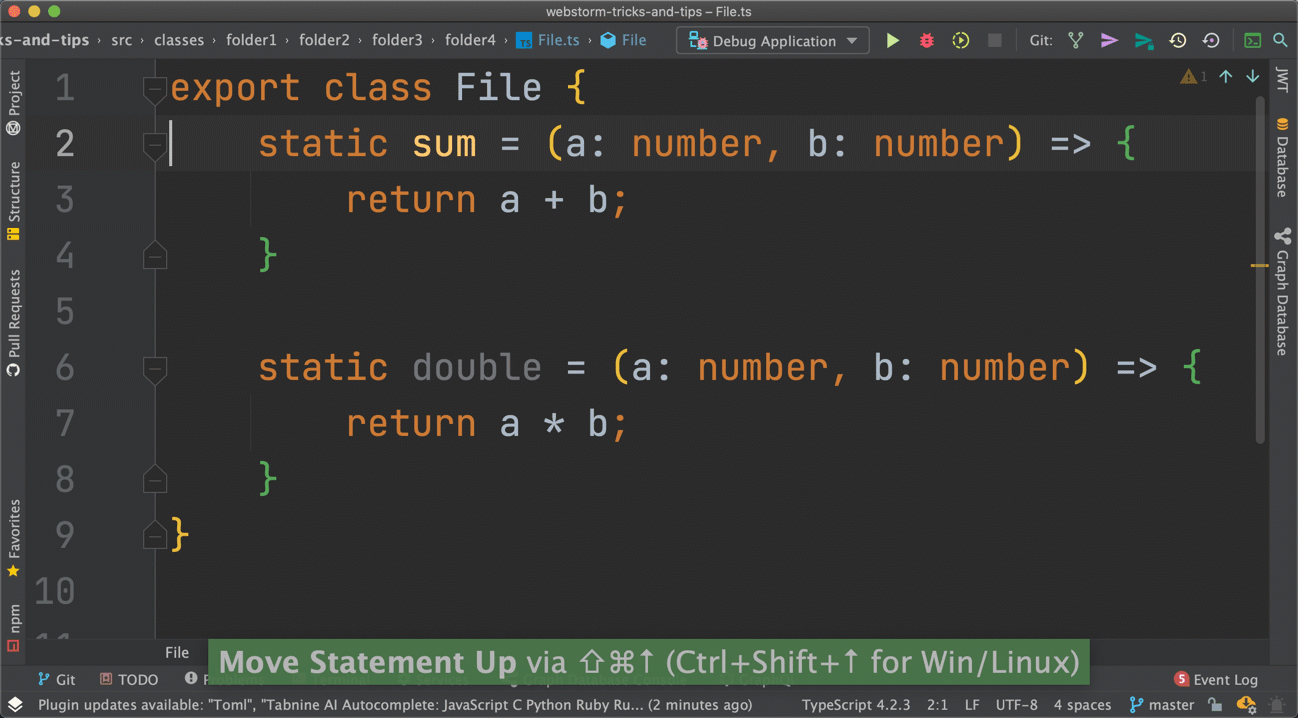
39. Move statement
If you want to move a function you can just use “Move statement” action by pressing Shift + Command + Up/Down. In that case IDE will move a function without selecting it:
40. Select line, fragment, function, class, package
What if you want to select a specific code fragment, maybe a part of a function, or some props or a class or entire package? You can do that by using “Extend/Shrink Selection” action by pressing Option + Up/Down:
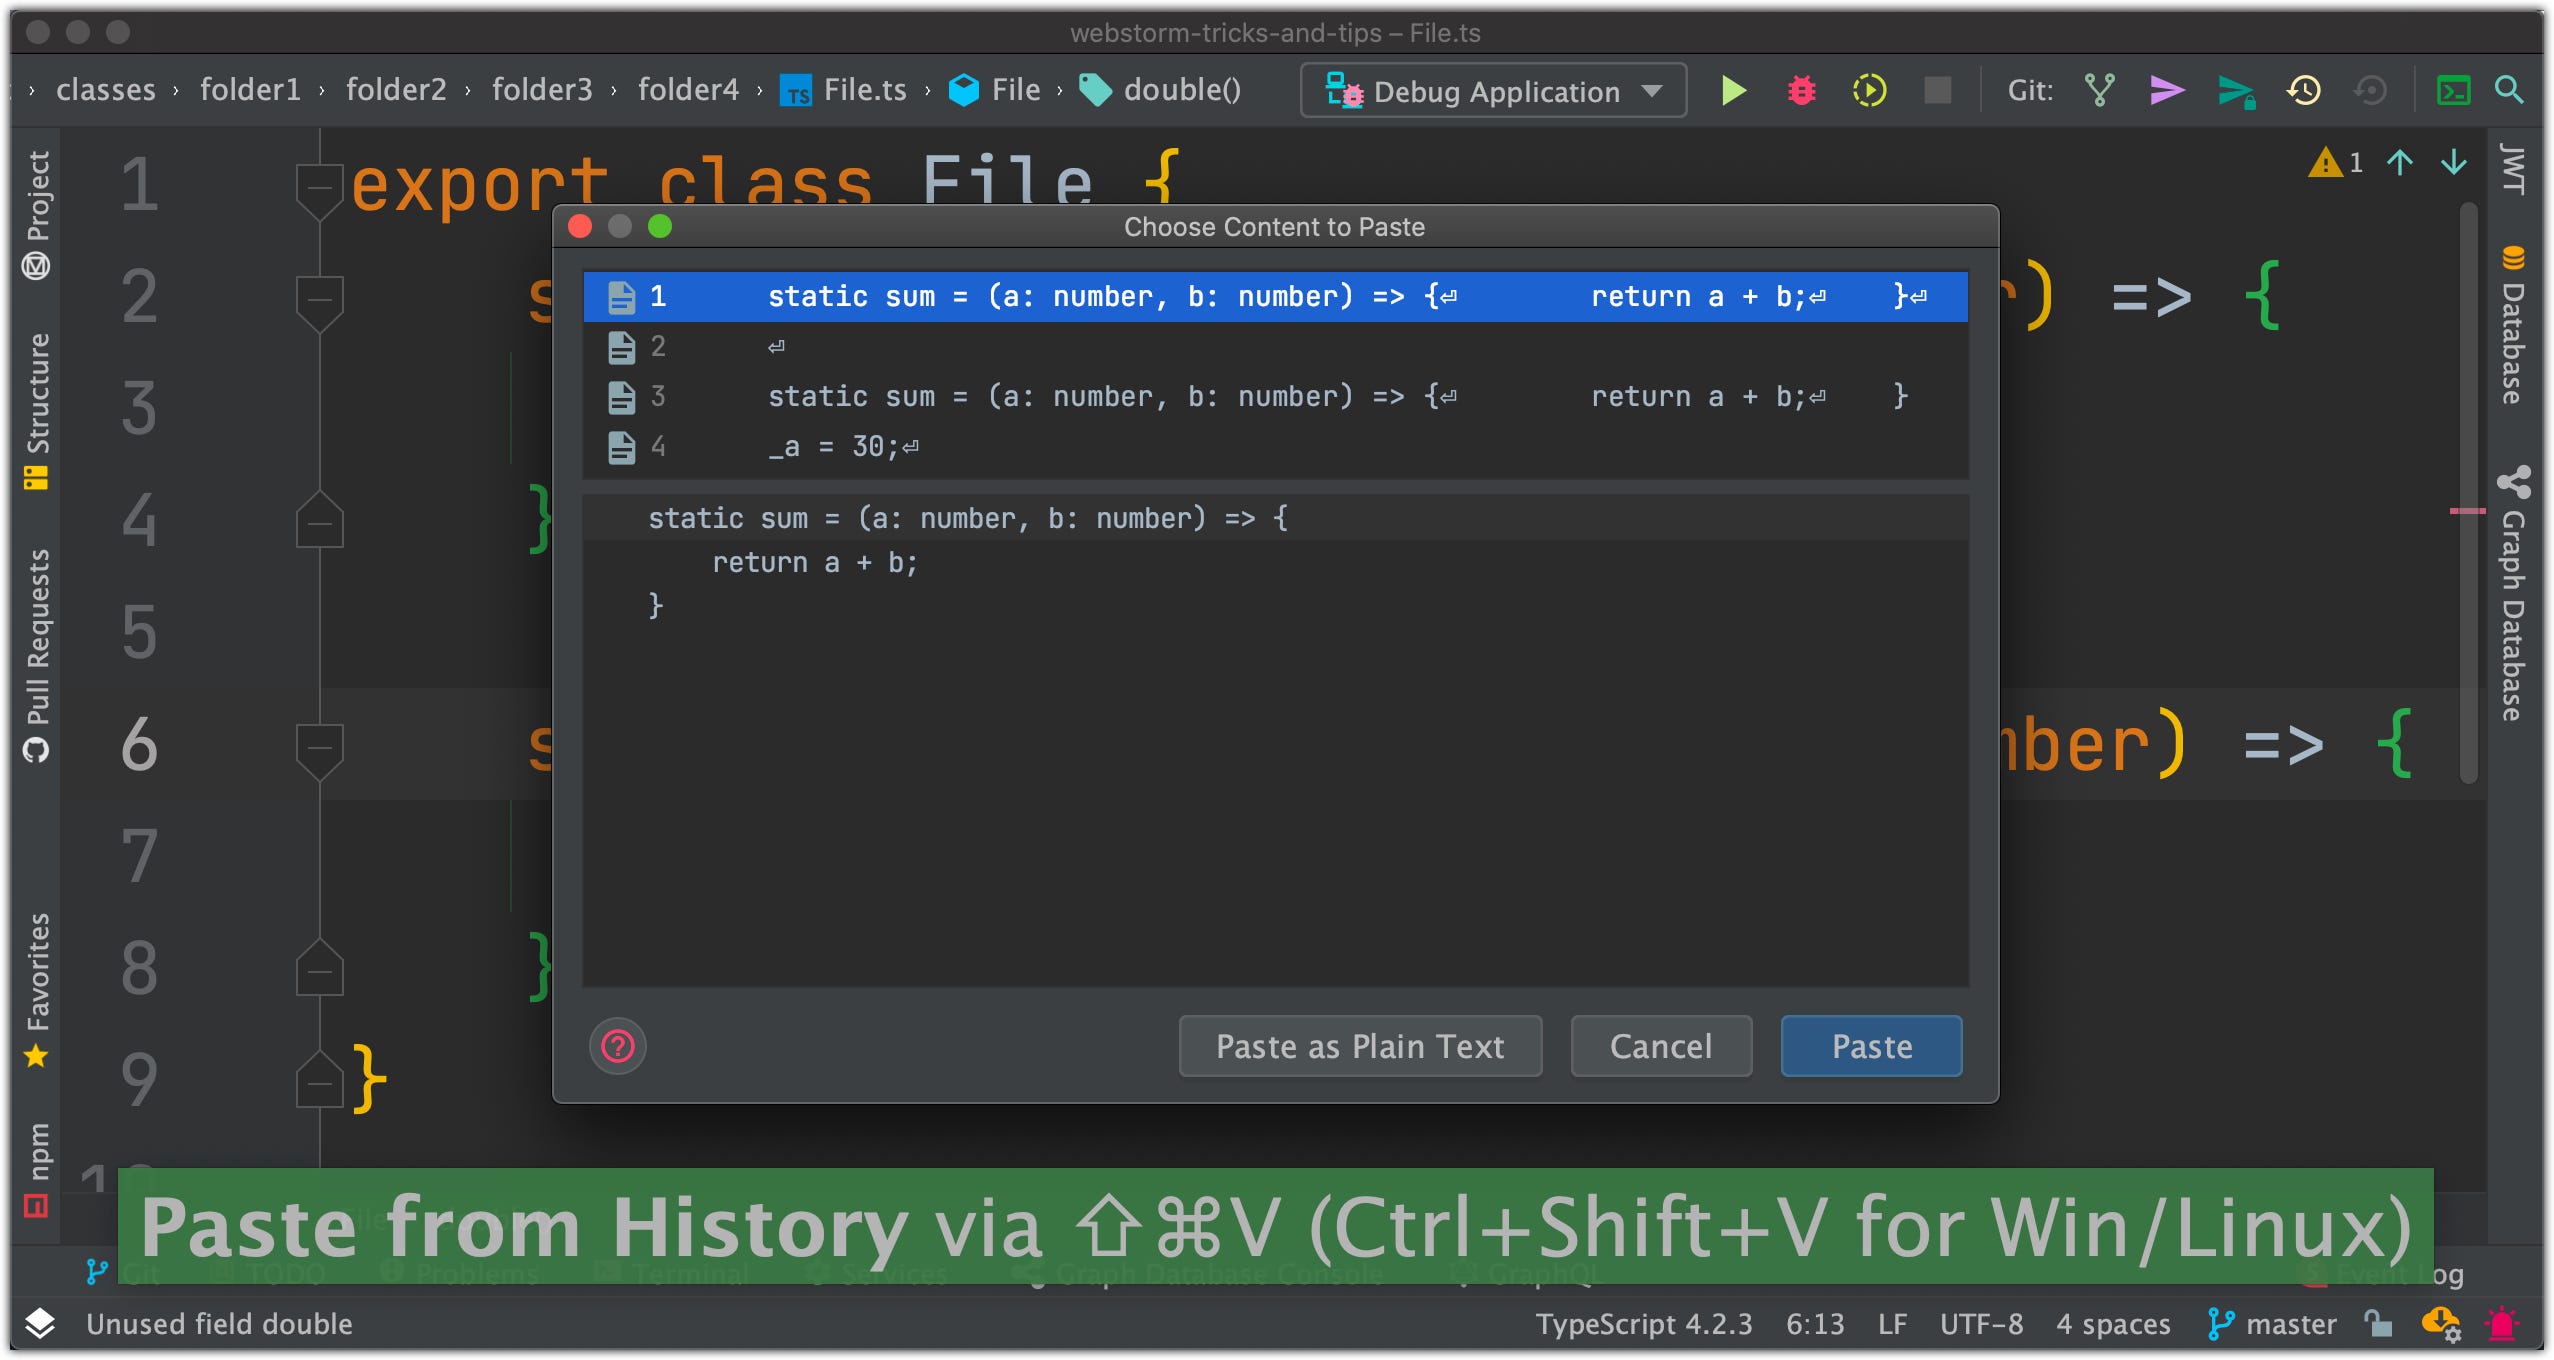
41. Clipboard history
How many times you missed your keys and instead of using [Command+V] (copy) after [Command+X] (cut), you used [Command+X] again? 🤦♂
In that case, you will lose your Clipboard history, but not if you are using JetBrains IDEs 🙂.
If you used [Command+X] twice you can press [Shift+Command+V] and IDE will show you all your Copy/Cut history you used:
42. Duplicate a line/selection
If you want to create a copy of a code fragment you don’t need to use Copy/Paste functionality, you can just use the “Duplicate Line” action by [Command+D] hotkey:

If will perfectly work for selections too:

43. Multiple cursors by mouse click
You can set multiple cursors by pressing Option/Alt key with the Mouse click:
44. Multiple cursors by next Occurrence
[Control+Command+G] hotkey will select only next Occurrence. This is definitely will be in handy:
Check this out:

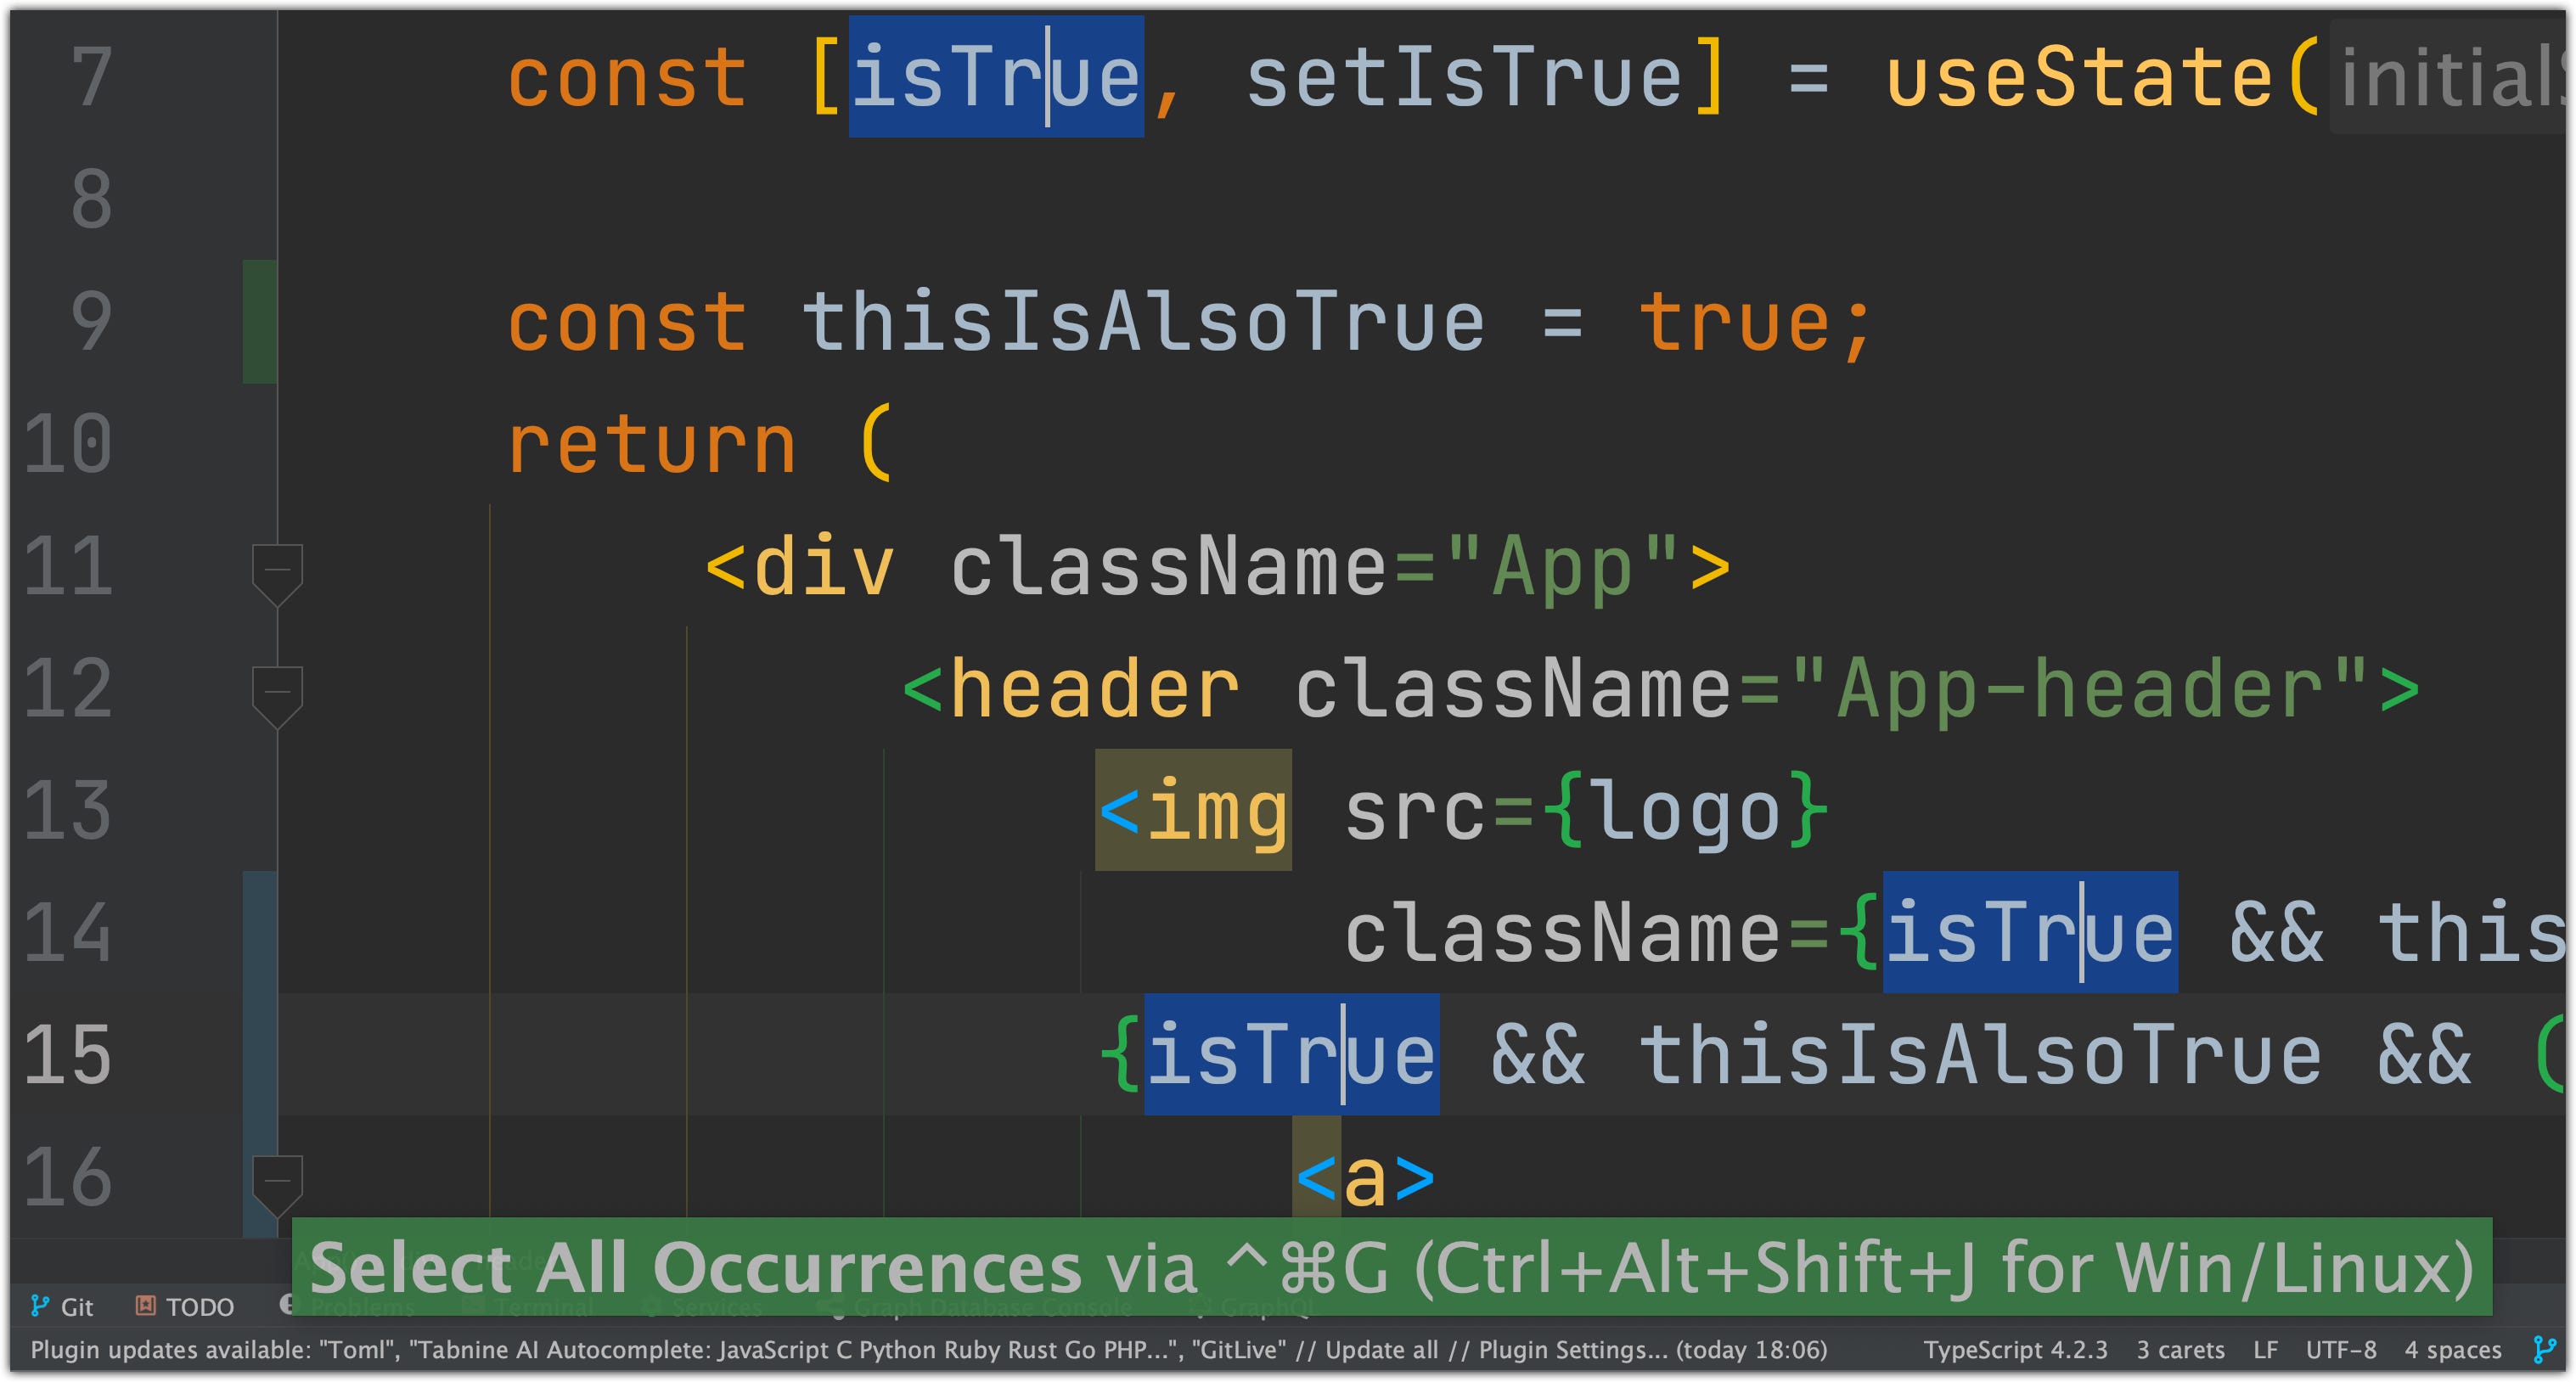
45. Multiple cursors. Select All Occurrences
[Control+Command+G] hotkey will set multiple cursors at every occurrence in the code:
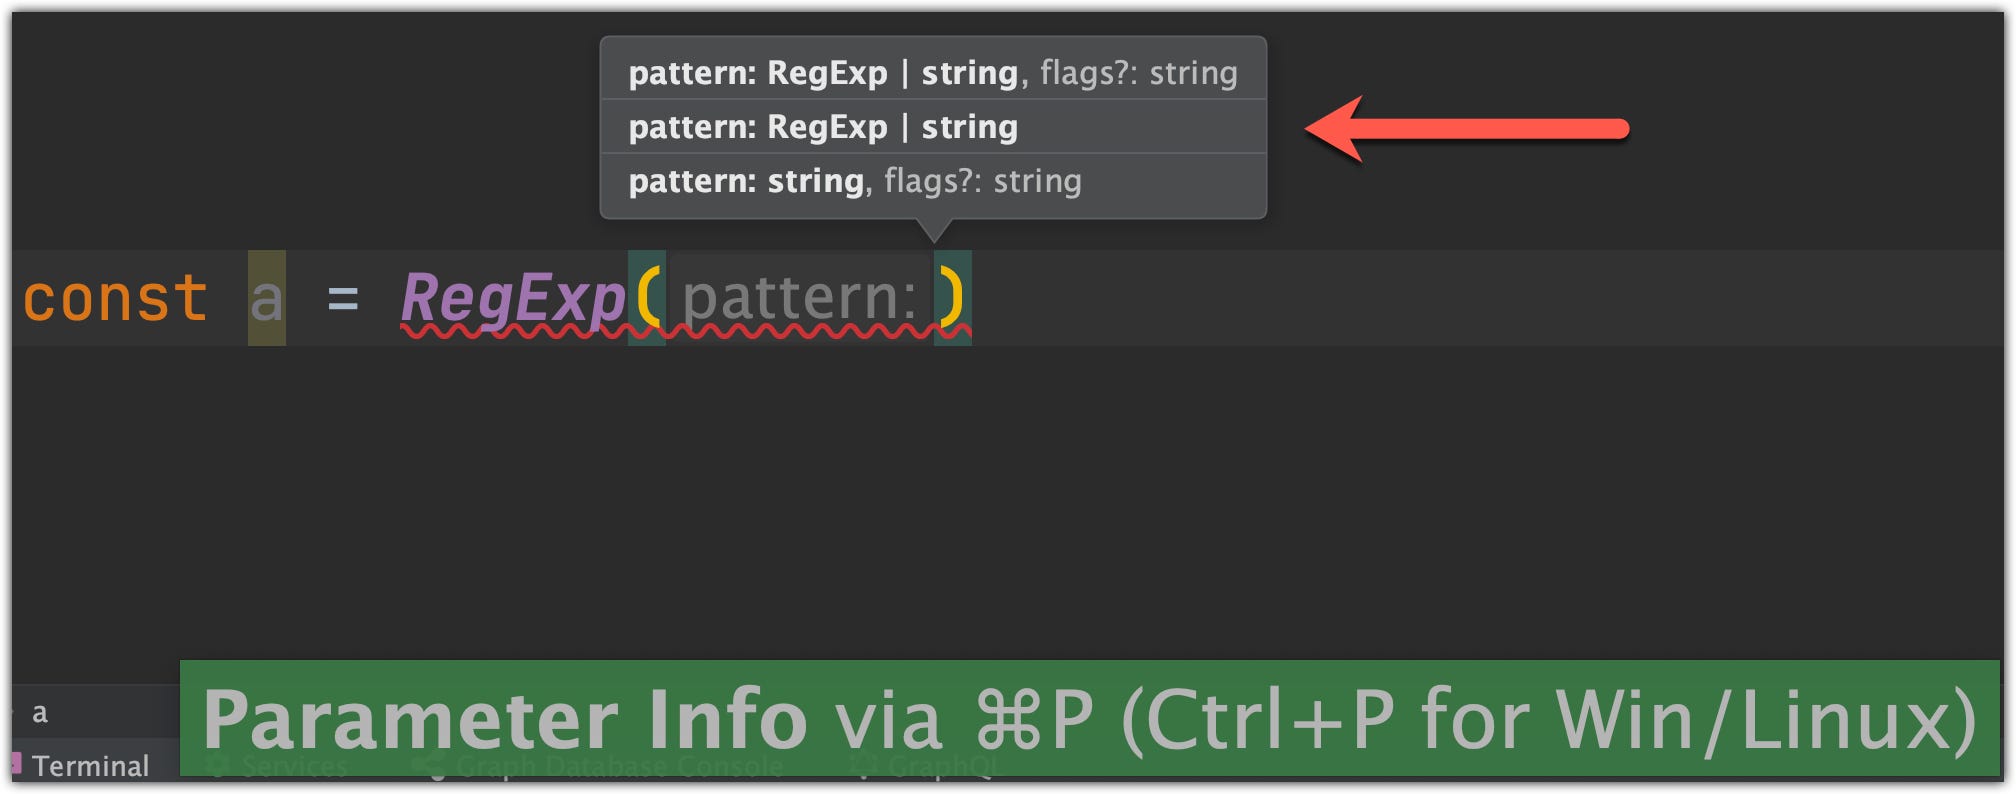
46. Parameter info
If you forgot what params you need to pass to the function, you don’t need to delete brackets and set them again.
You can just use the [Command+P] hotkey
47. Reformat code
You can reformat all file by using the “Reformat code” action via [Option+Command+L] hotkey.

⚠️ NOTE: If you want to reformat only specific lines you can select required lines and use the “Auto-Indent lines” action via [Control+Option+I] hotkey:
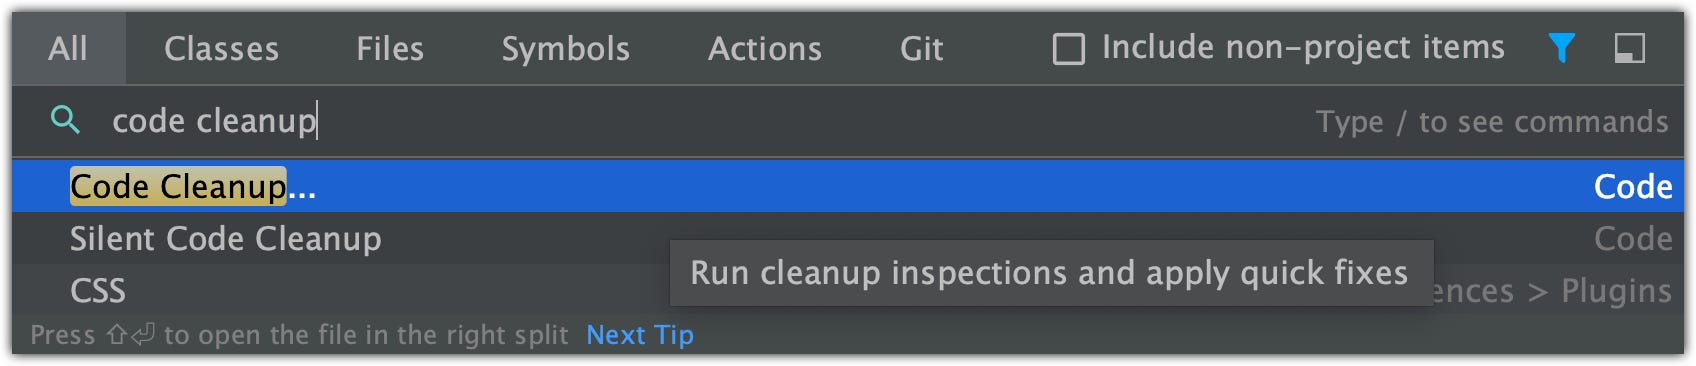
You can open ‘Code cleanup’ preferences by searching code cleanup in the Search everywhere:


!Bog`, and IDE will suggest with a completion list:

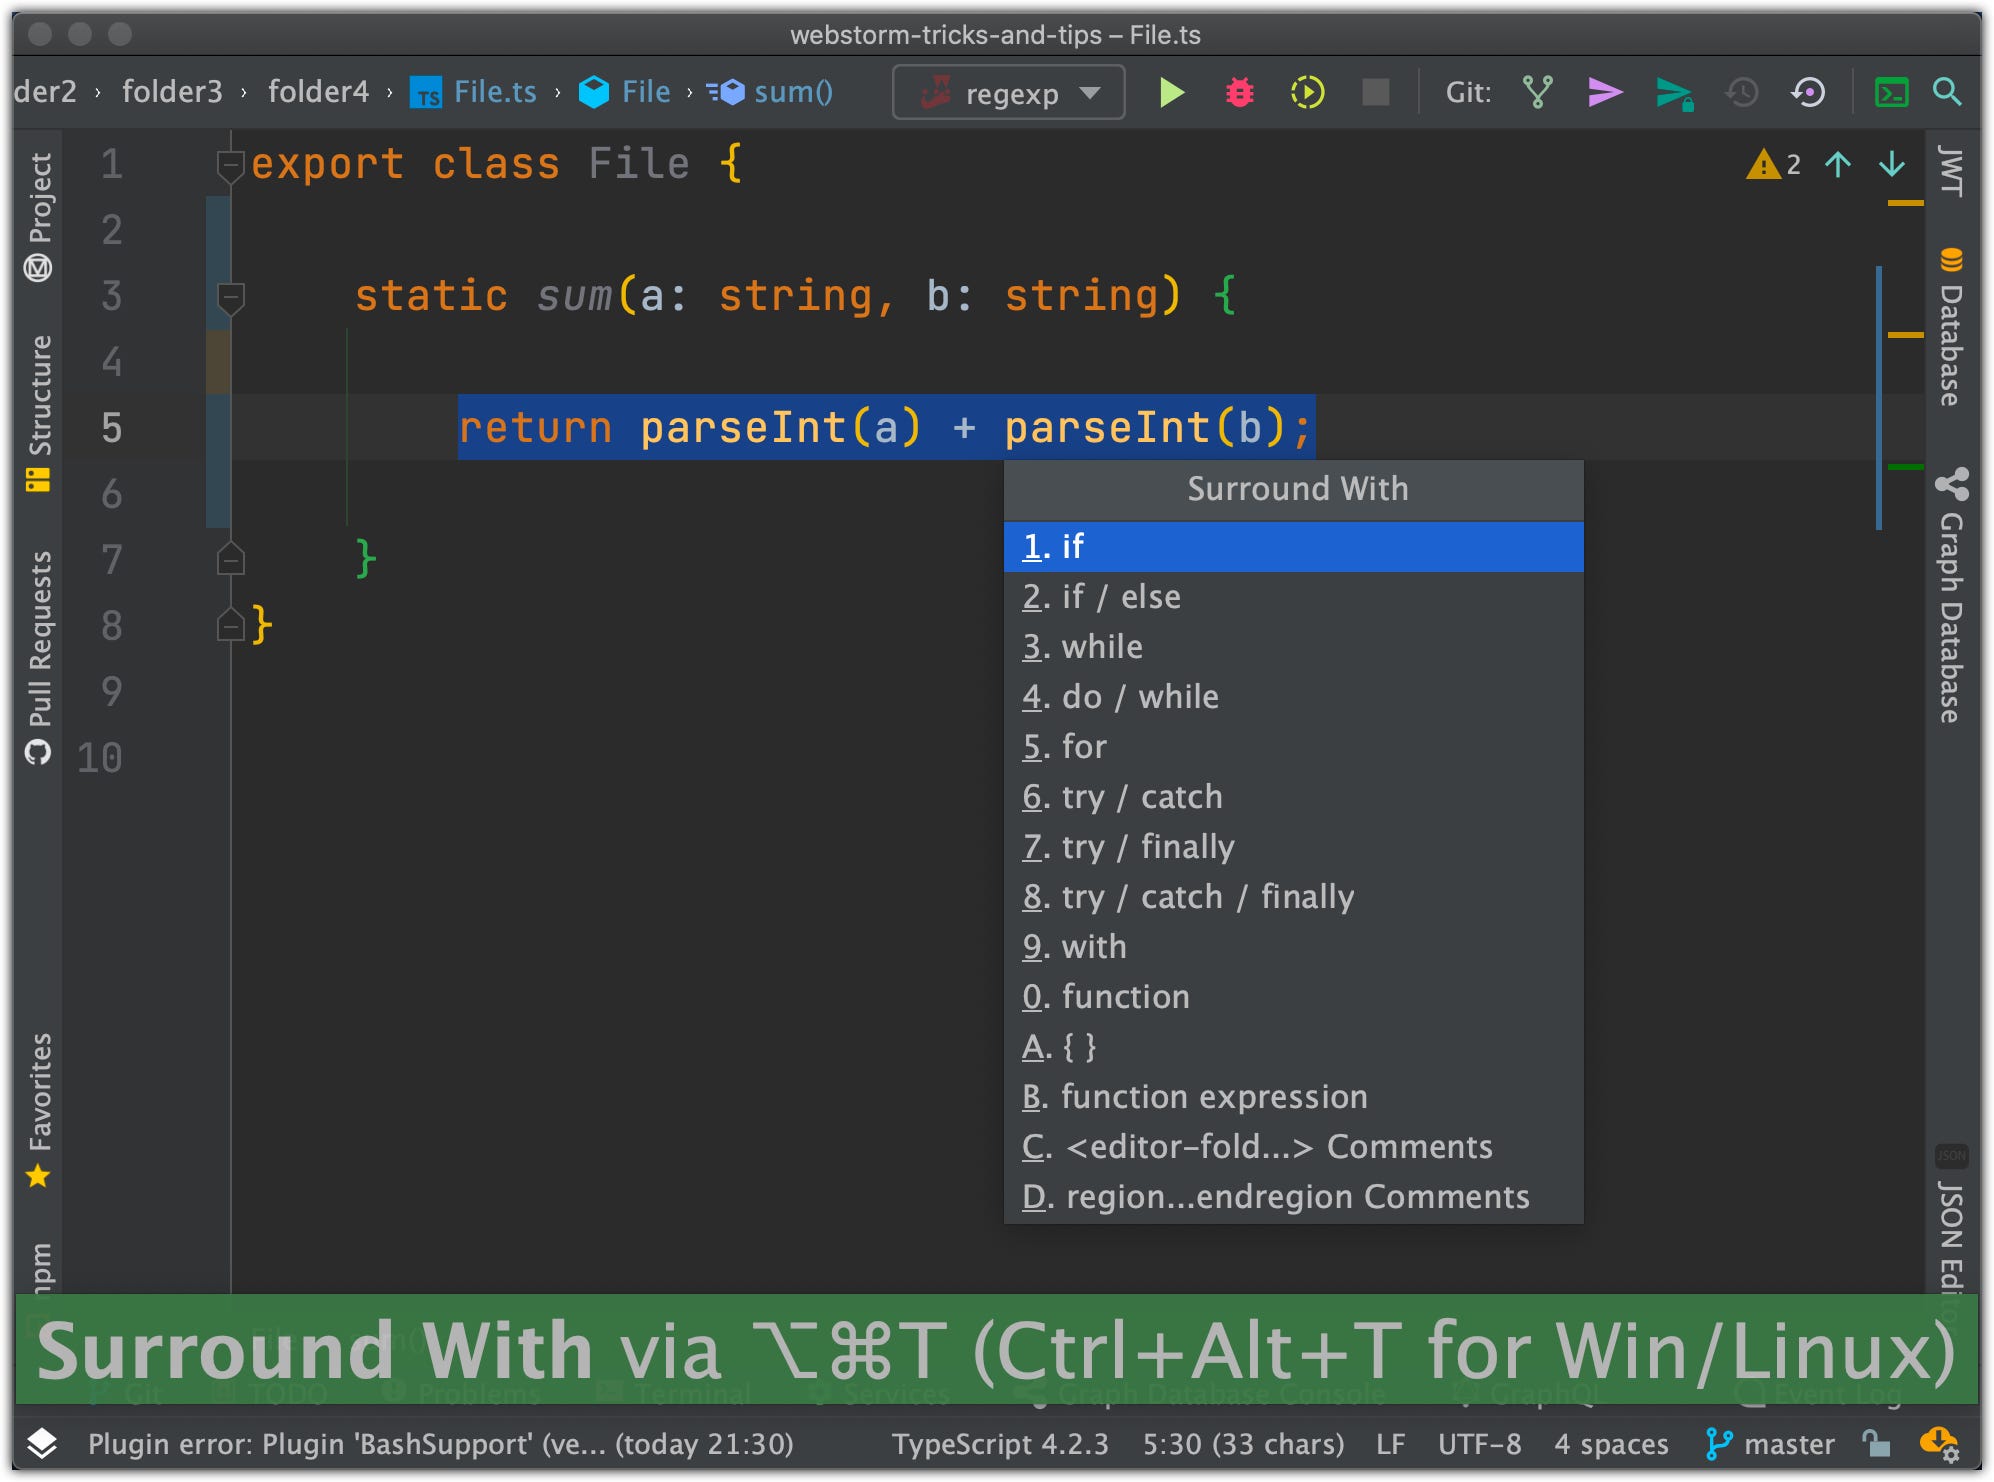
52. Surround with
‘Surround With’ popup will appear when you use [Option+Command+T] hotkey:
53. Create constructor, getters, setters, override methods
If you created a class with some fields, you don’t need to create constructors, getters, setters, override methods manually → IDE could do that for you:
[ Command+N ] or [ Control+Enter ]:
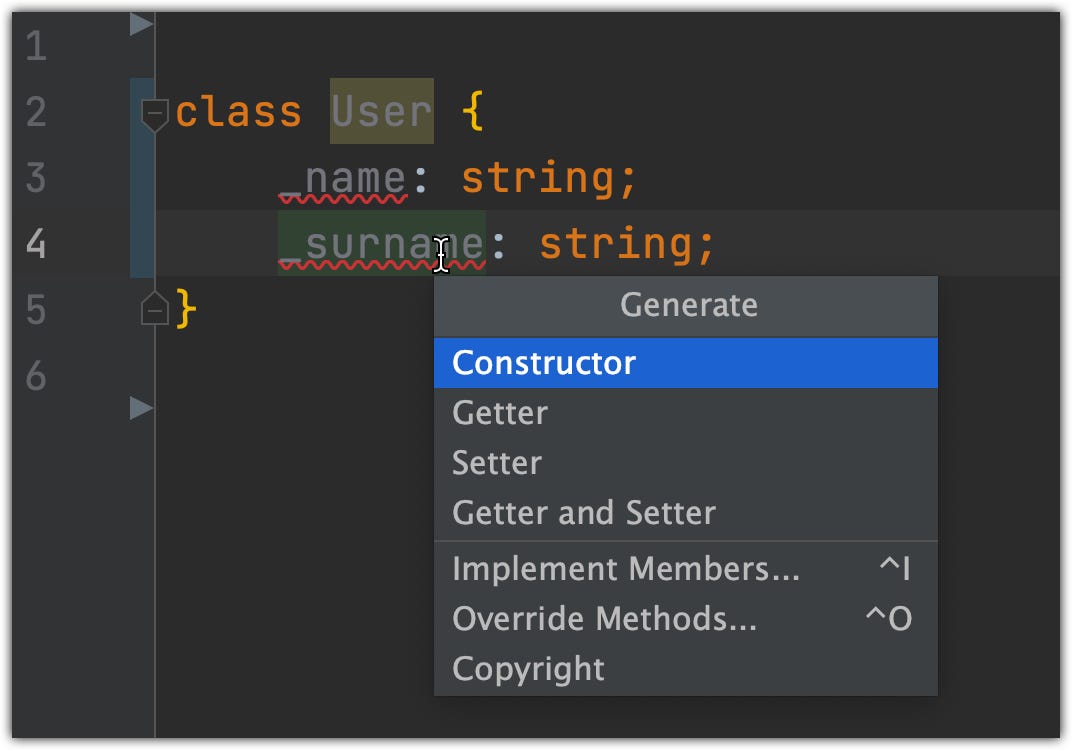
All this is generated:
54. Postfix code completion
Postfix code completion helps you reduce backward caret jumps as you write code. You can transform an already-typed expression to a different one based on a postfix you type after the dot, the type of expression, and its context.
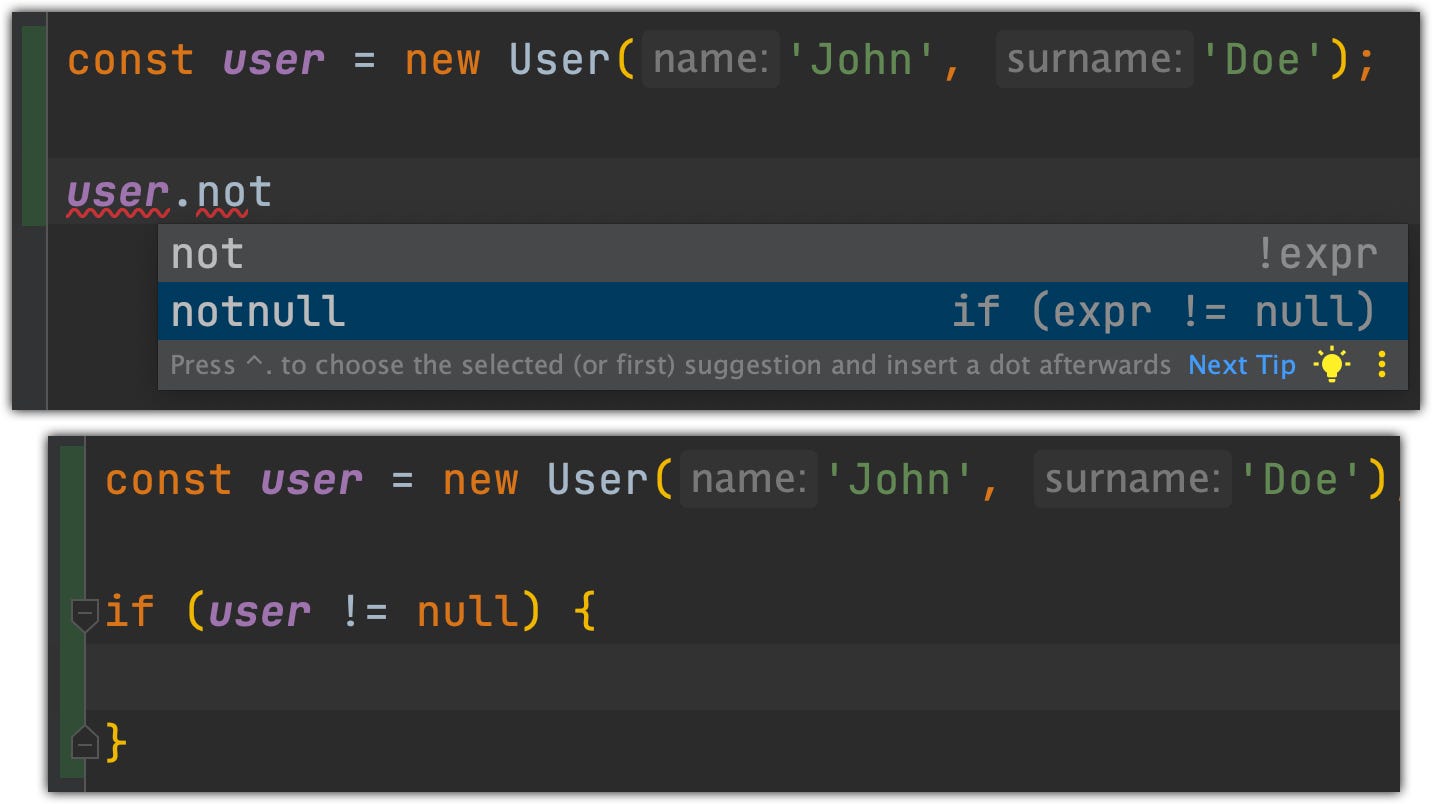
List of available completions for user prop:

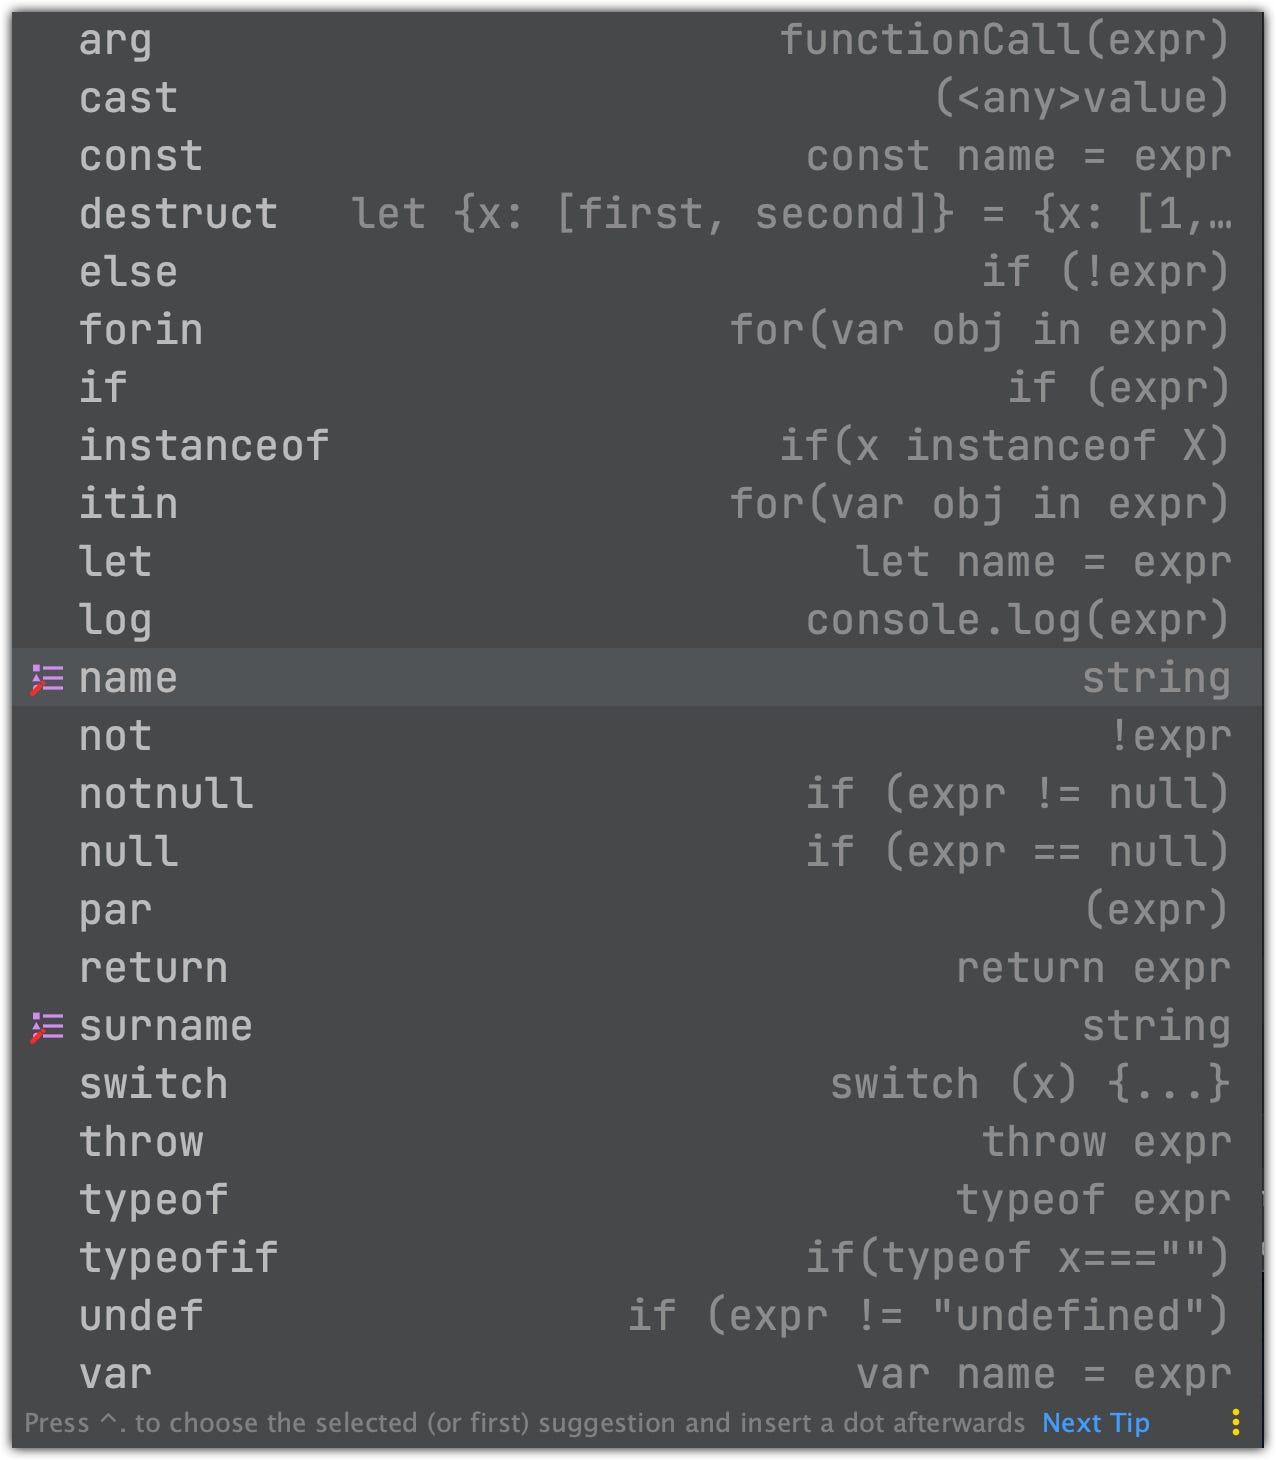
You can create your own completions in the IDE Preferences:


55. Show quick documentation
You can see the documentation in the popup window by using F1 key:
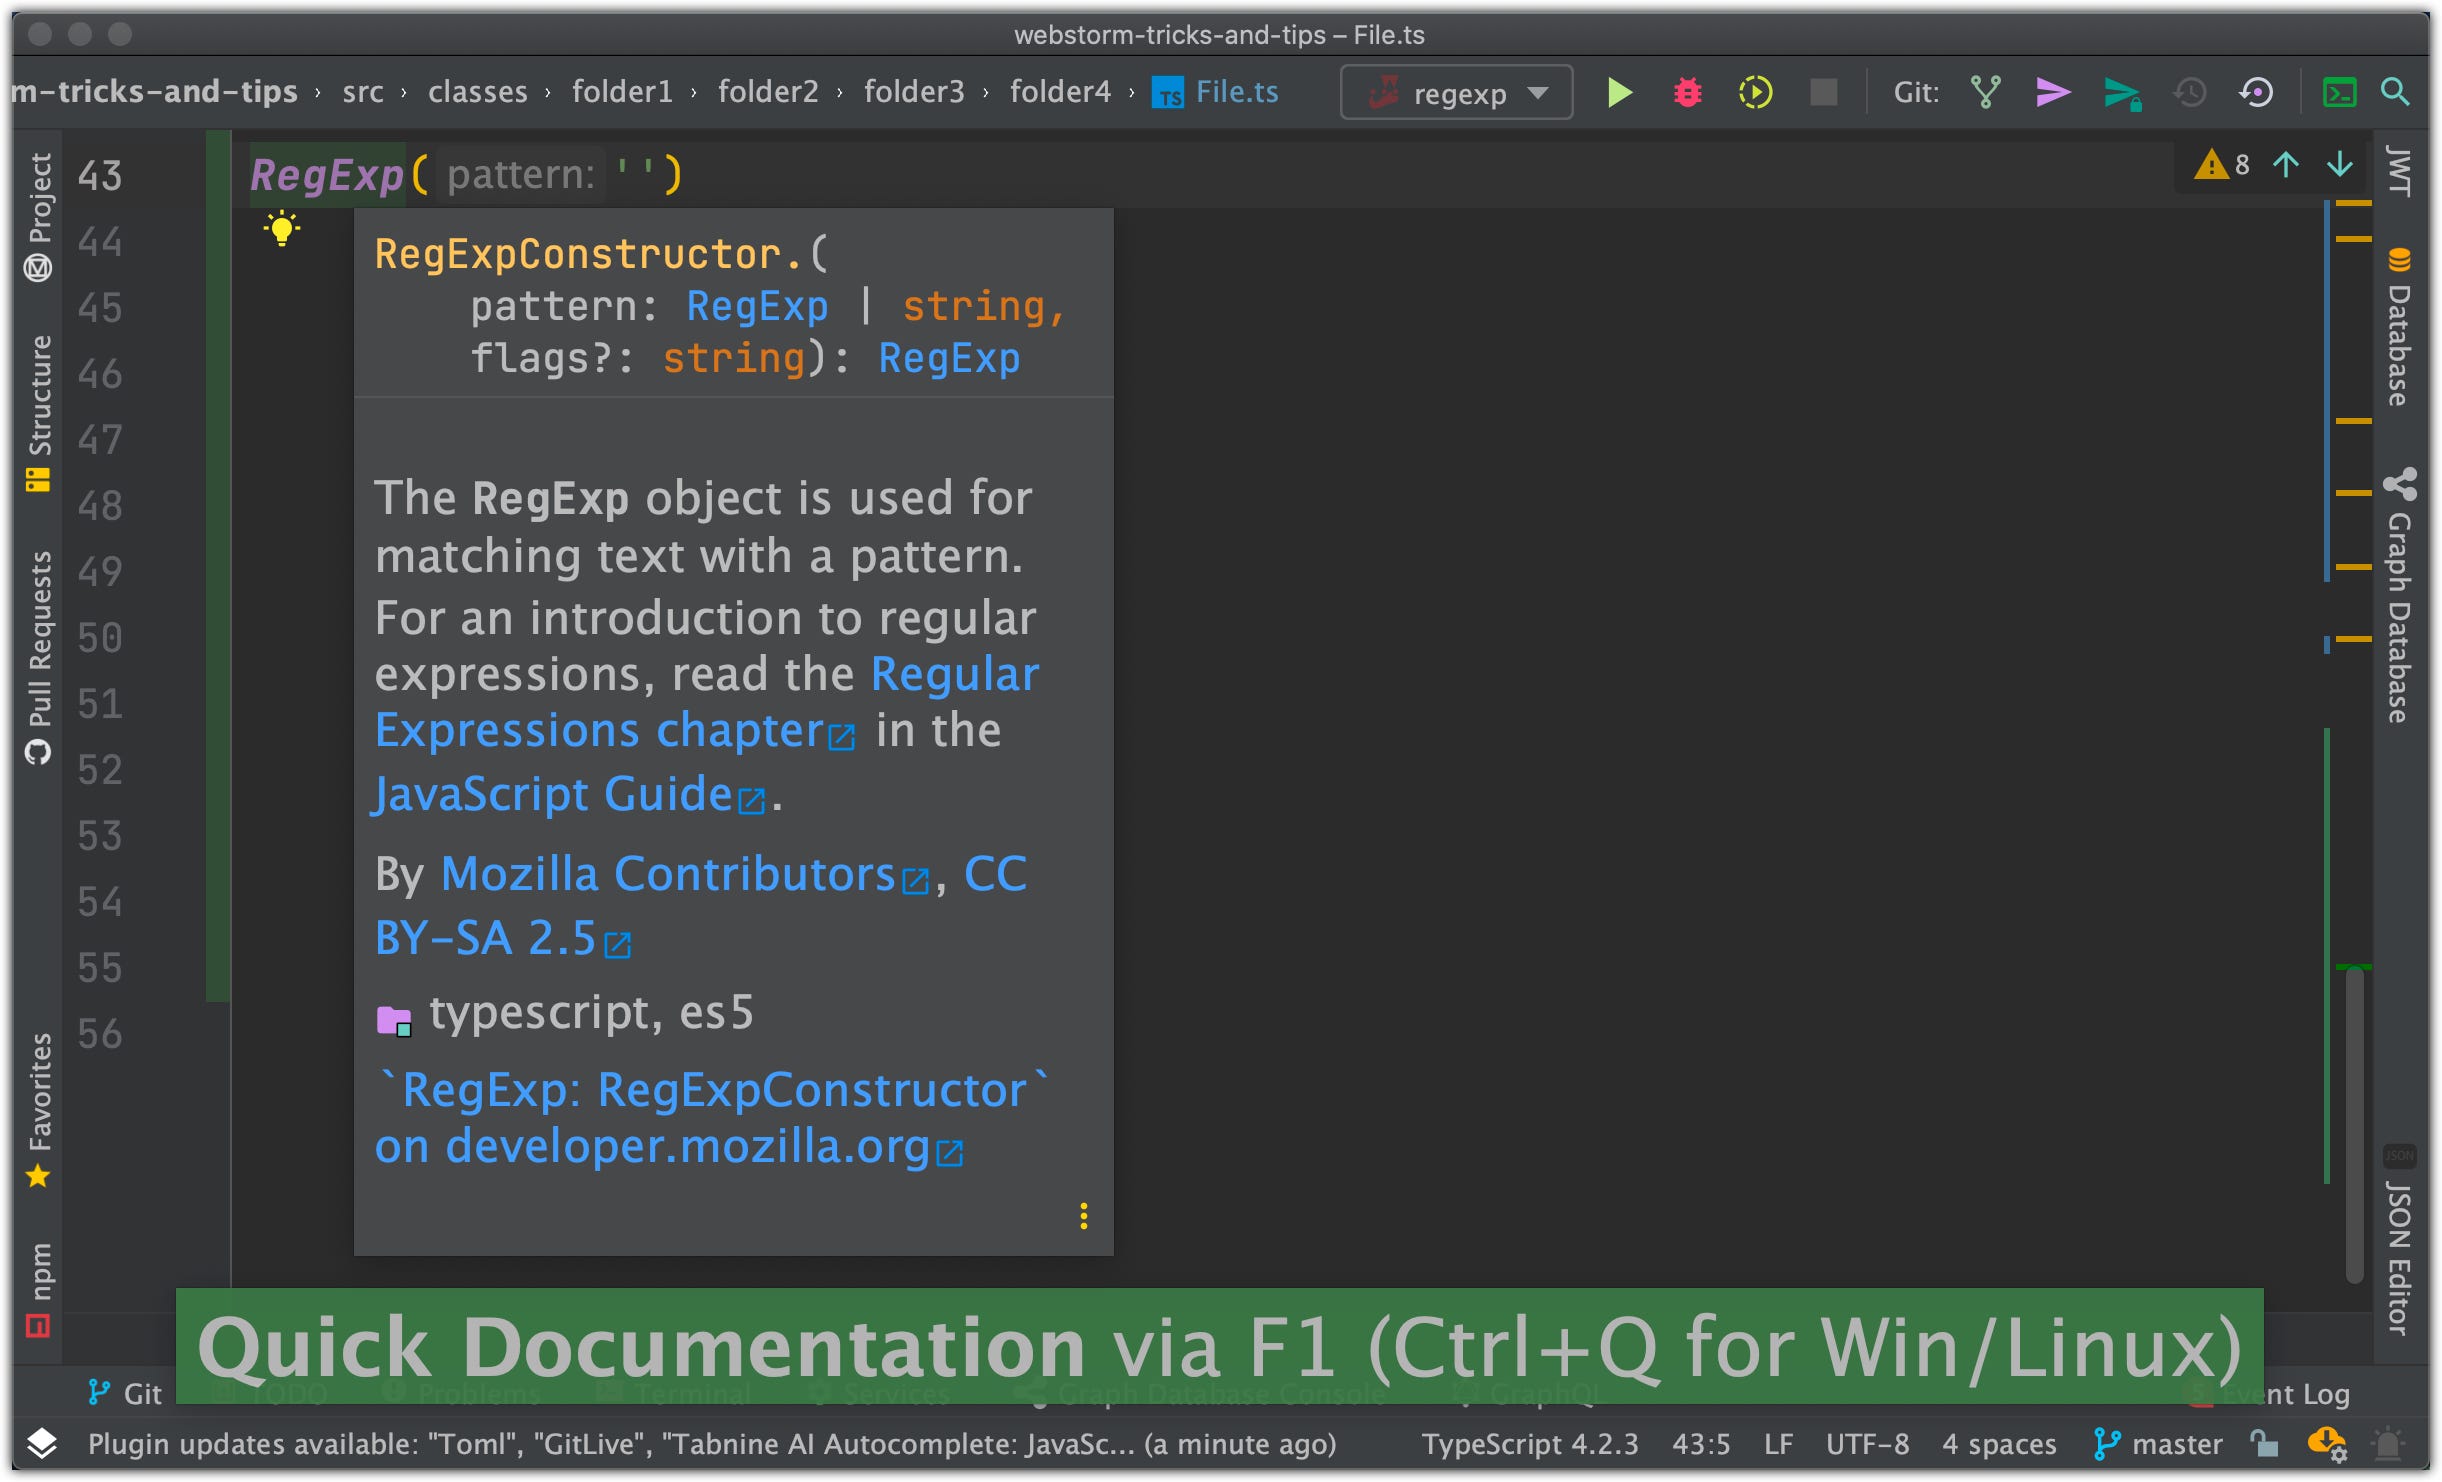
Quick Documentation action screenshot
56. Refactor this
You don’t need to remember all IDE Refactor hotkeys, you can just use [Control+T] hotkey for showing all available refactor actions, and you can use them right away:

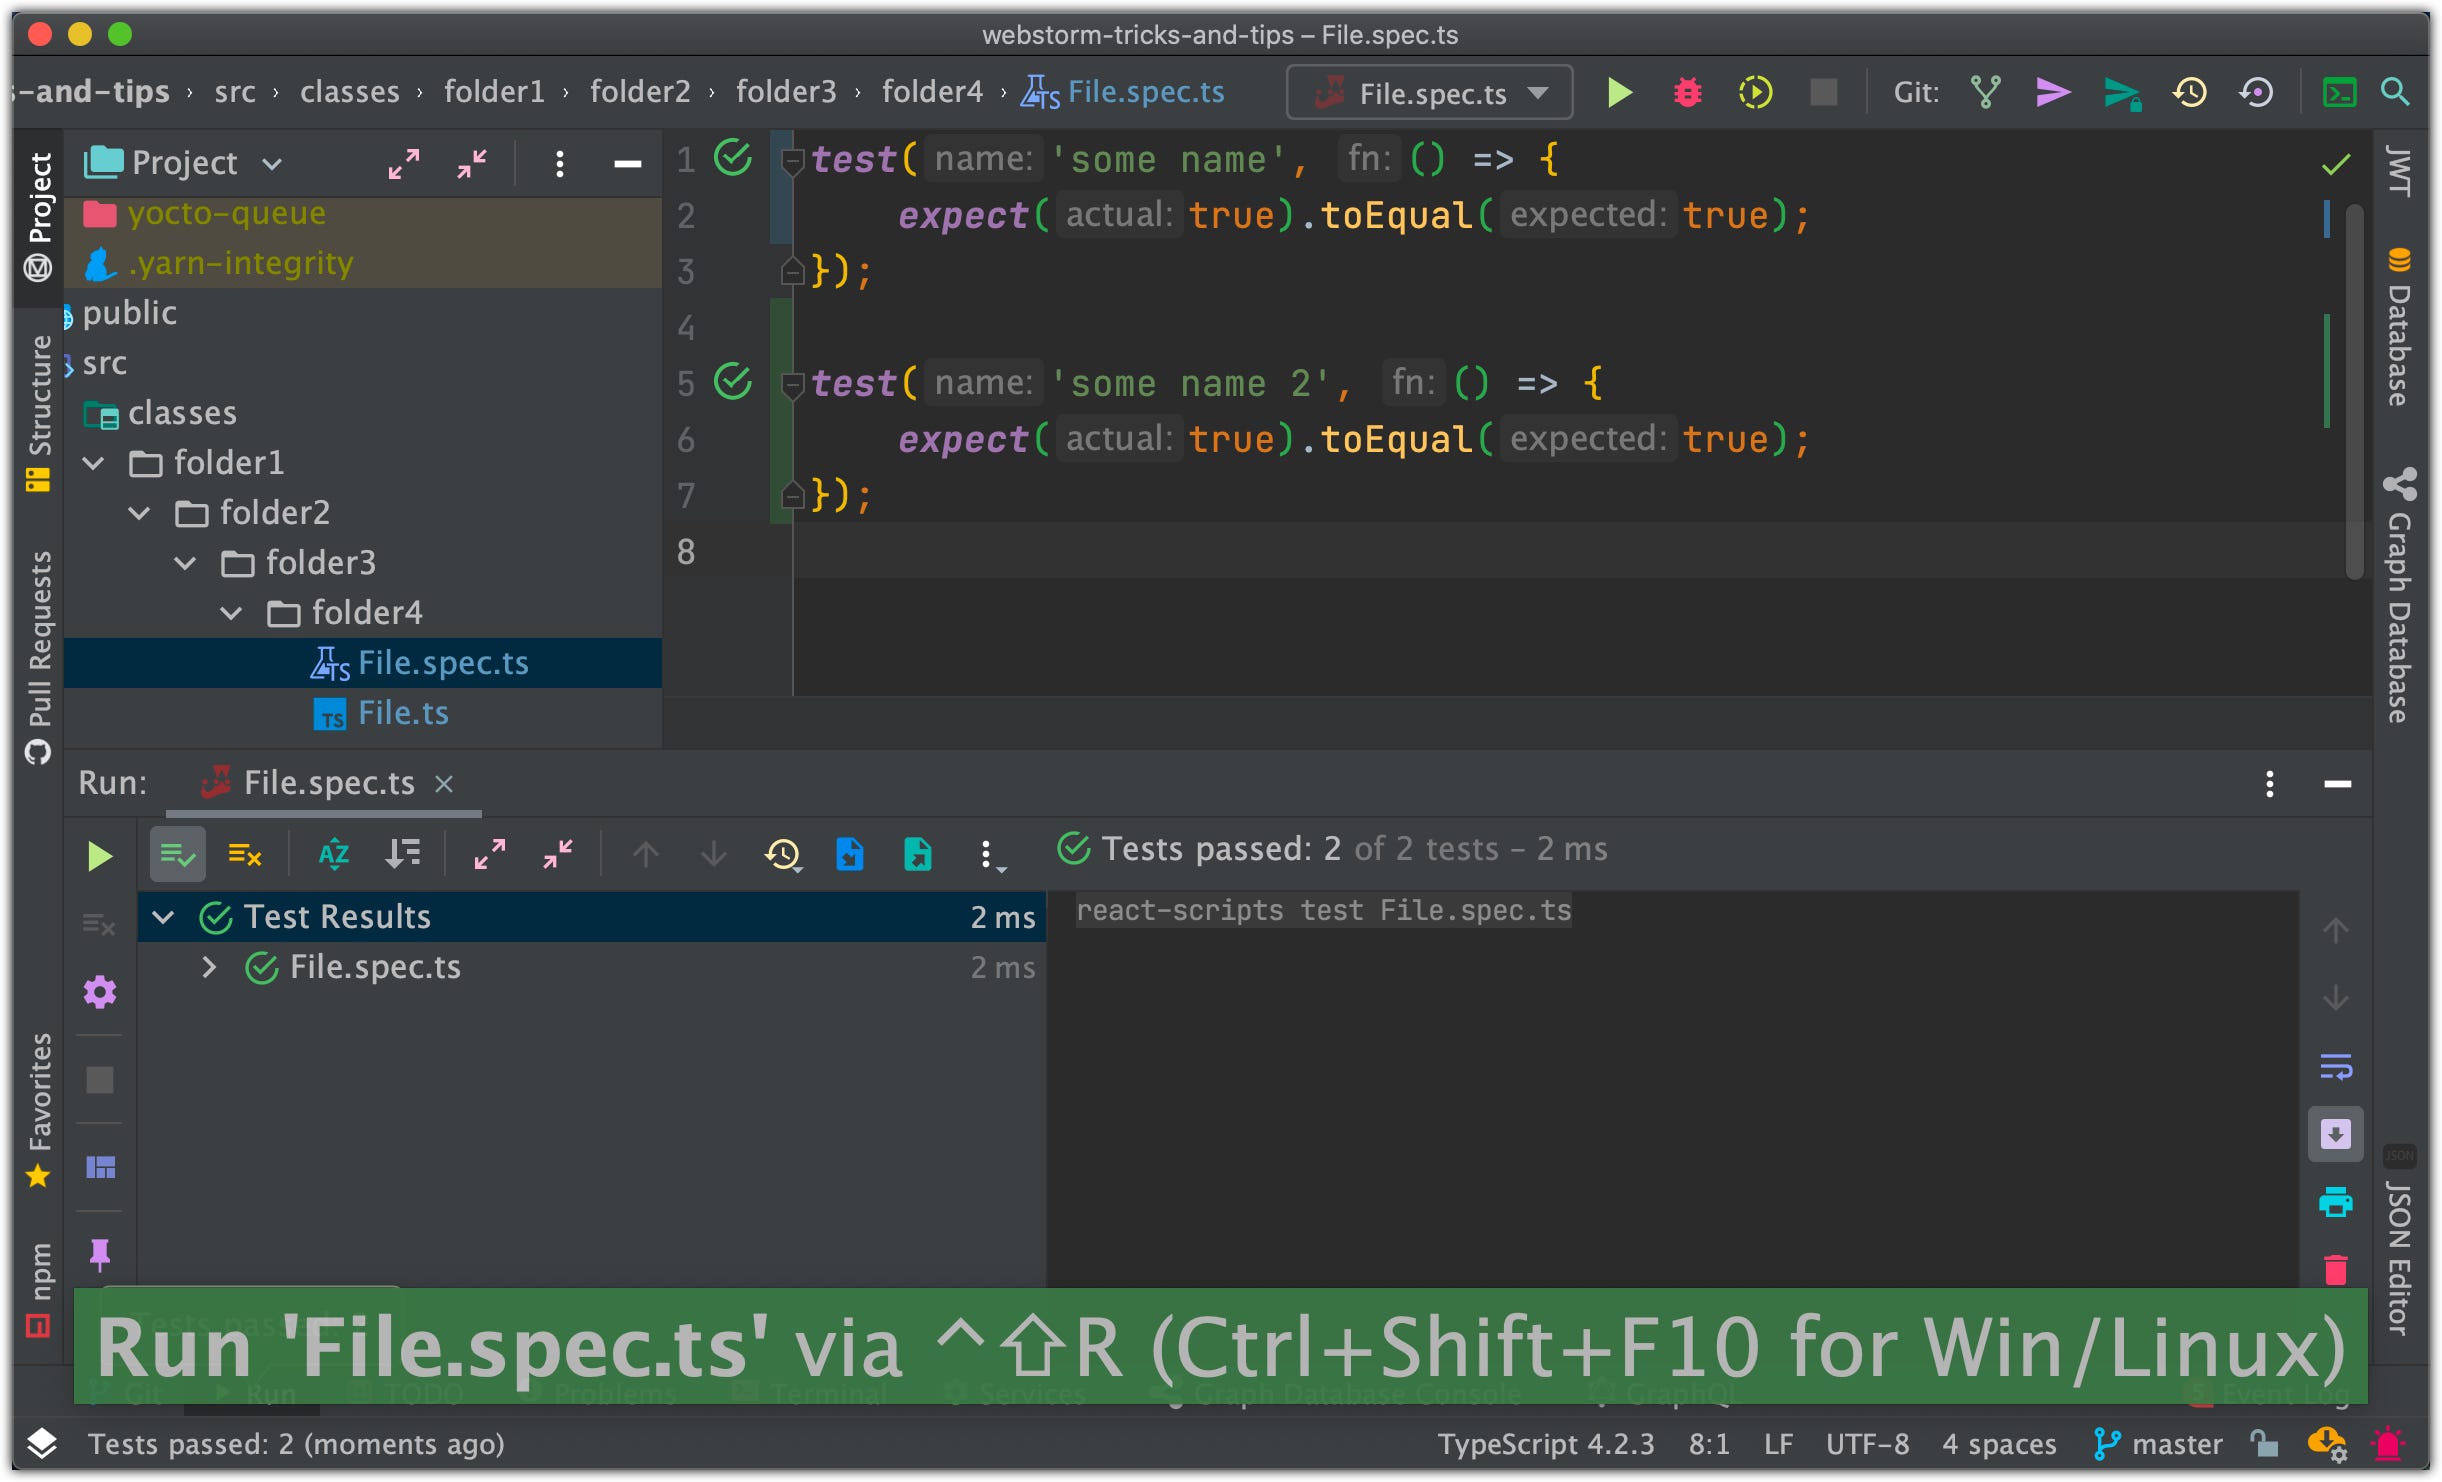
57. Run the current file
If you have a test file, you can run all tests in it by using [Control+Shift+R] hotkey:
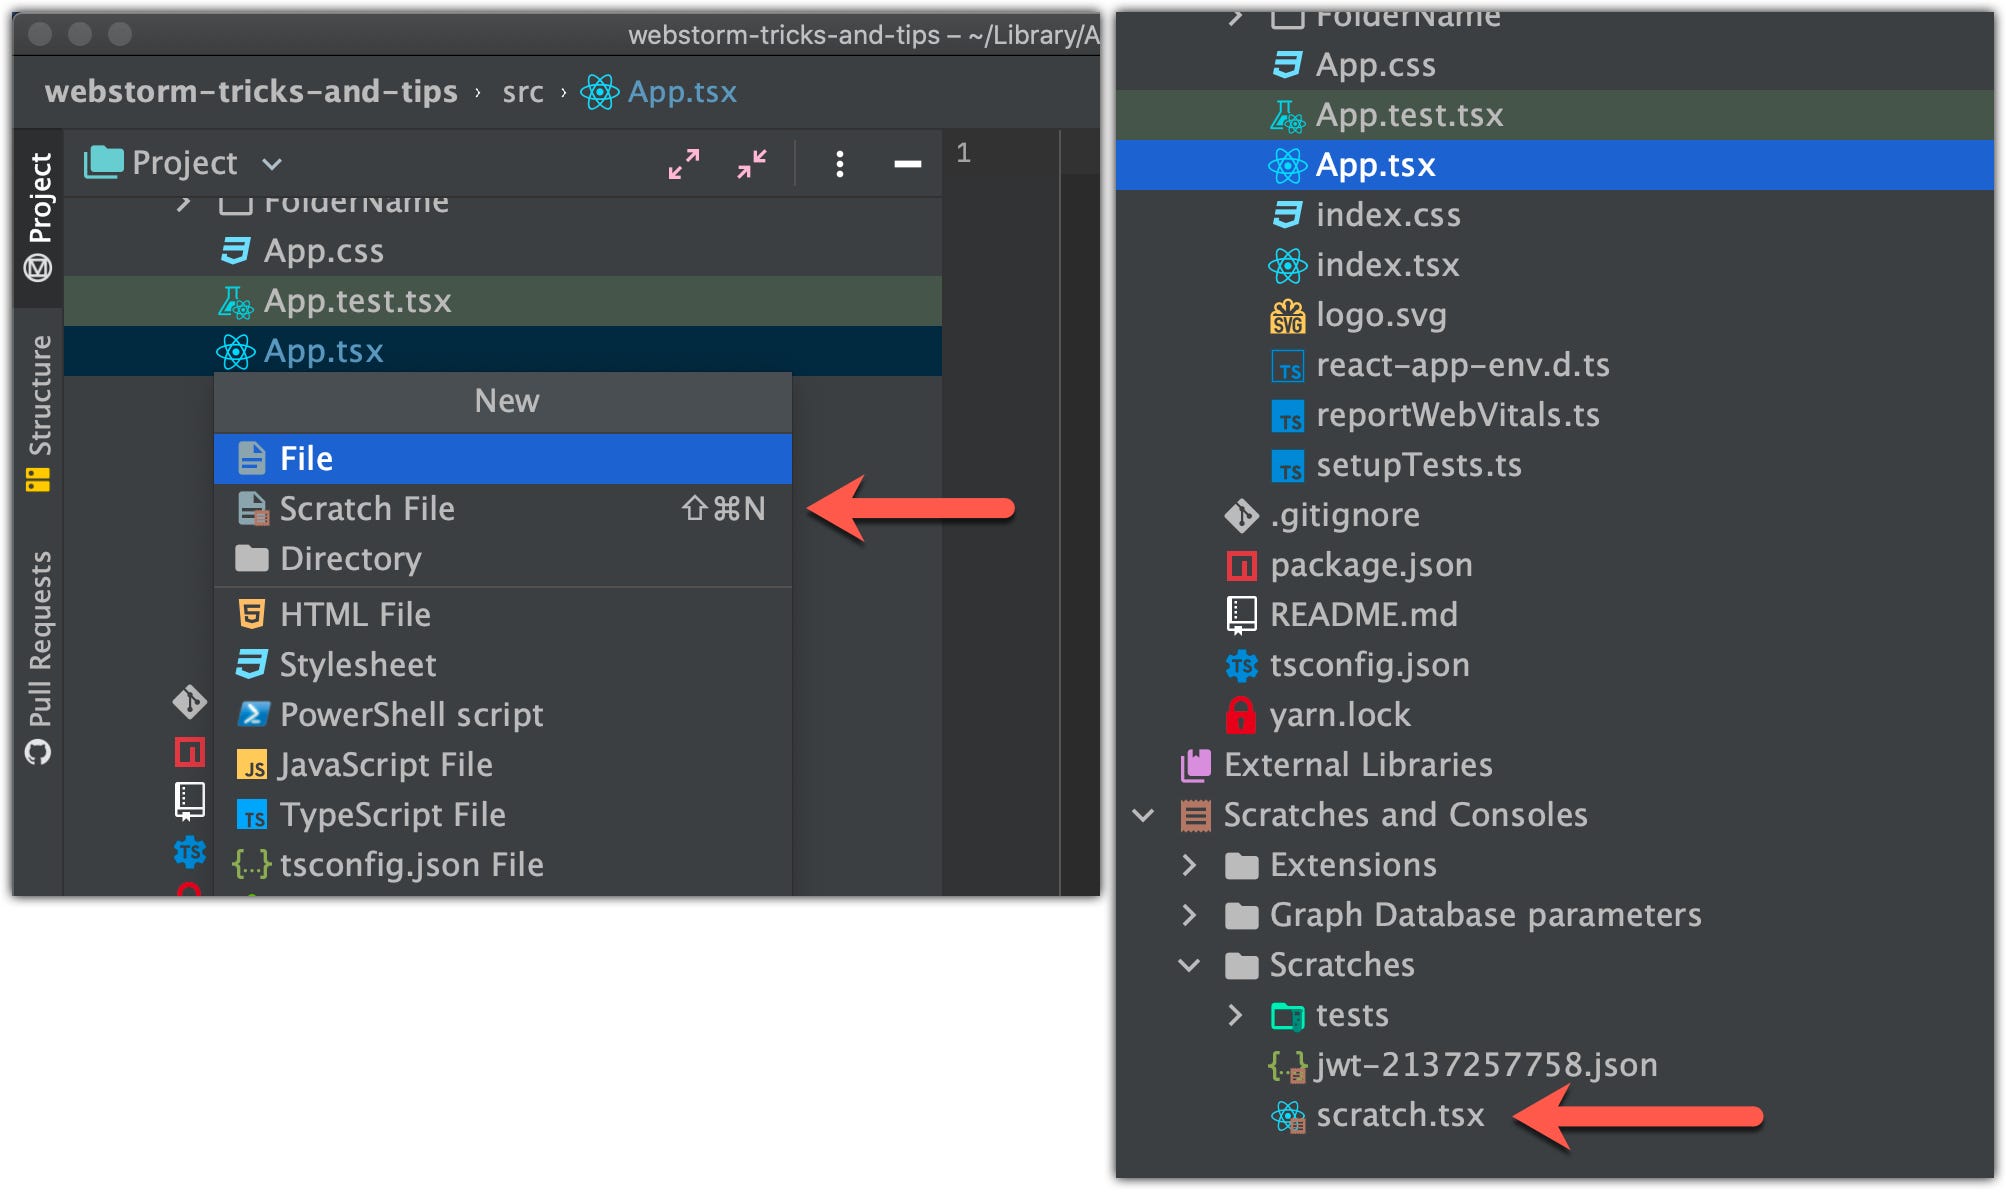
58. Scratch files
Sometimes you may need to create temporary notes or draft up some code outside of the project context. Instead of switching to a different application for this purpose, you can use scratch files and scratch buffers.
You can run them just like if they were included in the Project:
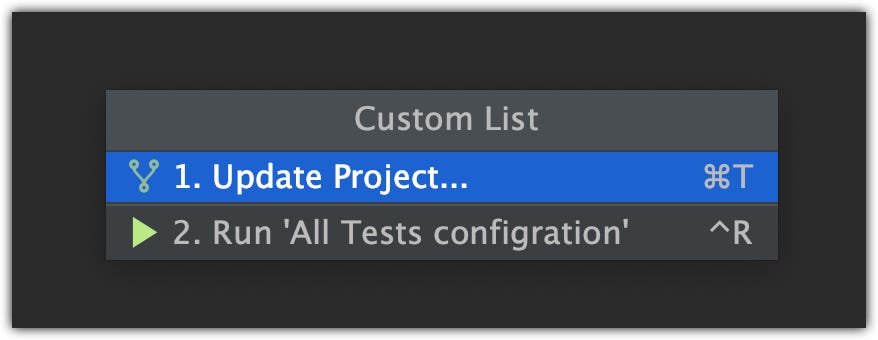
59. Creating your own menu list
If you navigate to IDE’s Preferences > Quick Lists, you could add your own menu with actions you like the most:

After creating you list, navigate to the Keymap, search for your list name, and assign a new Keyboard Shortcut:

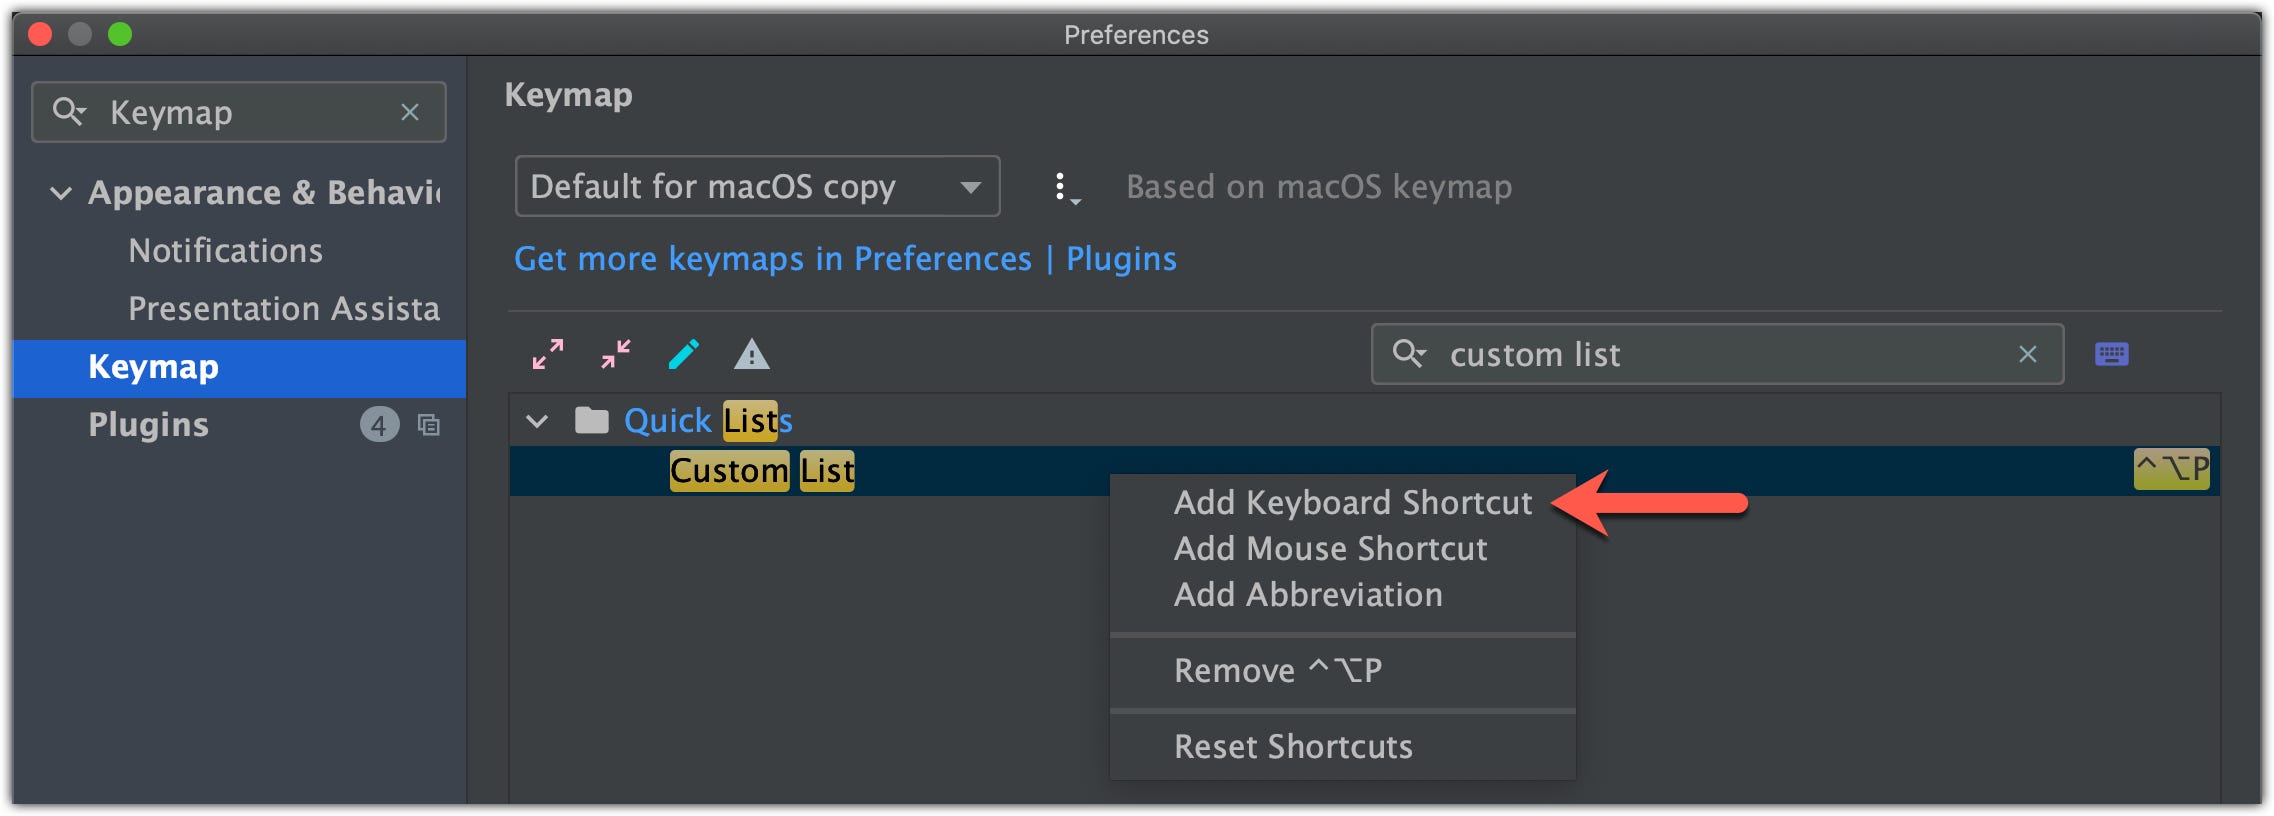
Now you will be able to invoke your list by using your shortcut:

60. Keymap reference
If you want to see all available hotkey in your IDE, or you forgot some of them, you can search for Keymap reference in the ‘Search everywhere’:
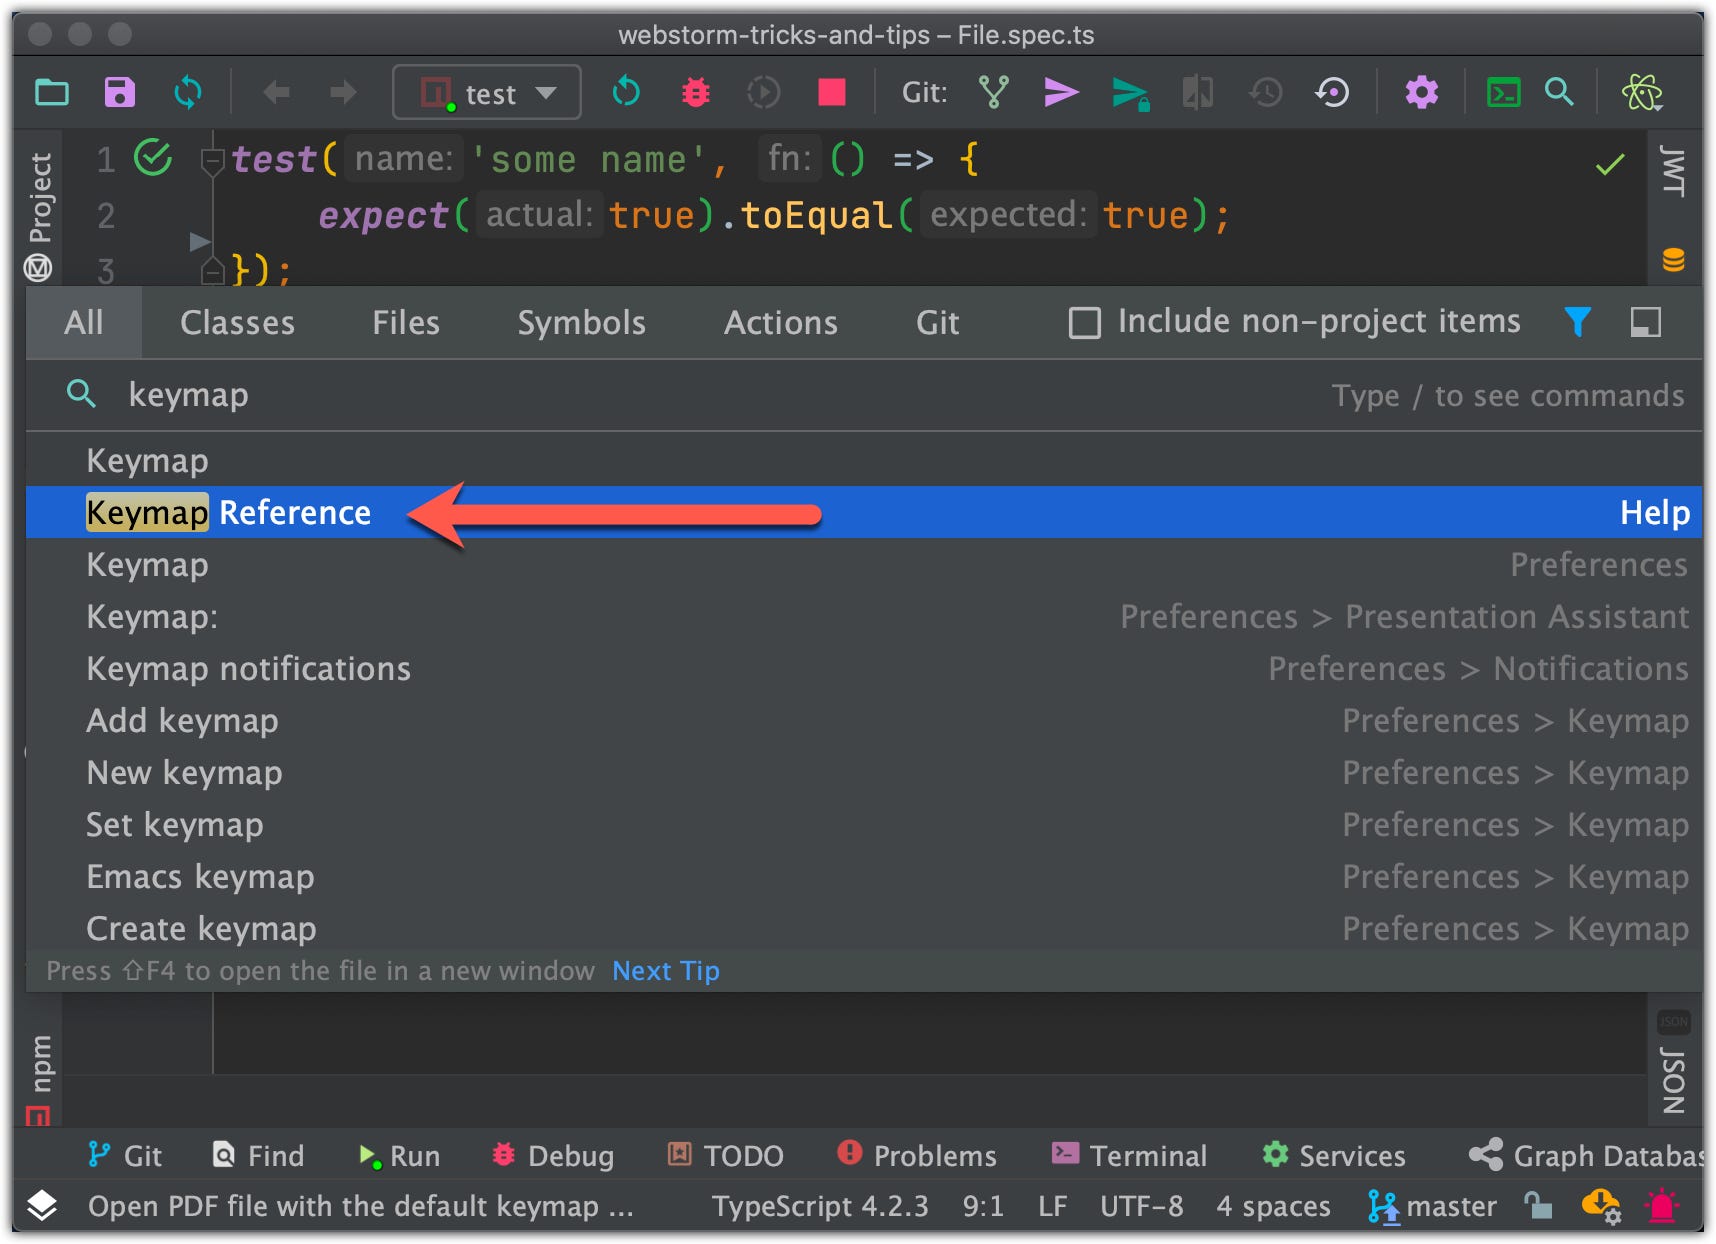
It will open a PDF file with all available hotkeys and actions:


Related storiesasic Code Completion’ at it will provide you a list of a proper variable name, [ Control+Space ] hotkey:

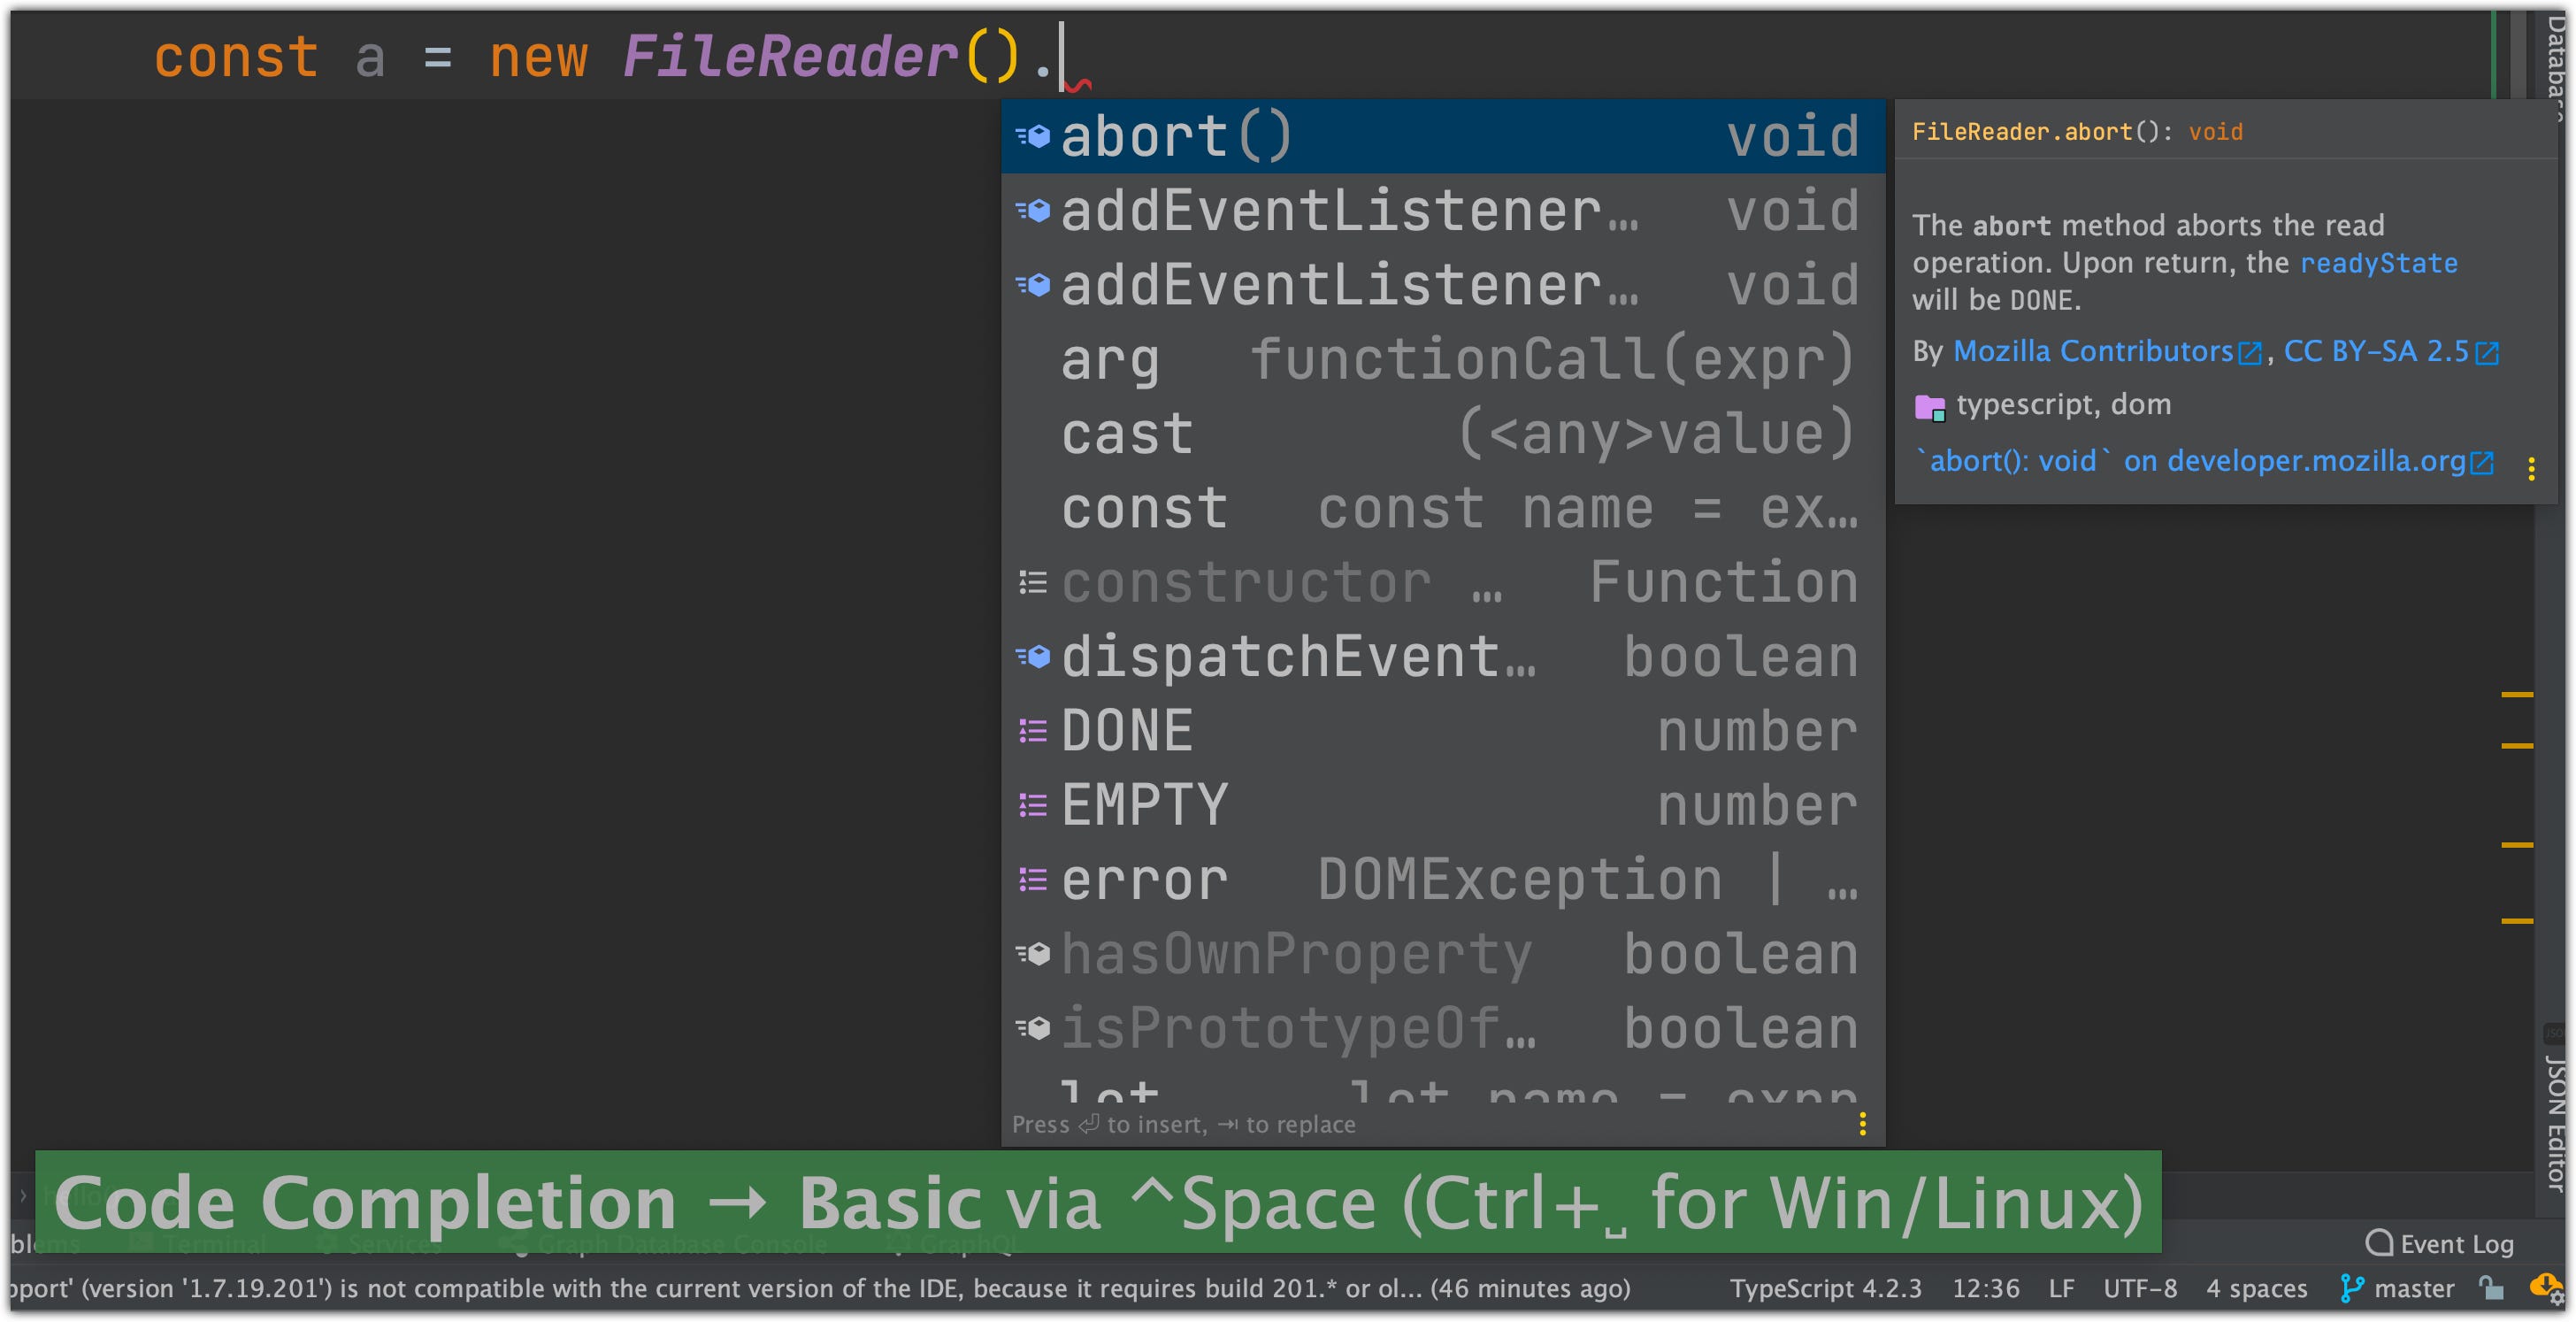
49. Code completion. Basic completion
‘Basic Completion’ will show you all available functions and variables you can use for completion, [ Control+Space ] hotkey:
50. Code completion. Smart completion
Smart Completion will analyze your code and will narrow down the suggestion list to what makes sense, [ Control+Shift+Space ] hotkey:

51. Code completion without a ref
If you want to type a console.log you can just type `l](https://miro.medium.com/max/2528/1*9nNZEwlOHG-WSc4ATTphpQ.jpeg)
You can change code style in those Preferences:
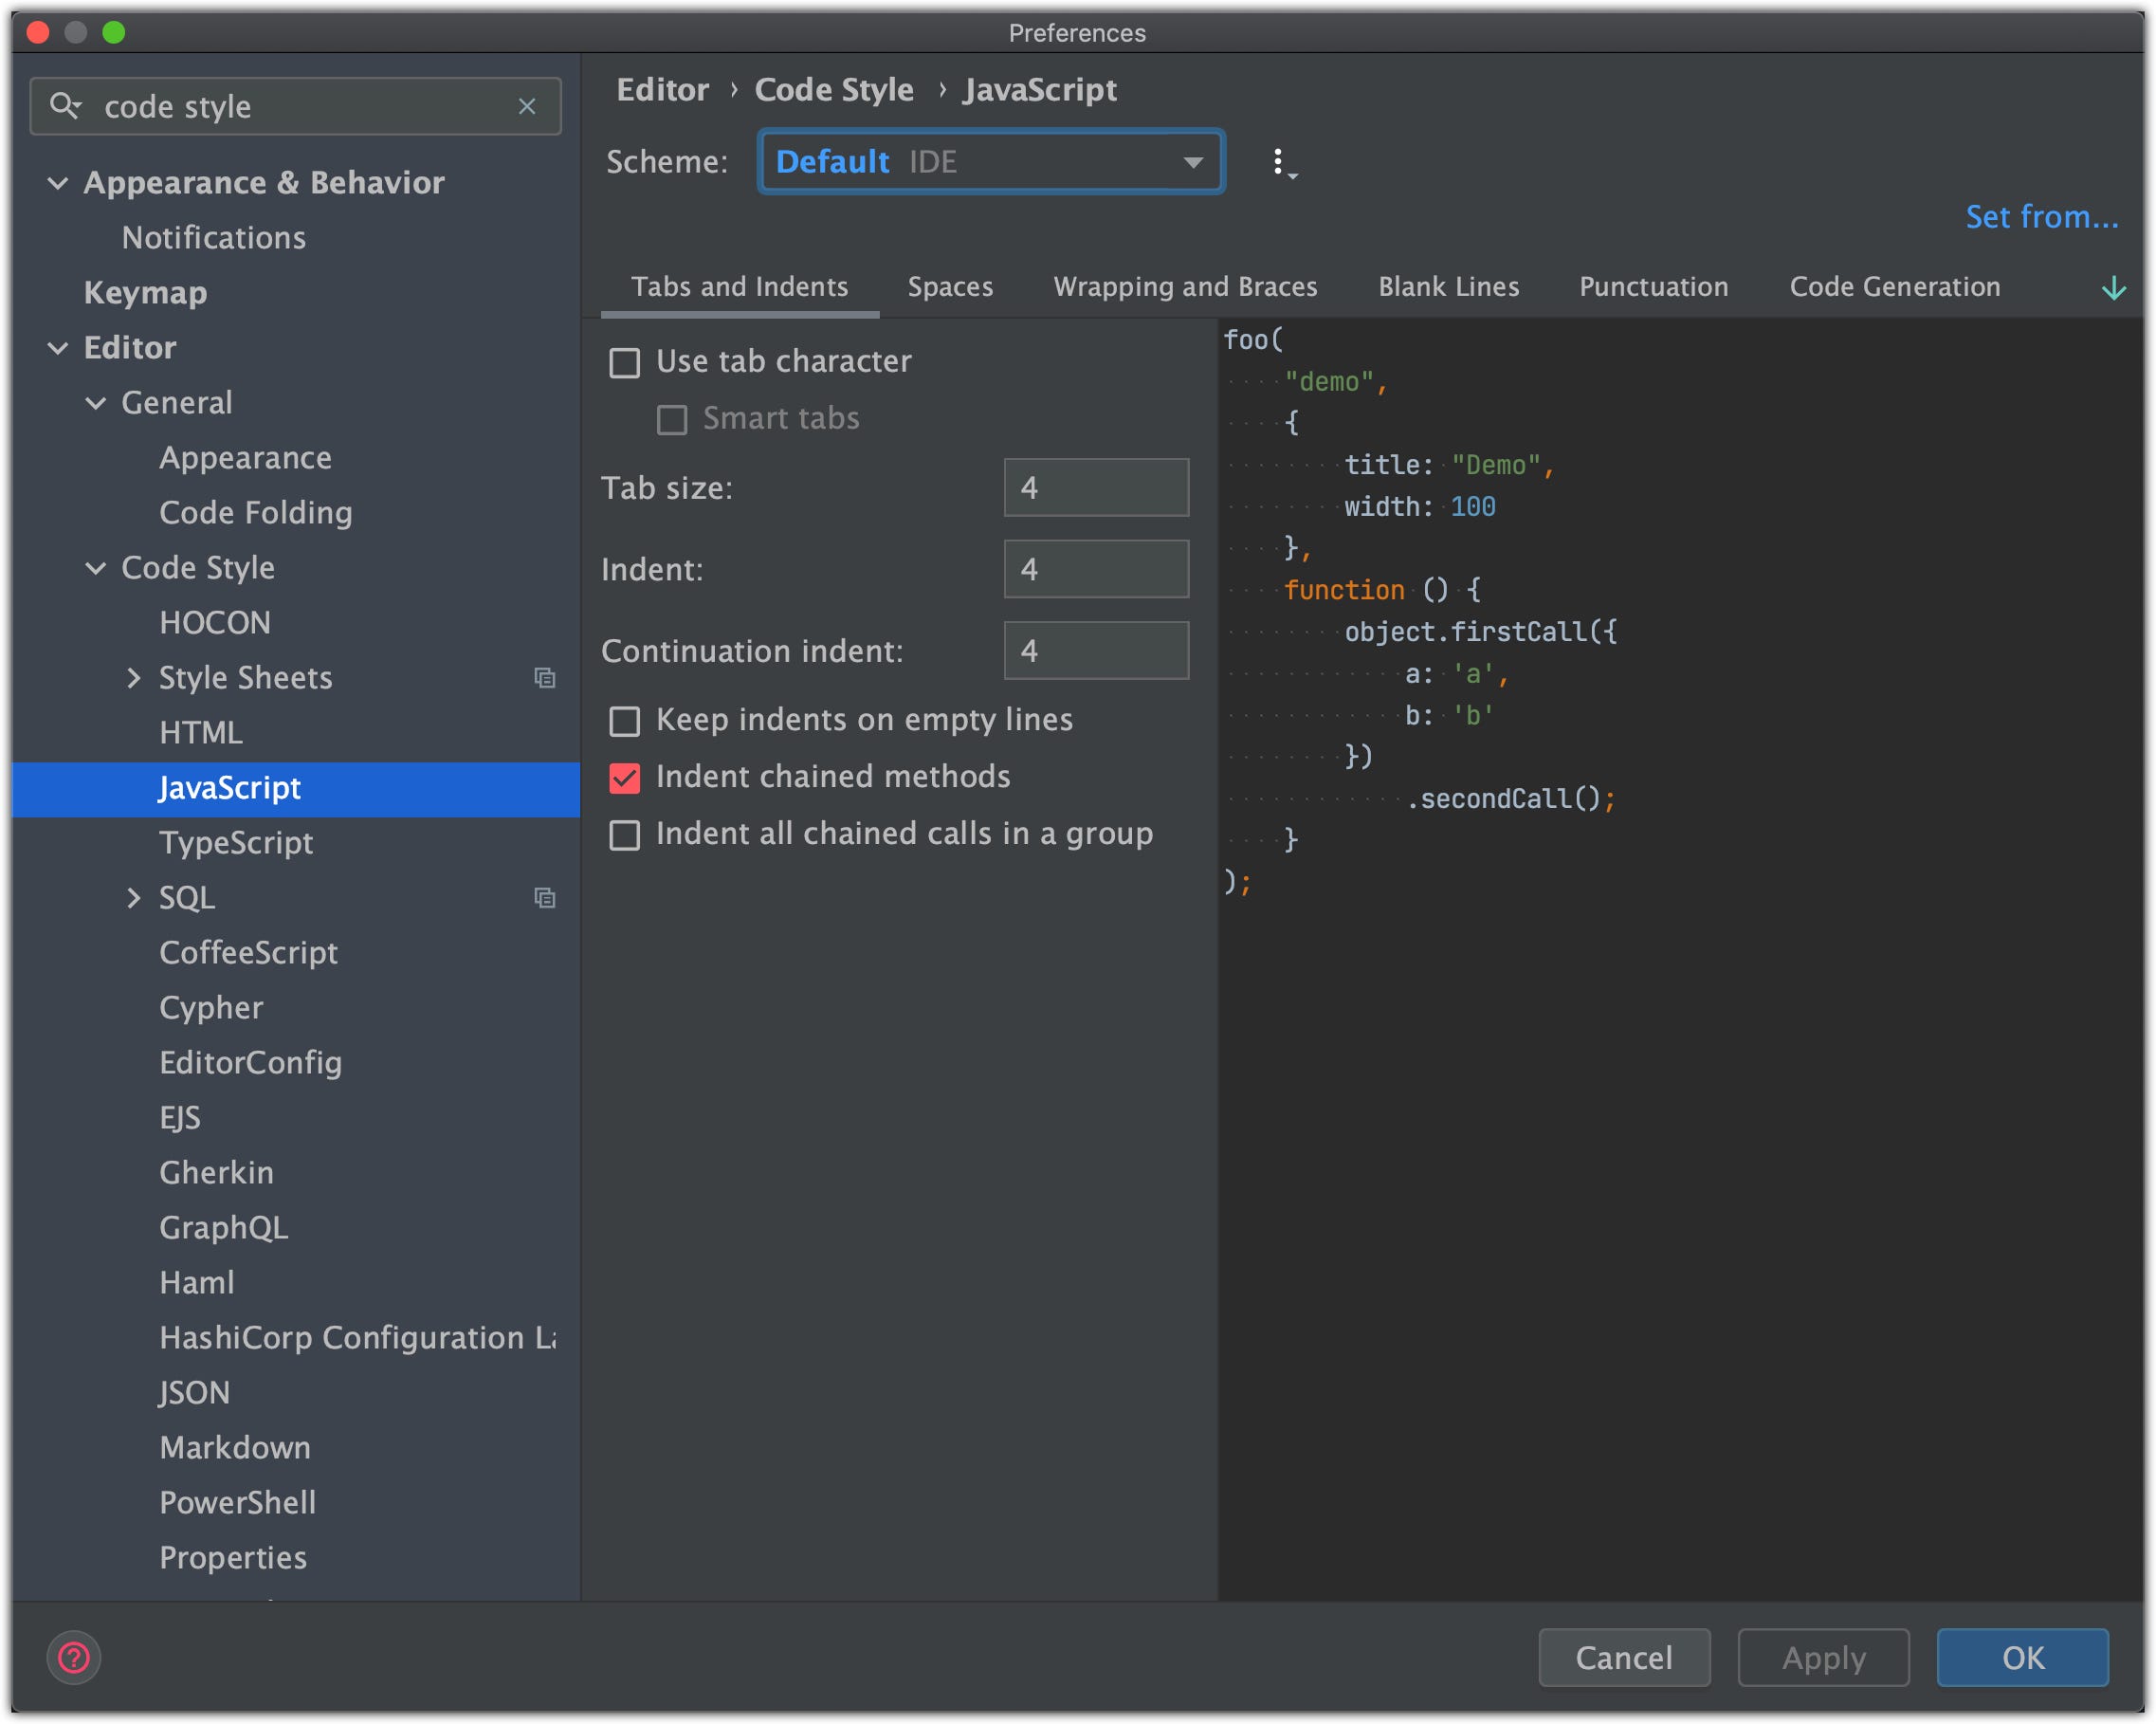
⚠️ NOTE: You can adjust code styles interactively by selecting your code fragment and select ‘_Adjust code style setting_’ in the ‘_Show Context Actions_’, [Option+Enter] hotkey:
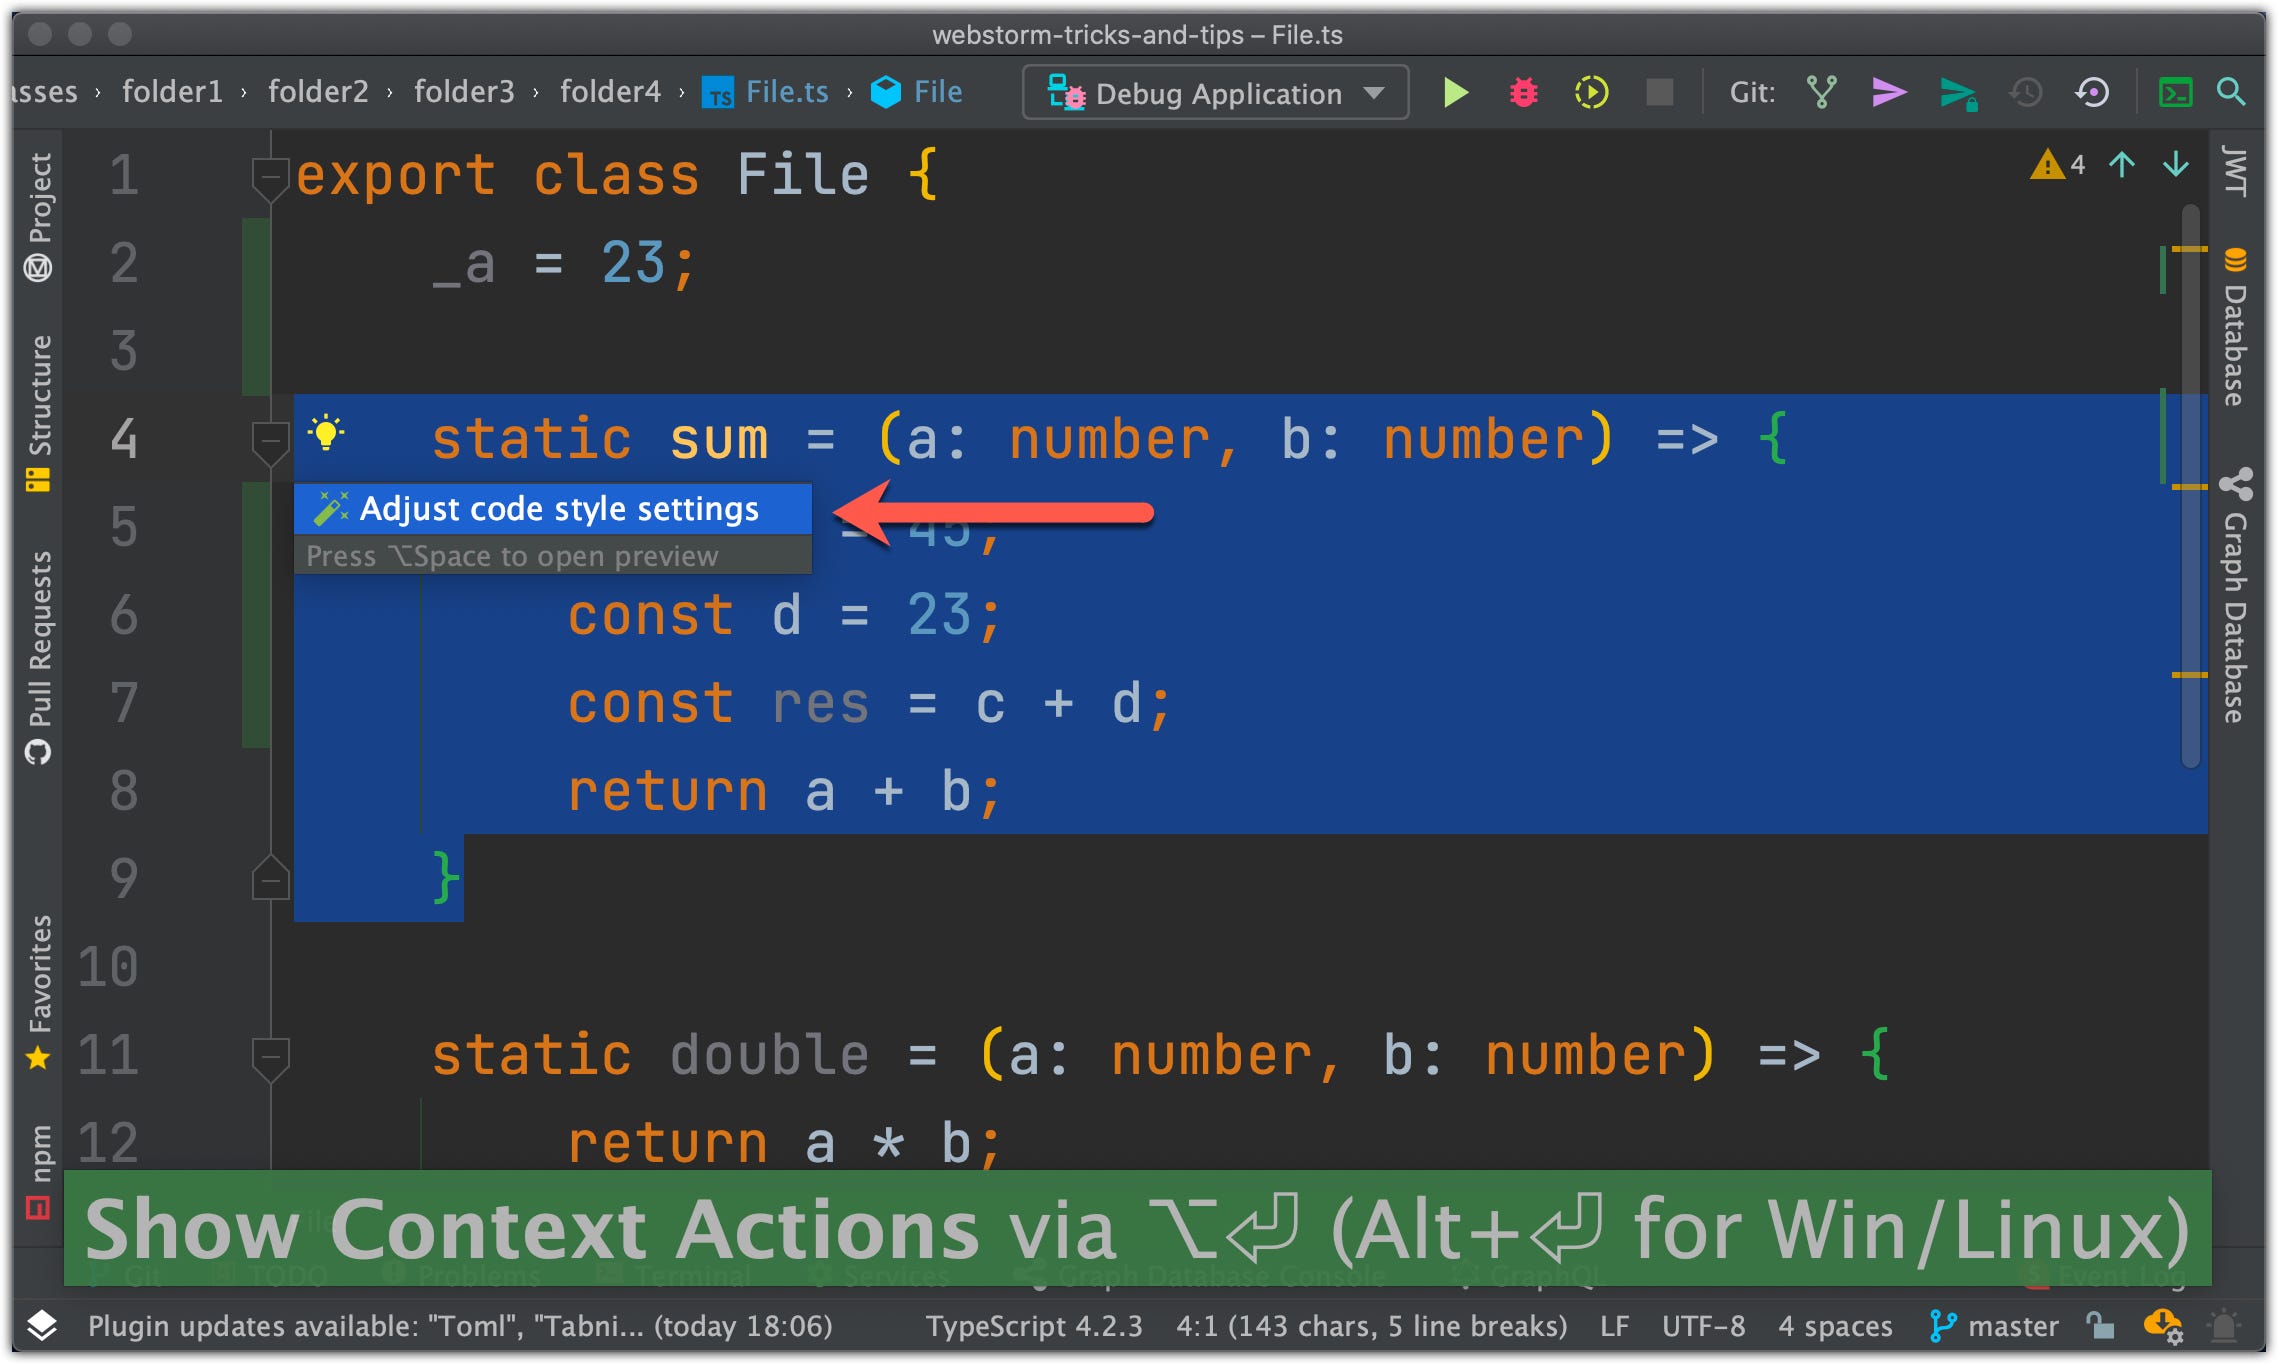
Let’s have a look at how it works in the IDE:

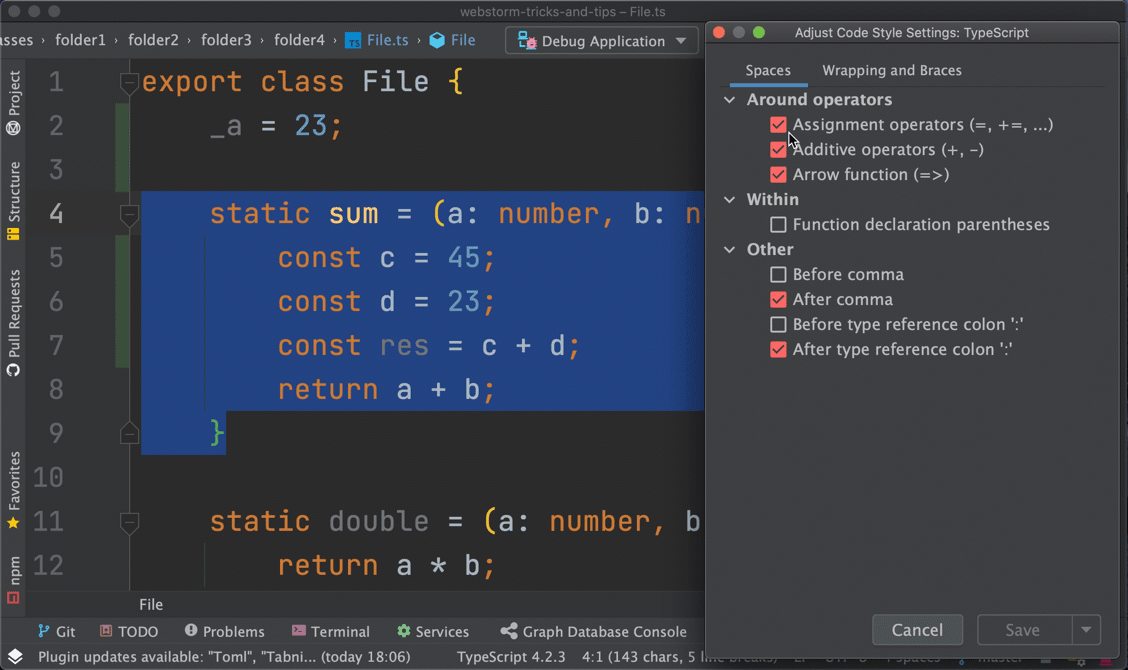
GIF. Adjust Code Style Settings dynamically
48. Code completion. Variable name
If you want to rename a variable you can use a ‘[(https://miro.medium.com/max/4408/1*zTLGb_2OZA_GgRwQumxtdg.jpeg)
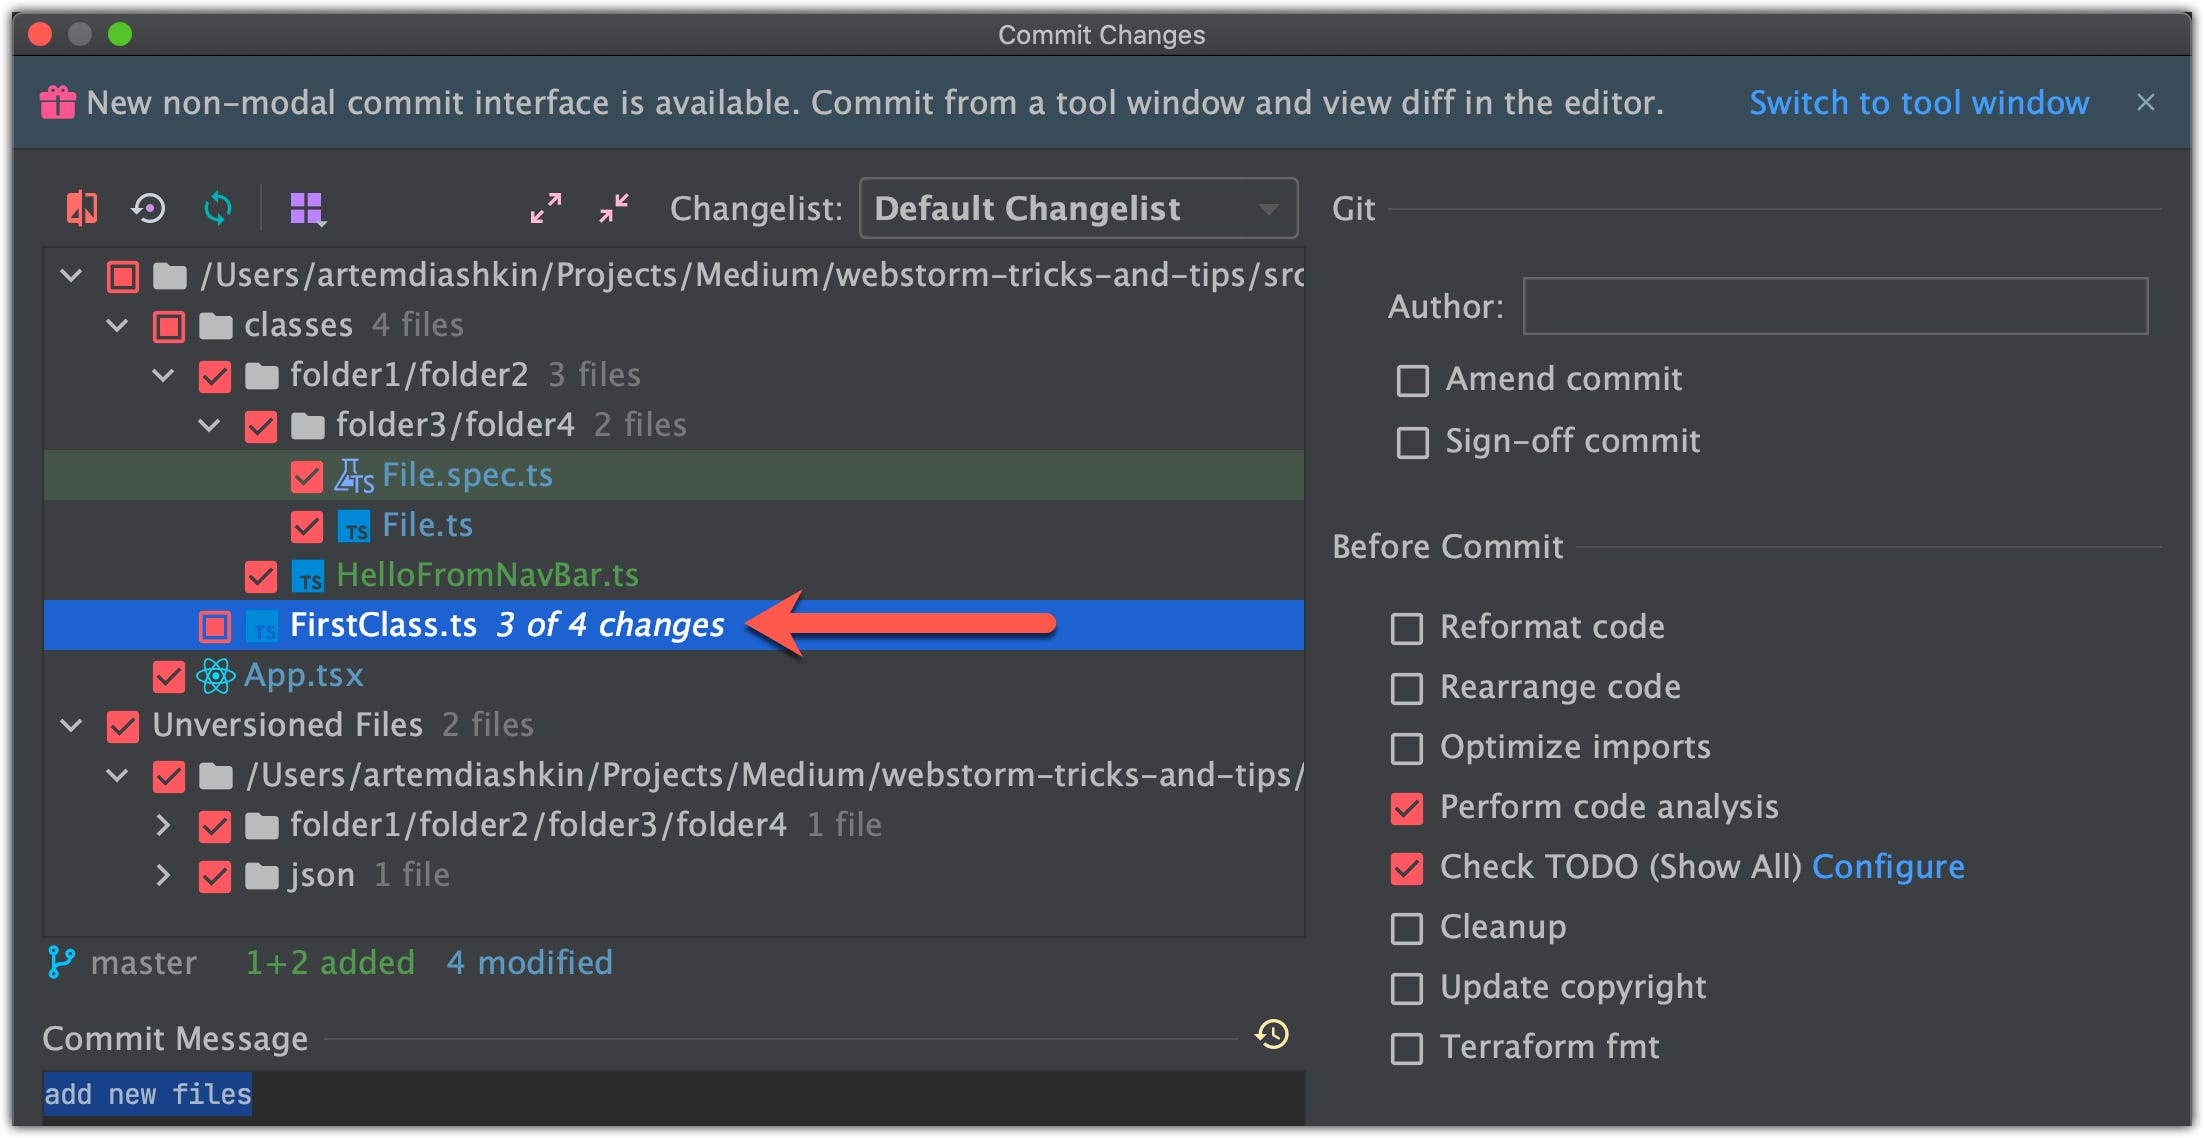
If you click a file in a “Commit changes” window, IDE will open a Compare Changelist window, where you can review changes and even exclude parts of code that should not be committed:

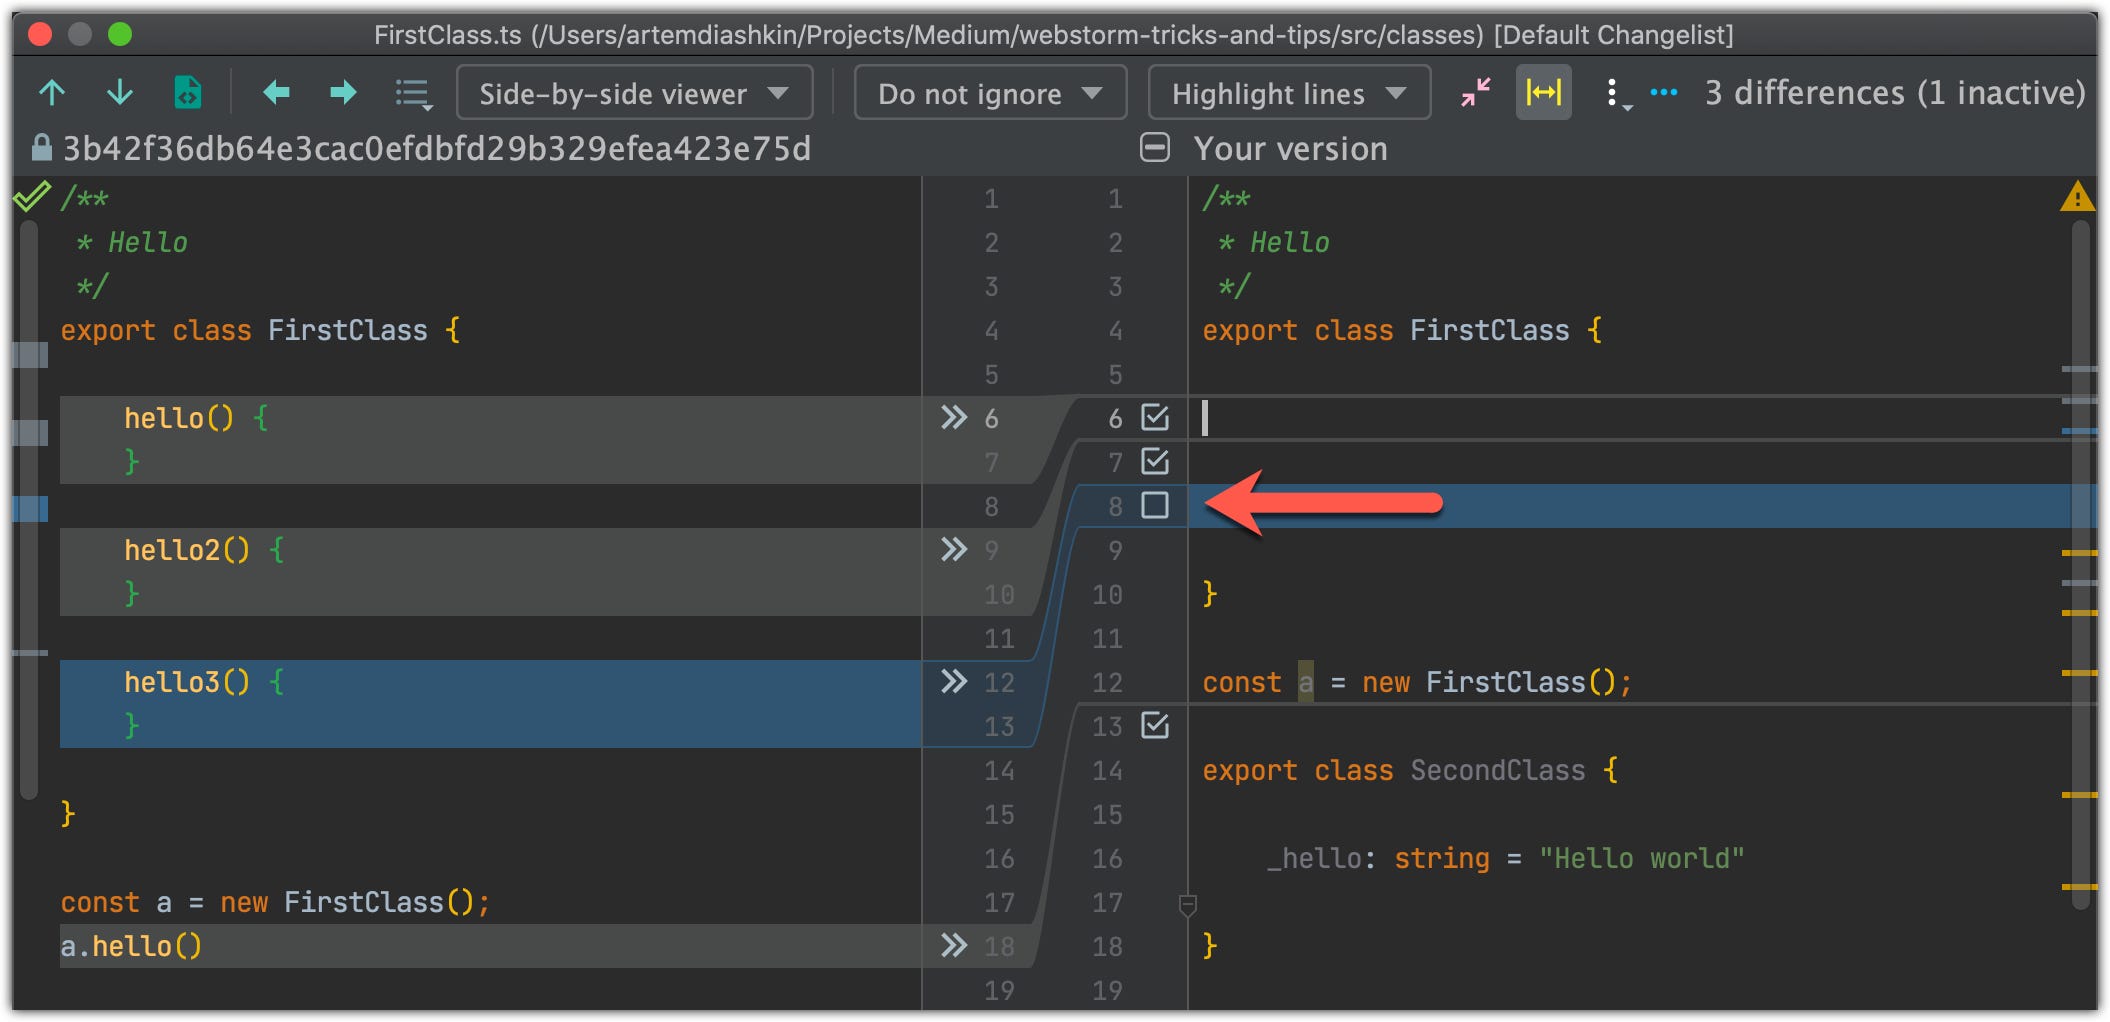
IDE will show you the changed checkbox icon with the number of committed changes:

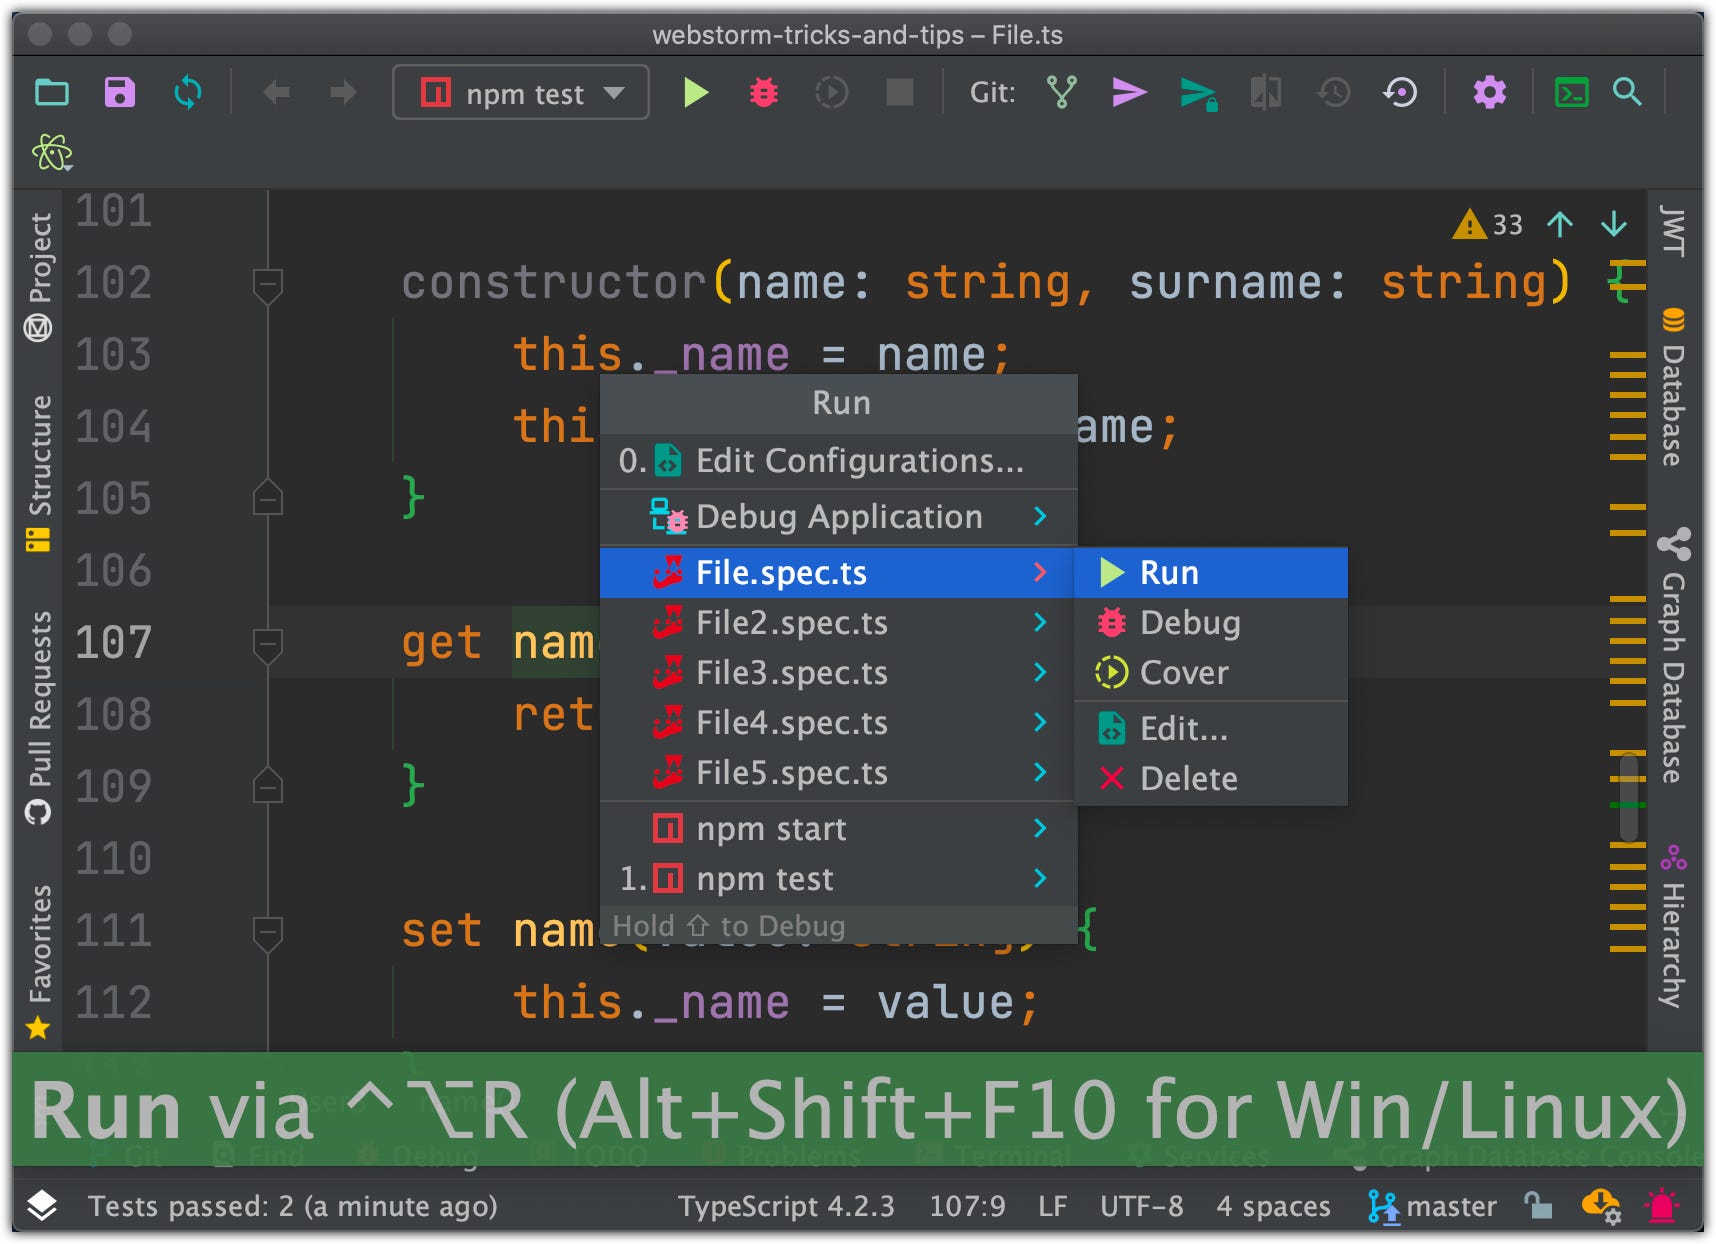
17. Run menu
Every file, test, script you run IDE adds those into its configurations (if you saved those they will be available after IDE restart):

… for saving configuration use Edit Configuration > Save Configuration icon:

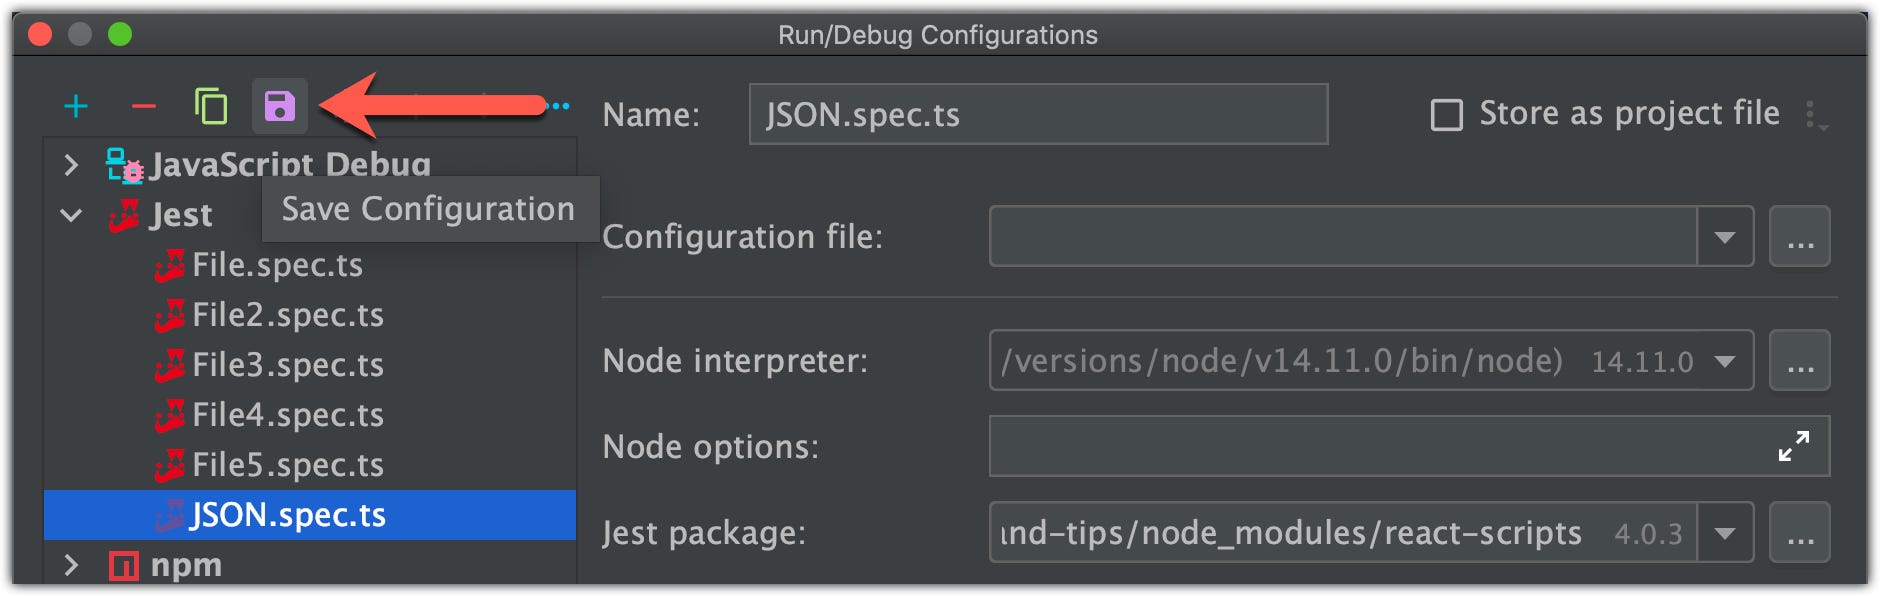
But the cool thing is that you can open a pop-up window with all your saved configurations by pressing Control+Option+R and run them without navigating elsewhere:

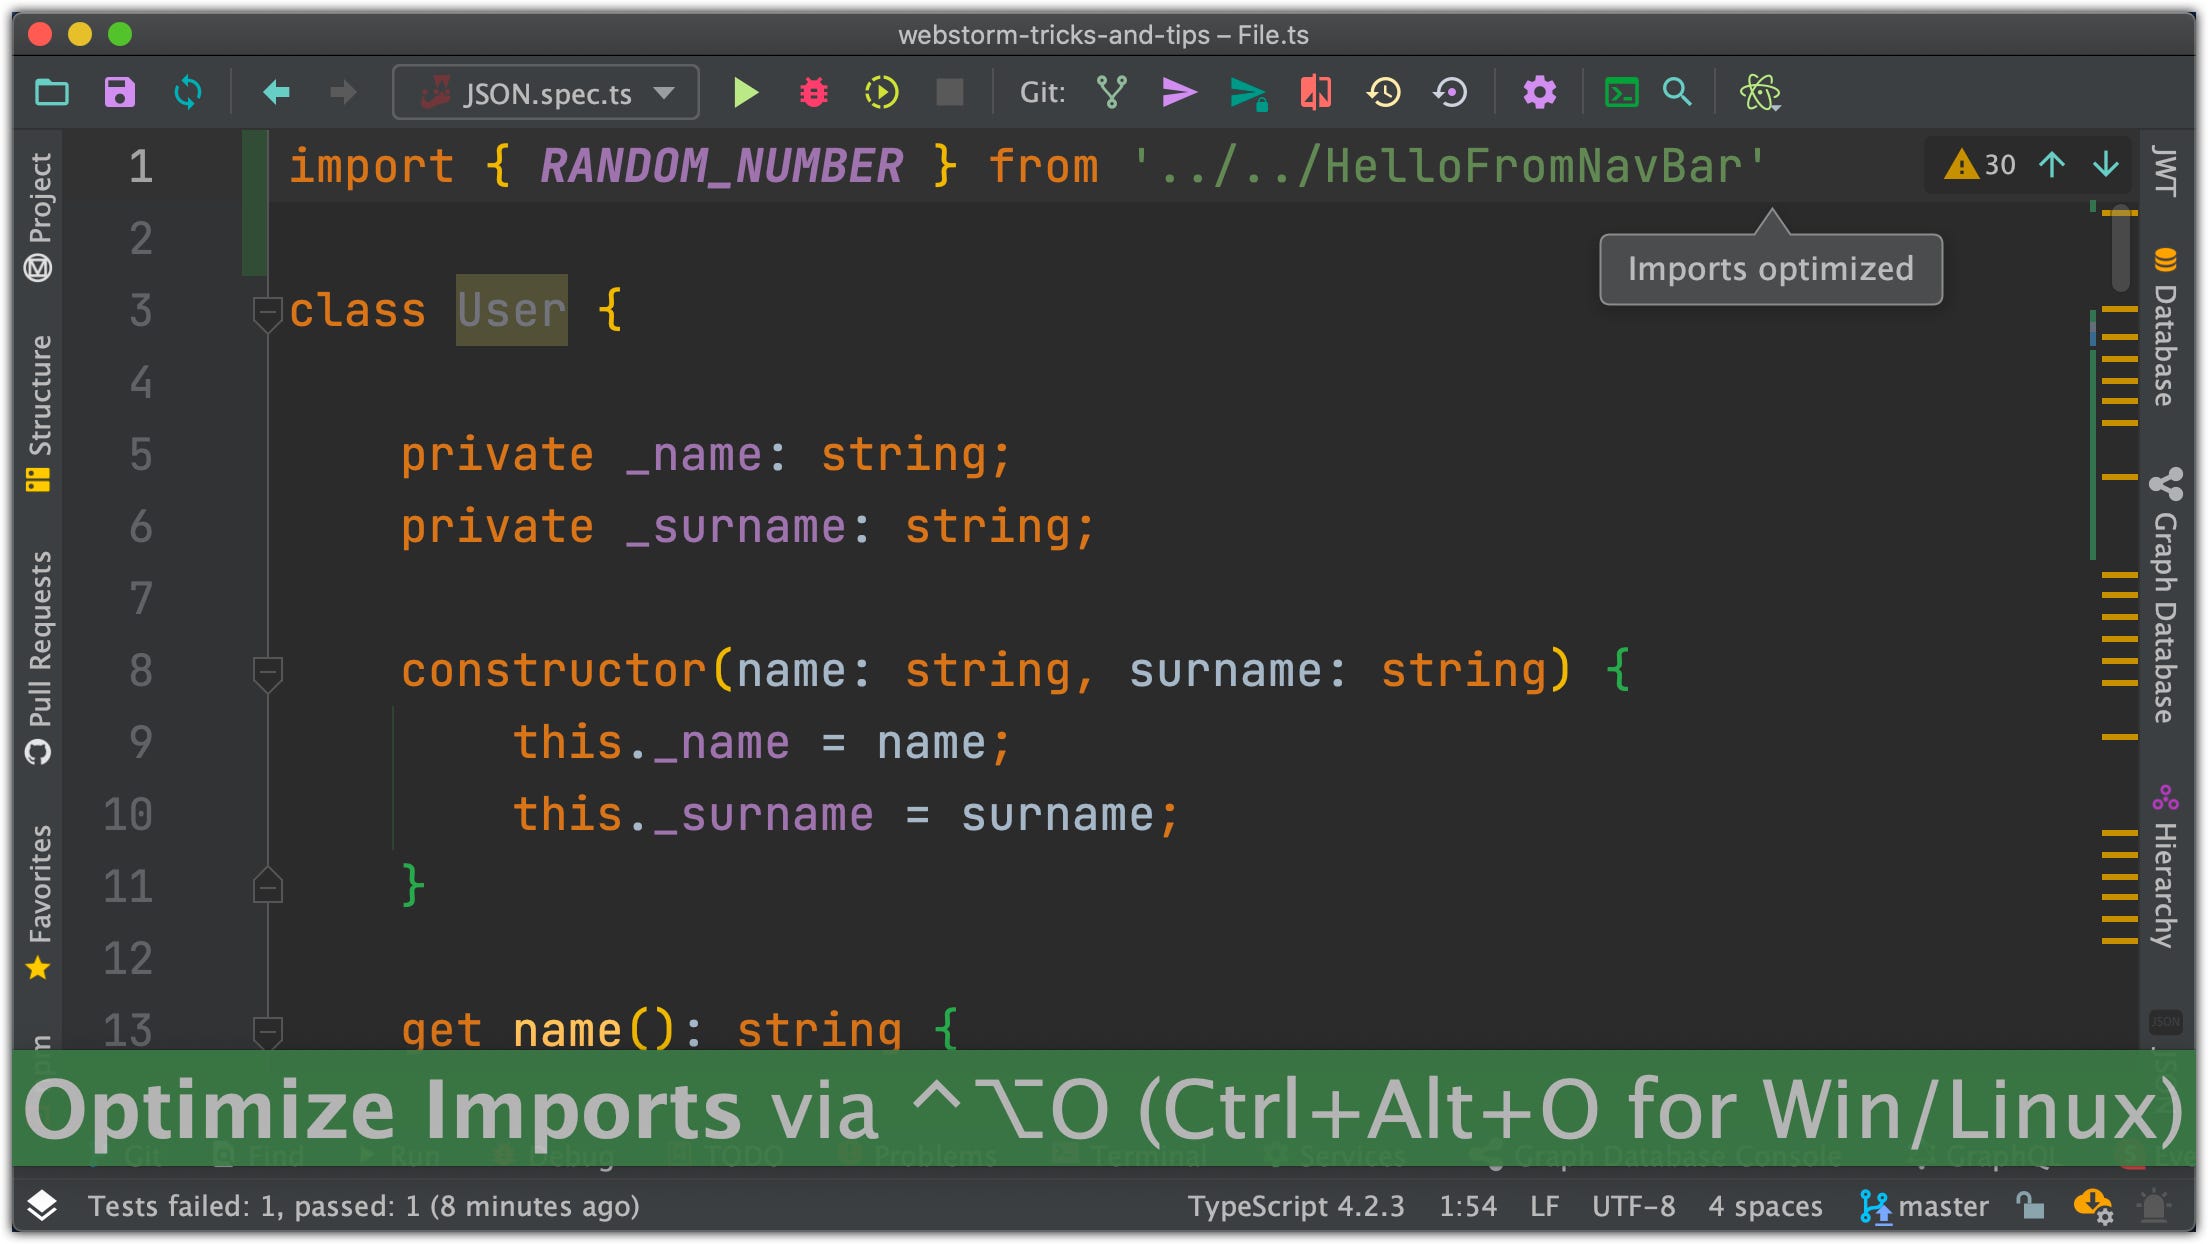
18. Optimize imports
You don’t have to manually delete unused imports from your file:

You [